 Buy Now →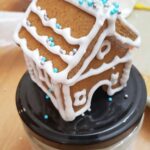
How to Make a Mini Gingerbread House
Description
Everything you need to make mini gingerbread houses from scratch… a no-spread gingerbread dough that holds its shape, a fast-dry icing that sets like glue, and simple directions for building and decorating the houses. Perfect for a family Christmas project with kids of any age.
Ingredients
Units
Scale
For the No-spread Gingerbread Dough / Cookies
- 3 cups all-purpose flour
- 1/2 tsp salt
- 1 Tbsp ground ginger
- 2 tsp ground cinnamon
- 1/4 tsp ground cloves
- 6 Tbsp salted butter,softened to room temperature
- 3/4 cup brown sugar
- 1 large egg
- 1/2 cup molasses (unsulphured, not blackstrap)
- 2 tsp vanilla extract
- 1-3 tsp milk, if needed
For the Fast-Dry Icing:
- 1 pound powdered sugar
- 3 pasteurized egg whites
- 1/2 teaspoon cream of tartar
Instructions
For the cookies:
- Preheat the oven to 375°F.
- In a small bowl, whisk together the flour, salt and spices. Set aside.
- With an electric mixer, cream the butter and sugar together just until combined. Do not overmix at this point – no need for the usual “light and fluffy”.
- Add the egg and mix just until combined.
- Next add the molasses and vanilla. Mix until combined.
- Begin adding the flour while mixing a little at a time. Continue mixing until all the flour is added and until a dough forms. If your dough is dry and/or crumbly, begin adding teaspoons of milk, just until it forms a firm dough. You don’t want it sticky or wet.
- Lightly flour your surface, then roll out the dough to 1/4″ thickness.
- Bake on a cookie sheet with a silicone mat or lined with parchment paper for 8-9 minutes.
For the icing:
- With an electric hand mixer (or a stand mixer if you prefer), mix all ingredients in a large bowl until it forms soft peaks.
- Keep icing covered with a damp cloth until ready to use to prevent hardening.
To assemble the houses:
- Cool the baked pieces completely on a wire rack before you build. Warm gingerbread bends and sags.
- Sort your pieces into sets… each house needs two side walls, a front and back piece with the triangular peaks, two roof pieces, and a base to build on.
- Fill a piping bag fitted with a small round tip with the icing. Pipe a thick line of icing along the bottom edge of one end piece and press it onto the base, holding it a few seconds until it grabs.
- Pipe icing down both side edges of that end piece, then stand up the two side walls against it, one at a time. Hold each one until it sets enough to stand on its own.
- Pipe icing along the open edges and add the second end piece to close up the house.
- Let the walls dry 20-30 minutes before you add the roof. Skipping this step is how houses come apart.
- Pipe icing along the top edges of all four walls and set the first roof piece in place at an angle. Add the second roof piece and pipe a line of icing along the peak where they meet.
- Let the assembled house dry another 20-30 minutes before decorating.
To decorate the houses:
- Pipe icing wherever you want sprinkles to stick, working one small section at a time so the icing doesn’t crust over before the candy lands.
- Pipe a line along the roof peak and press on your candy or sprinkles for shingles. Icicles along the roofline are easy with a small tip… just touch down, squeeze, and pull away.
- Add a door, windows, and any trim with piped icing. Crushed candy canes make a nice snowy path around the base.
- Spoon extra icing around the bottom of the house for snow drifts, and add a gingerbread man or a pretzel fence to finish the yard.
- Let the decorated houses dry overnight, uncovered, at room temperature before moving or displaying them.

Notes
If you’re making the dough ahead of time, wrap it tightly in plastic wrap and refrigerate. Before you begin rolling it out, bring it to room temperature. It’s really hard to roll it out if it’s cold!
Nutrition
- Serving Size: 1 iced cookie
- Calories: 208
- Sugar: 30 g
- Sodium: 87 mg
- Fat: 3.3 g
- Carbohydrates: 42.7 g
- Fiber: 0.6 g
- Protein: 2.4 g
- Cholesterol: 15.4 mg
Recipe Card powered by