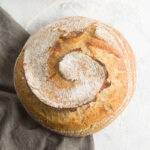
Easy Rustic Sourdough Bread (Only 5 Ingredients!)
This Easy Rustic Sourdough bread recipe is a great recipe for beginners! It has only 5 ingredients (including the sourdough starter) and I’ve included almost 20 step-by-step photos to make this the easiest of sourdough recipes to follow! You’ll have your very own artisan loaf of sourdough bread in no time flat!
Rustic Sourdough Bread
I absolutely love homemade bread, but I don’t bake it nearly as much as I used to when my kids were younger. But I’m always in awe of anyone who dives into the art of breadmaking.
Having said that – with the sourdough trend happening right now (at least where I live), I figured I’d share my first venture with this rustic bread. Full disclosure – I am not a sourdough expert. And I don’t foresee there being future sourdough recipes. But this seemed like a perfect fit for my Baking Basics Series.
And this Rustic Sourdough recipe has 5 simple ingredients, so it’s totally doable, even for a newbie just starting on a sourdough journey. You may not get a perfect sourdough loaf the first time around, but I’m confident you can get good results and enjoy your own homemade bread!
Tools Needed
- Large Mixing Bowl
- Plastic Wrap
- Proofing basket or Banneton Basket – It’s convenient to have one of these (and to save time on towel washing) but you can absolutely make this bread without one. In place of a proofing basket you could use a bowl lined with a floured cloth or tea towel, a colander, or even a loaf pan. Any of those options would serve to support the dough during its final rise.
- Wooden spoon
- Dutch Oven
- Bench scraper
- Cooling rack
- Kitchen Scale – I don’t often weight ingredients but it’s really important that you do for this recipe.
- Serrated Bread Knife
Ingredients
You’ll only need these five simple ingredients, four if you don’t count the water to make this rustic whole wheat sourdough bread recipe.
- 800g All-Purpose Flour
- 300g Whole Wheat Flour
- 800g Lukewarm Water
- 17g Salt
- 100g Active Sourdough Starter
How to Make Sourdough Bread
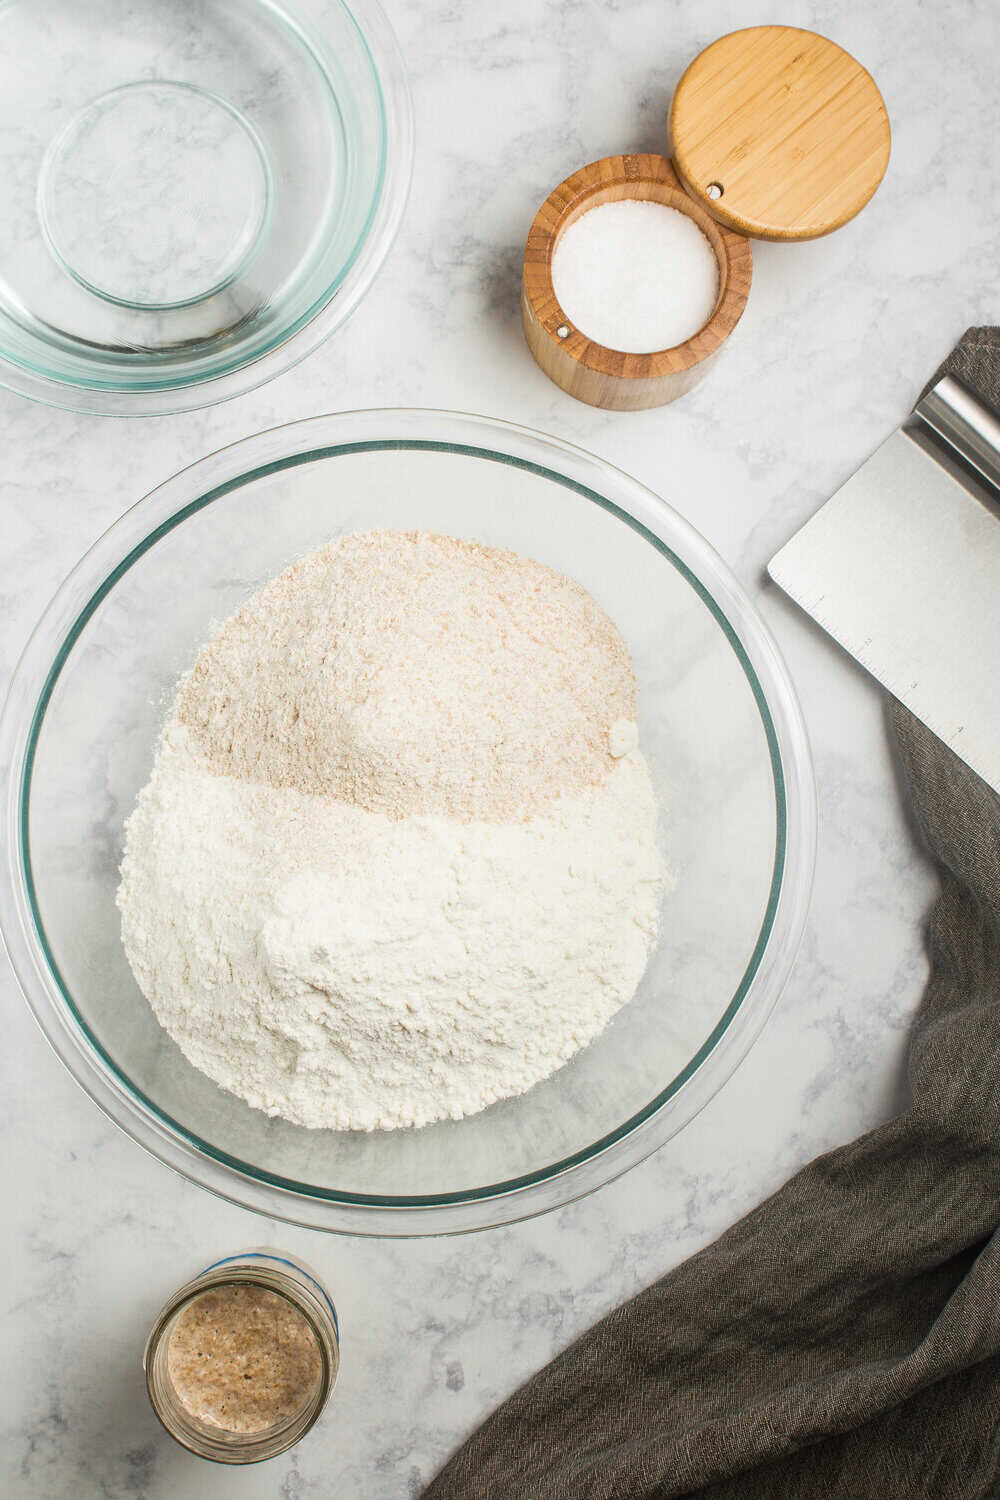
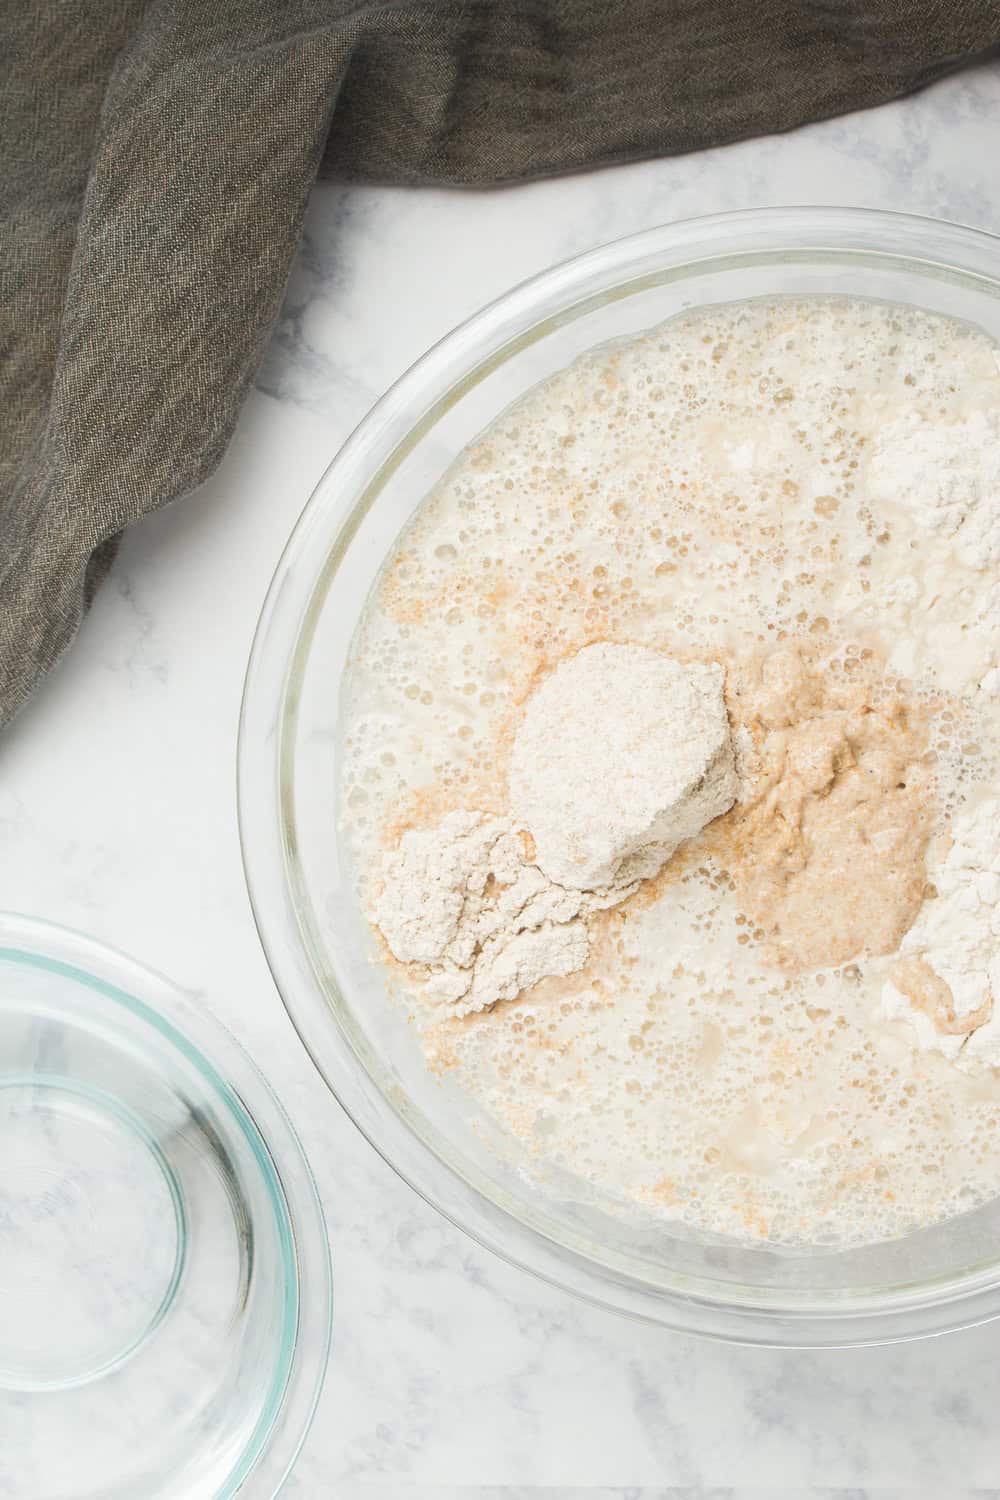
- In a large bowl, mix all the ingredients (flours, water, salt and active starter) together using your hands or a wooden spoon. Mix until they are well combined. The dough should feel wet and shaggy (“shaggy dough” mens it’s not cohesive and smooth dough, but rather appears rough, lumpy, and somewhat sticky). If your dough is too wet, add a little more flour 1/4 cup at a time until it gets to the right consistency. If your dough is too dry, add in a little water, 1 tablespoon at a time until it gets to the right consistency. This can also be done in a stand mixer with a dough hook, but since the rest of the process will be done by hand, I prefer to do it all by hand.
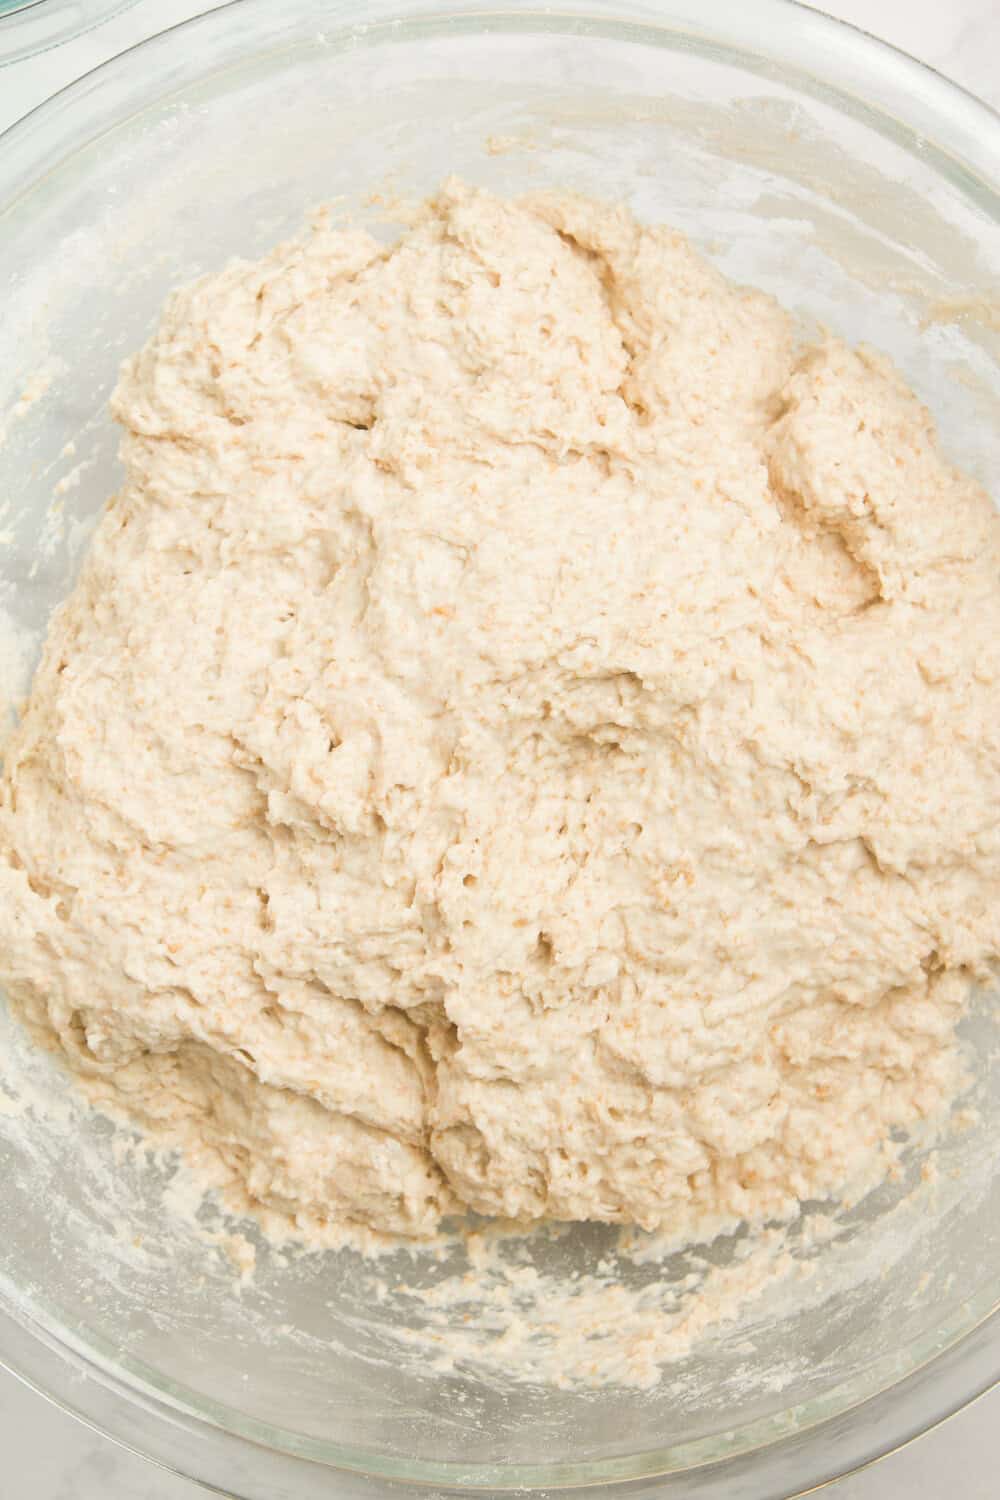
- Cover the large bowl with plastic wrap, lid, or kitchen towel. Let the dough rest at room temperature for about 30 minutes. During this time the flour will absorb the water and begin to develop gluten.
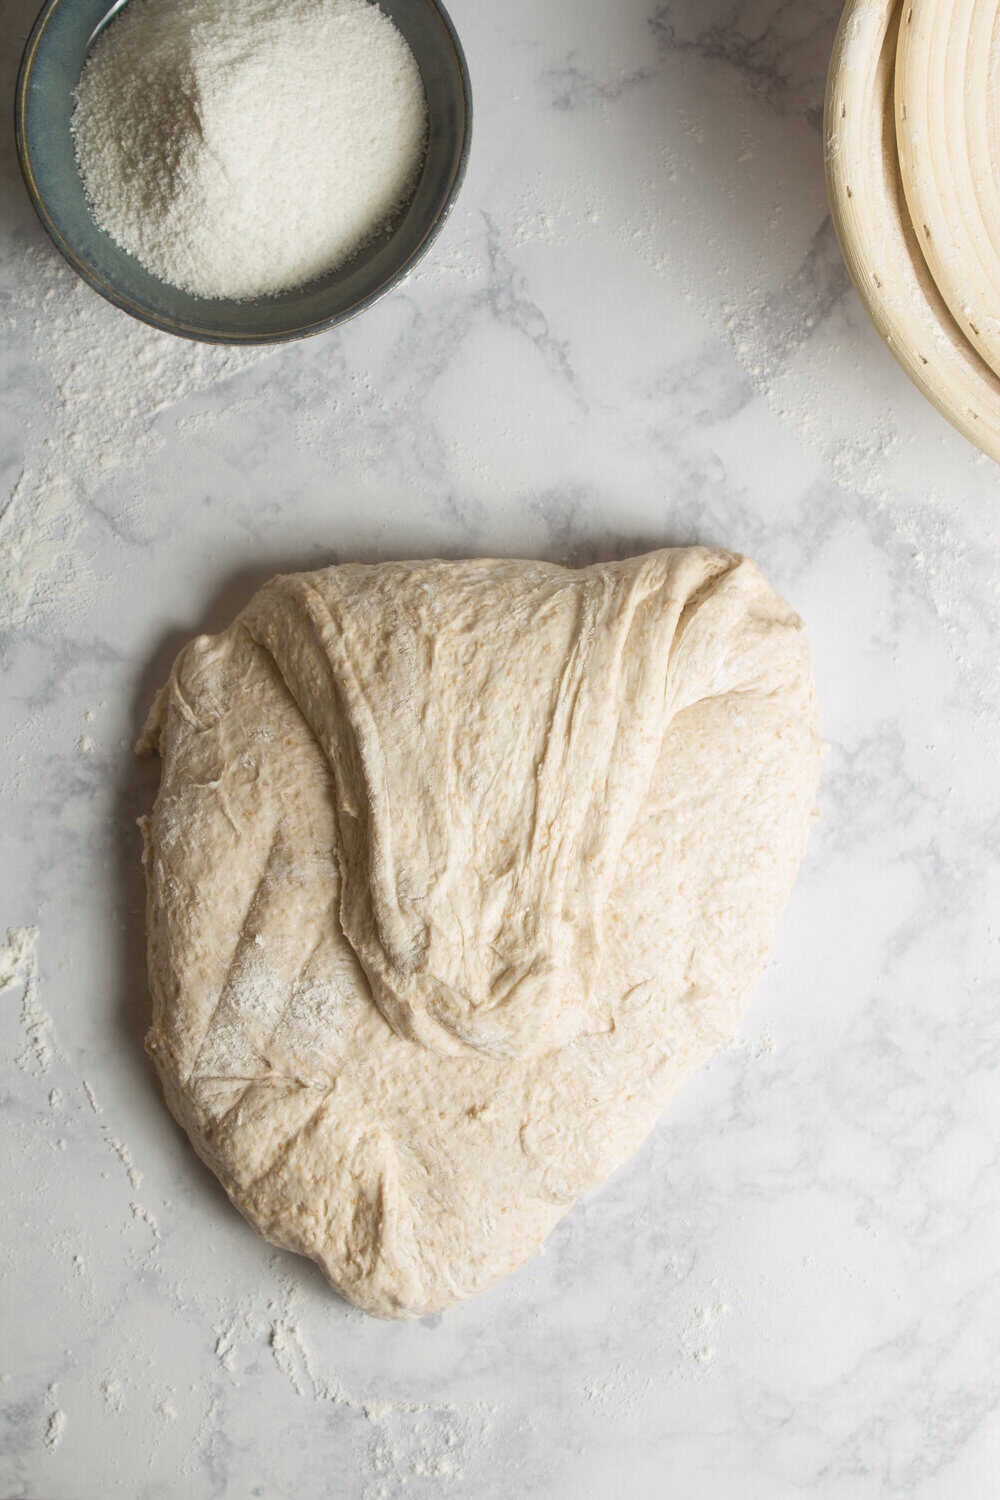
- Stretch up the dough and fold the dough over its middle. Give the bowl a quarter turn and repeat the stretch and fold around 5 times or until the bowl comes full circle. Cover the bowl and take a 10-minute break.
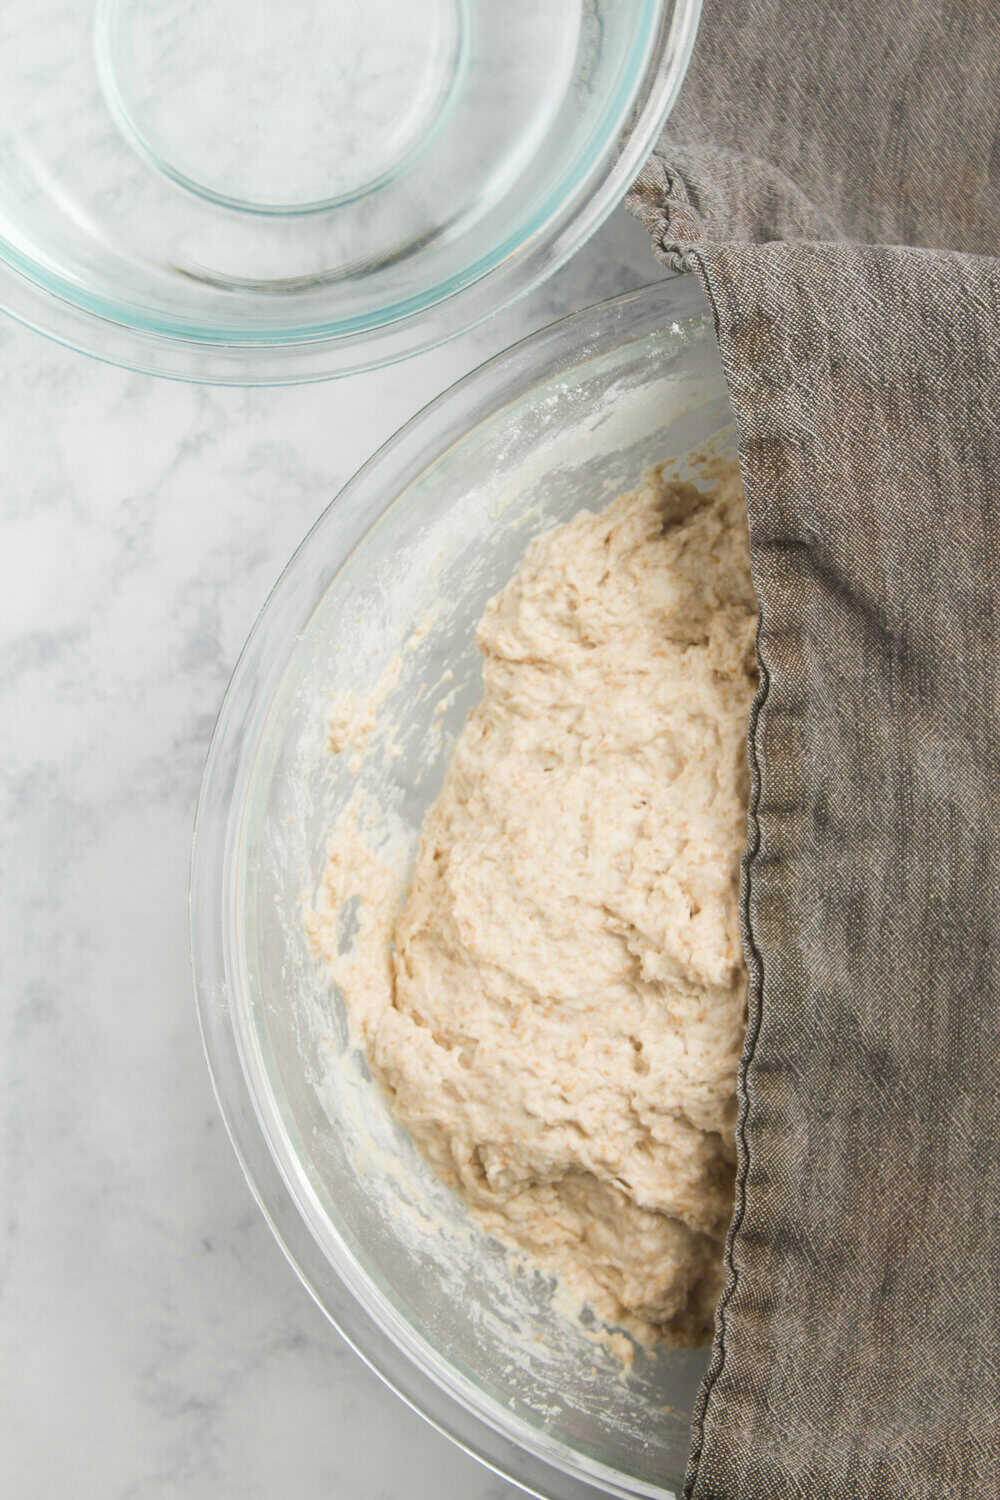
- Repeat the stretching and folding and take another 10-minute break.
- Repeat step 3 one more time. The process of stretching and folding strengthens the gluten in the dough and ensures that the dough will rise and have a more open crumb.
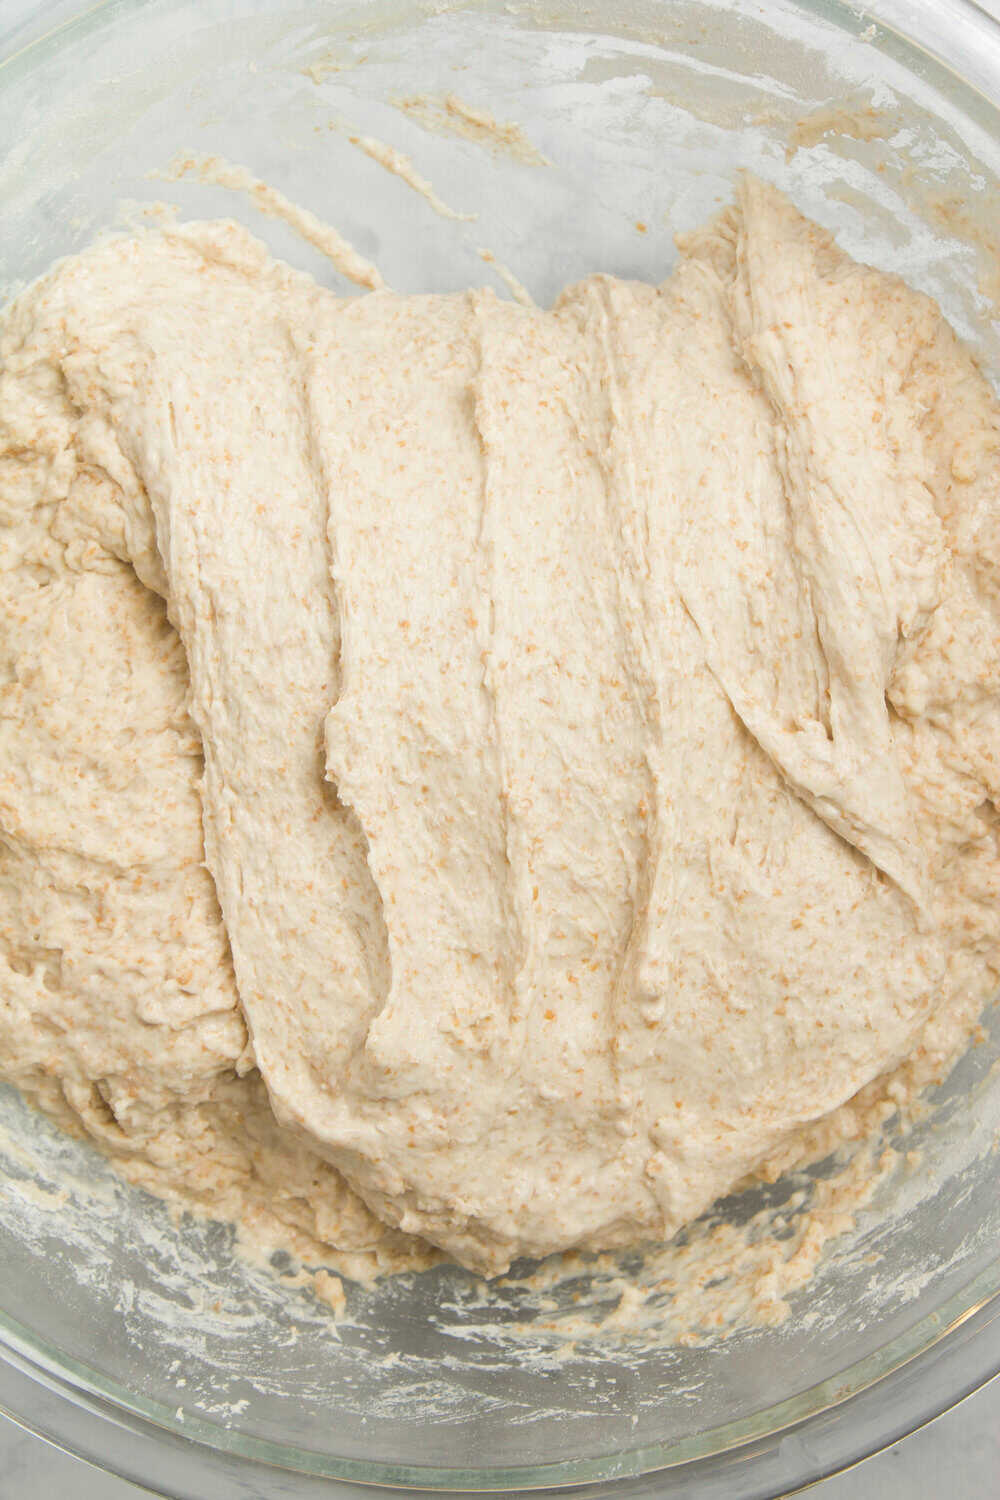
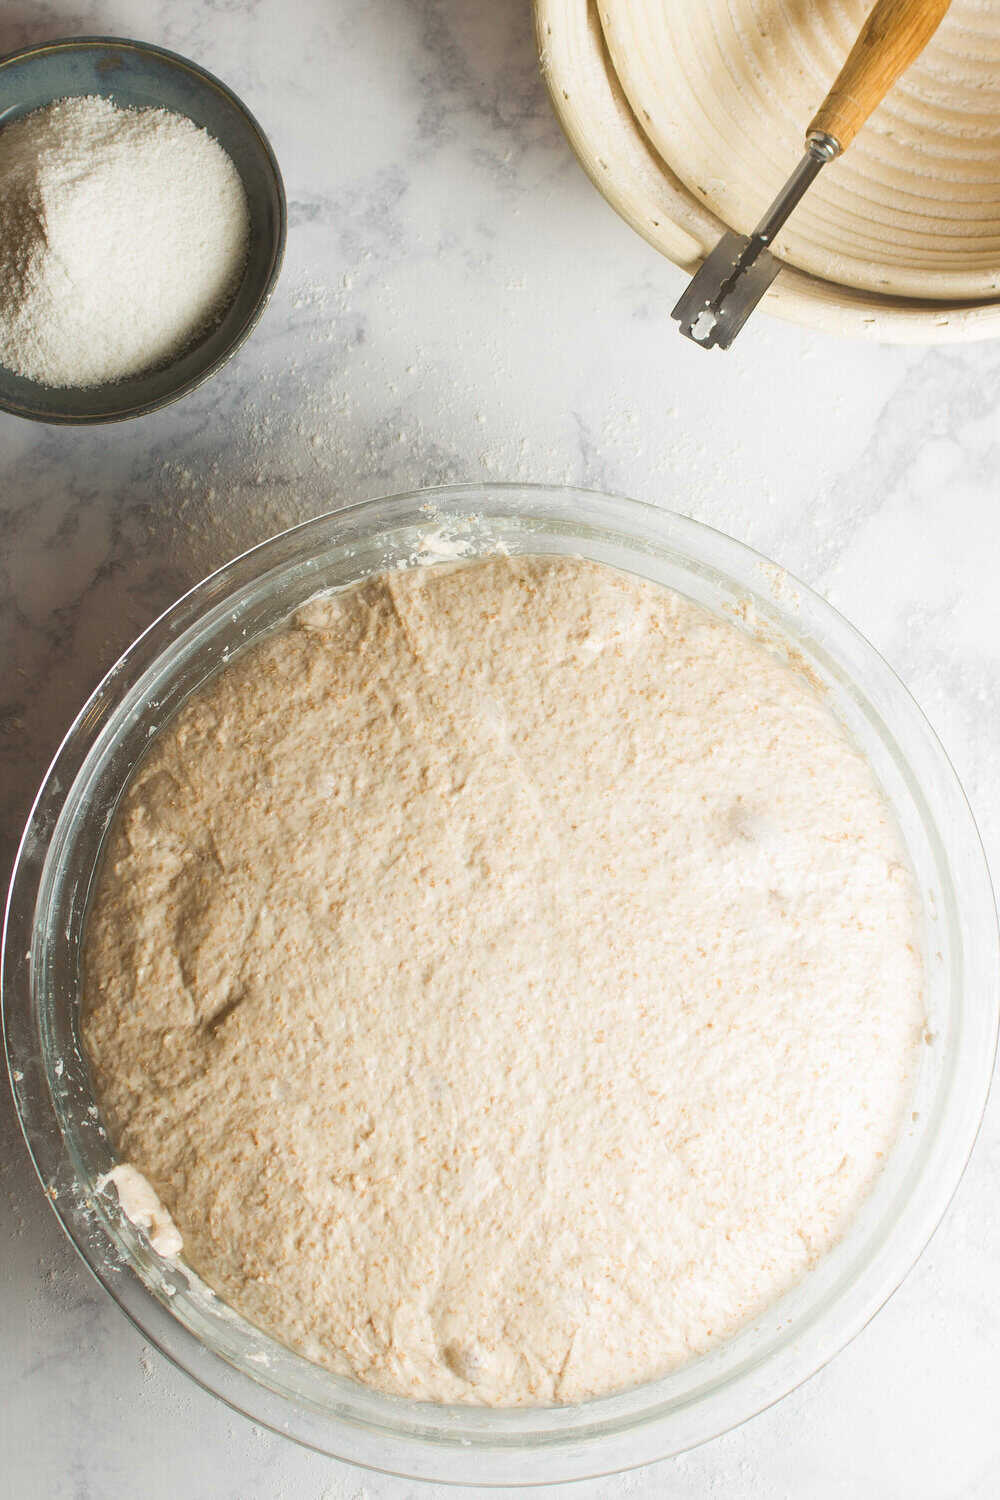
- Let the dough rise for the first time for 2-3 hours at room temperature.
- Next, put it in the fridge overnight, or for 1 1/2 hours to bulk ferment. The bulk fermentation process is a very important step and should not be rushed. If the dough doesn’t double in size, don’t be sad, sourdough takes a little longer to rise compared to commercial yeast bread doughs. The speed at which the dough rises usually depends on the temperature of your room. Typically, sourdough takes longer to rise in the winter than it does in the summer.
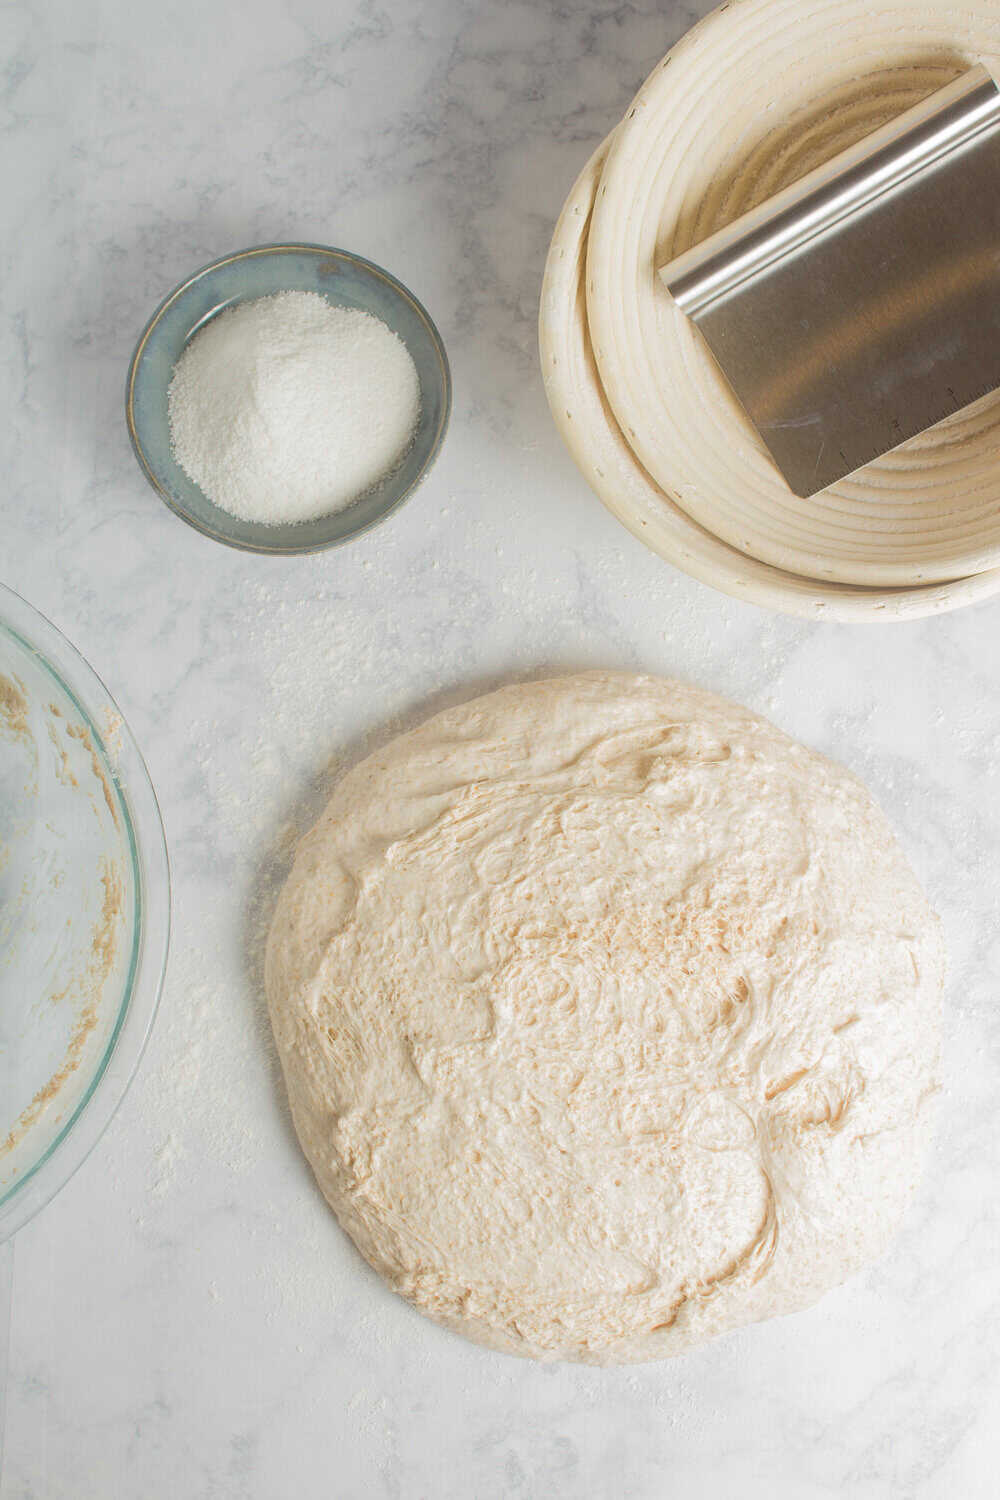
- Scoop out the bread dough from the bowl and onto a lightly floured surface.
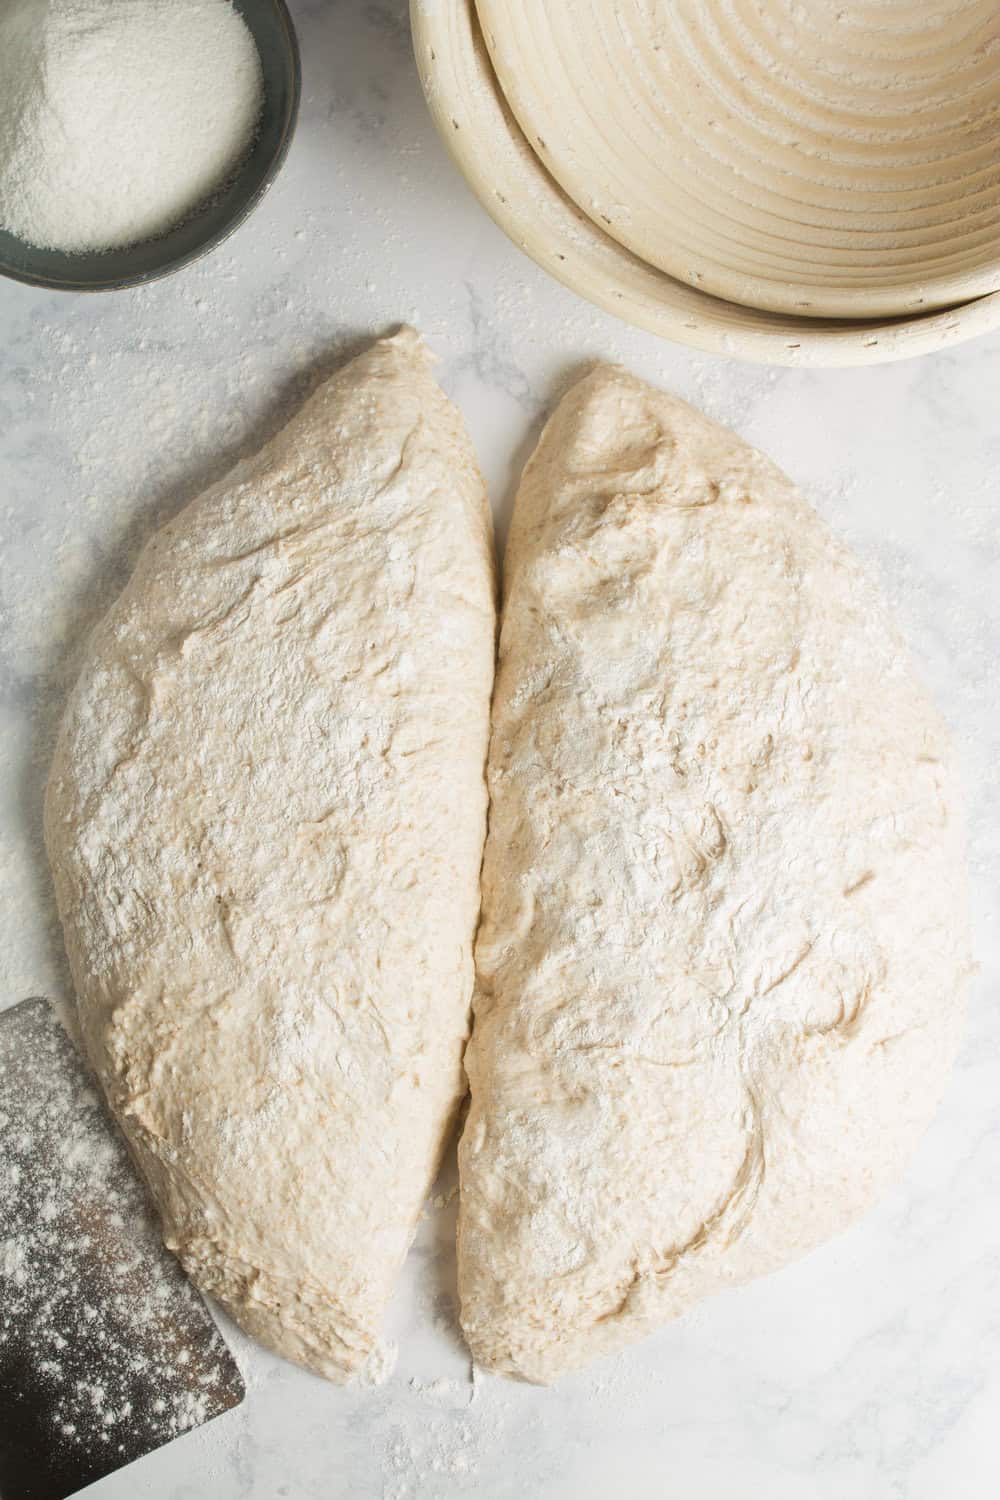
- Divide the dough into 2 equal parts and then shape it by shaping the dough into a smooth ball. This is how you do it: Visualize a diamond shape with 4 corners and pull the top “corner” up and to the bottom “corner”. Next, pull the bottom corner up and to the top corner. Pull the left corner to the right.Then pull the right corner to the left.
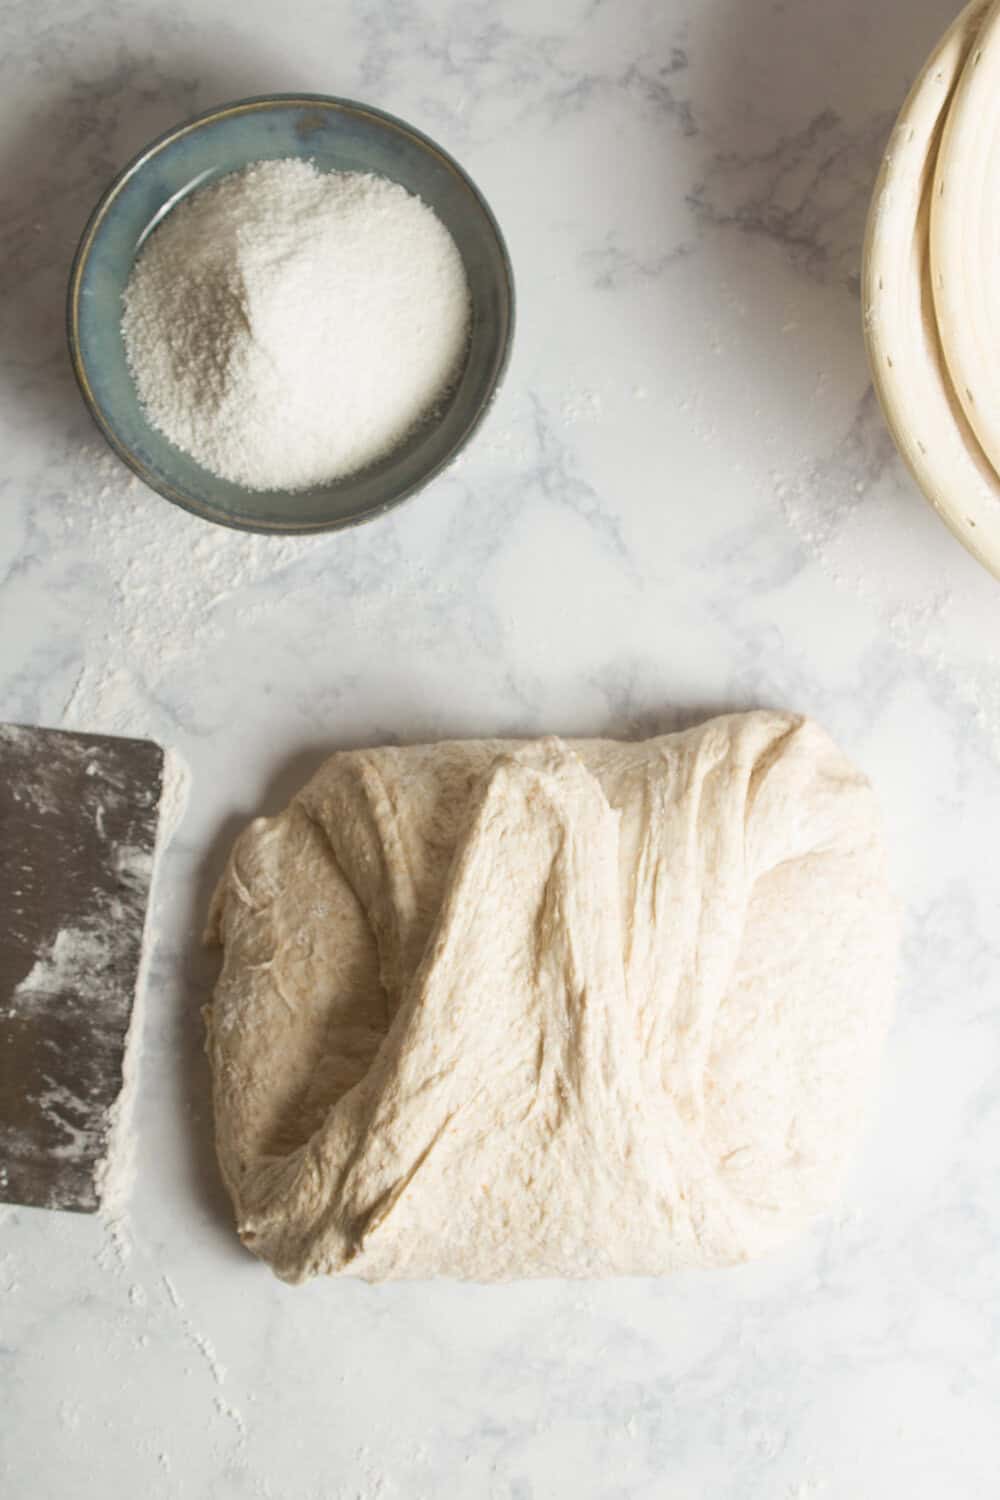
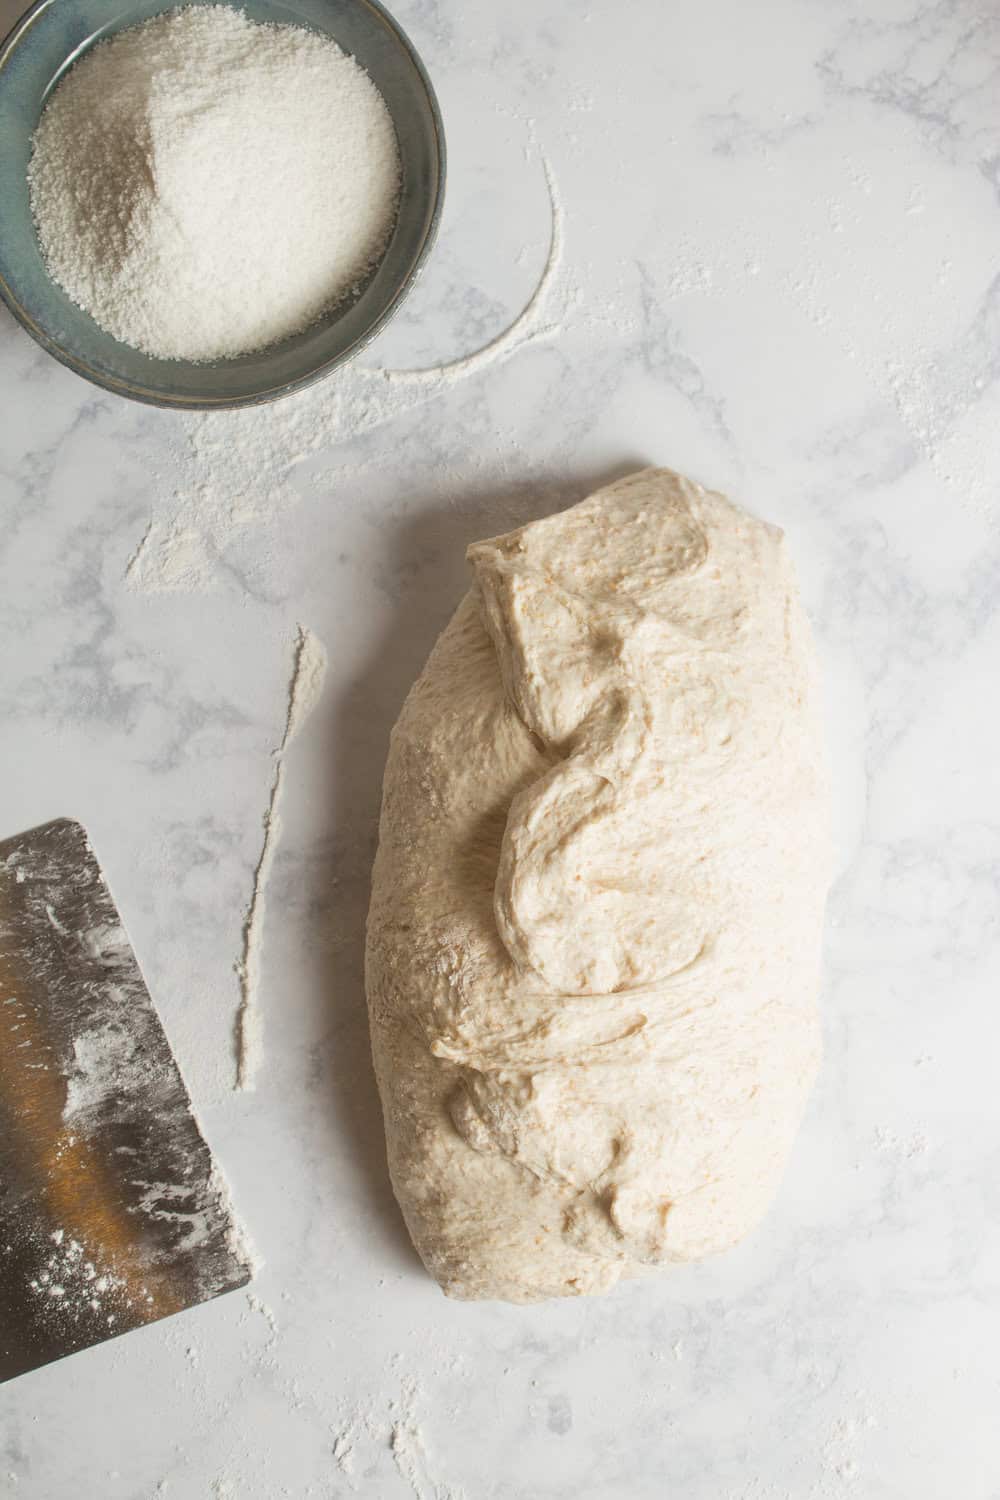
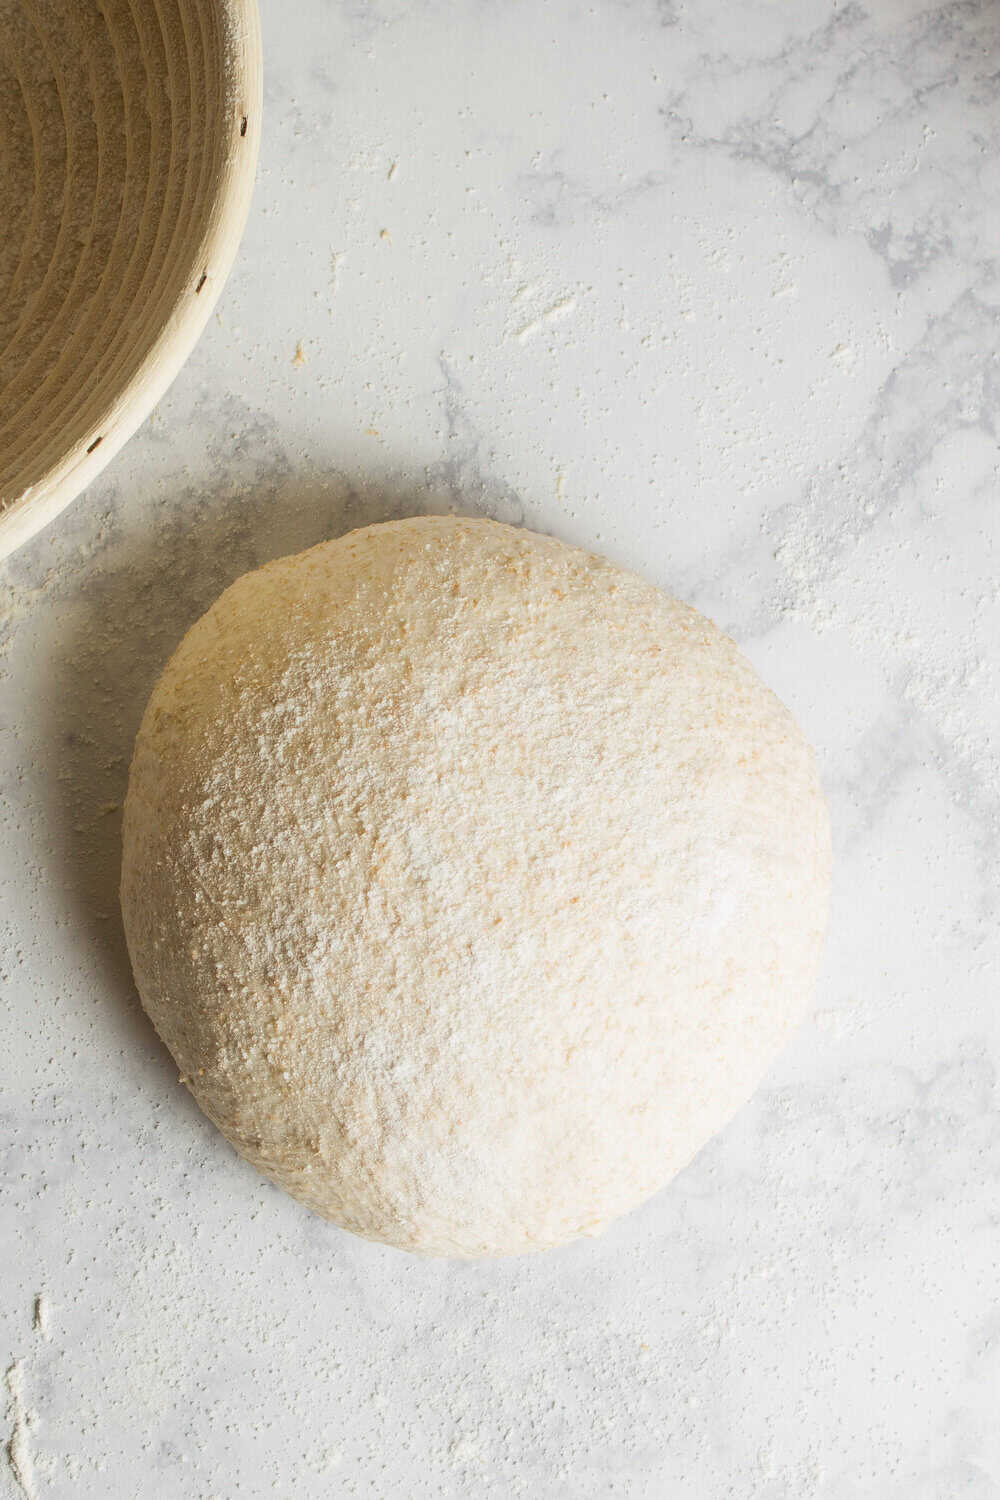
- Shape the rustic sourdough dough into a ball by cupping your hands around the dough ball and then gently pulling it towards you. This creates surface tension on the top of the dough. Rotate the dough and gently pull it again towards you. Do this a few more times till you form a smooth round loaf of dough that has a tight surface.
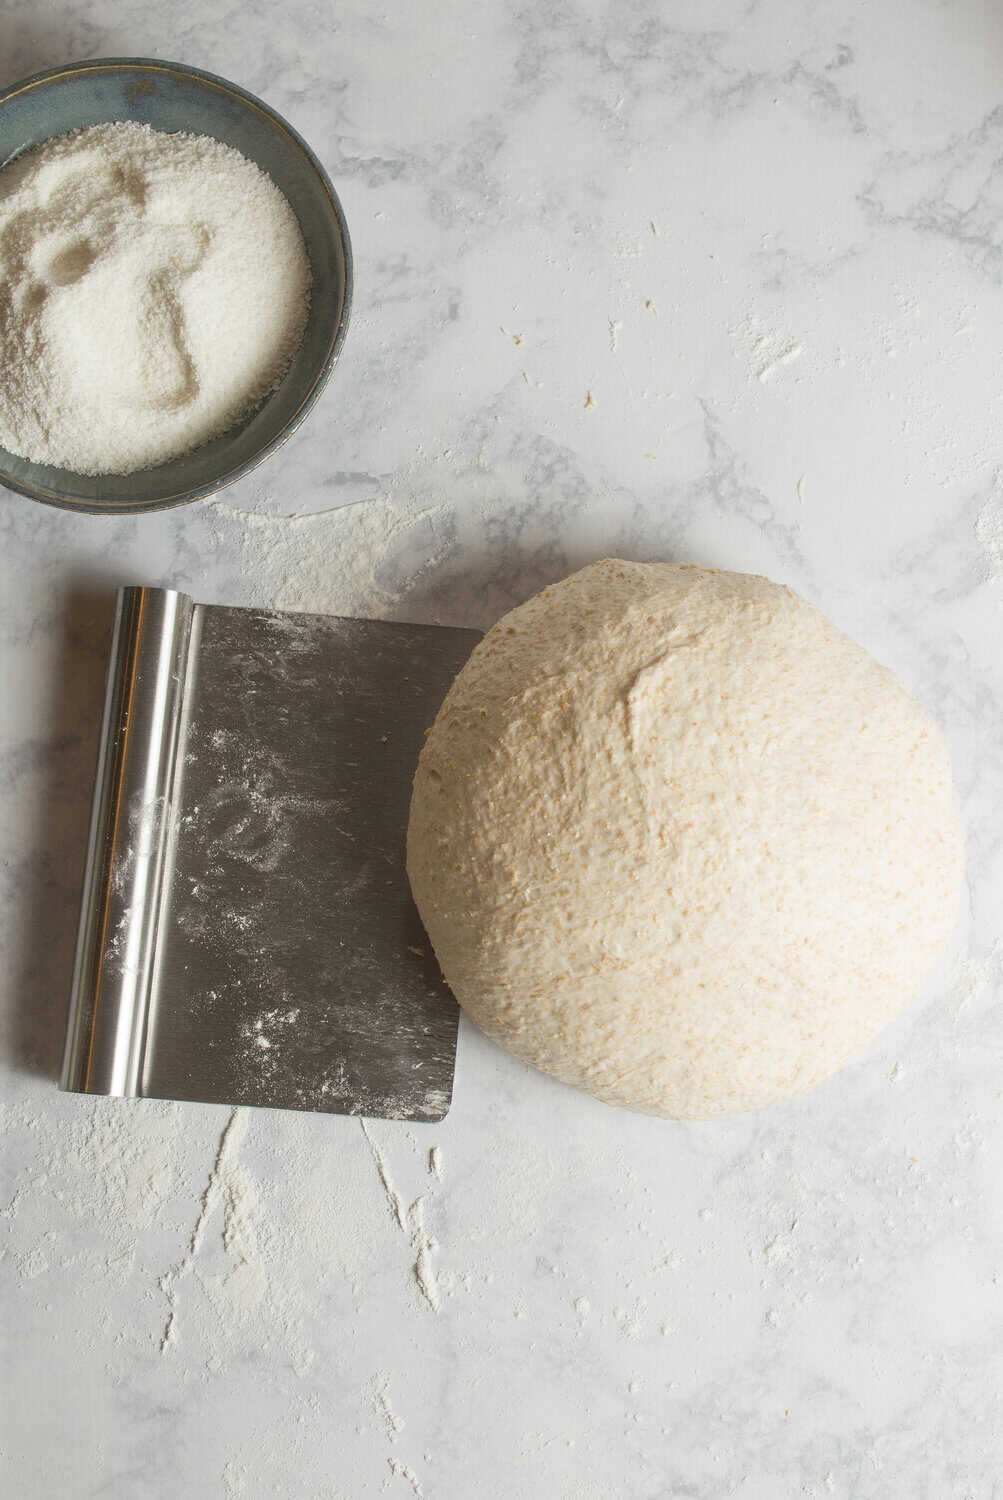
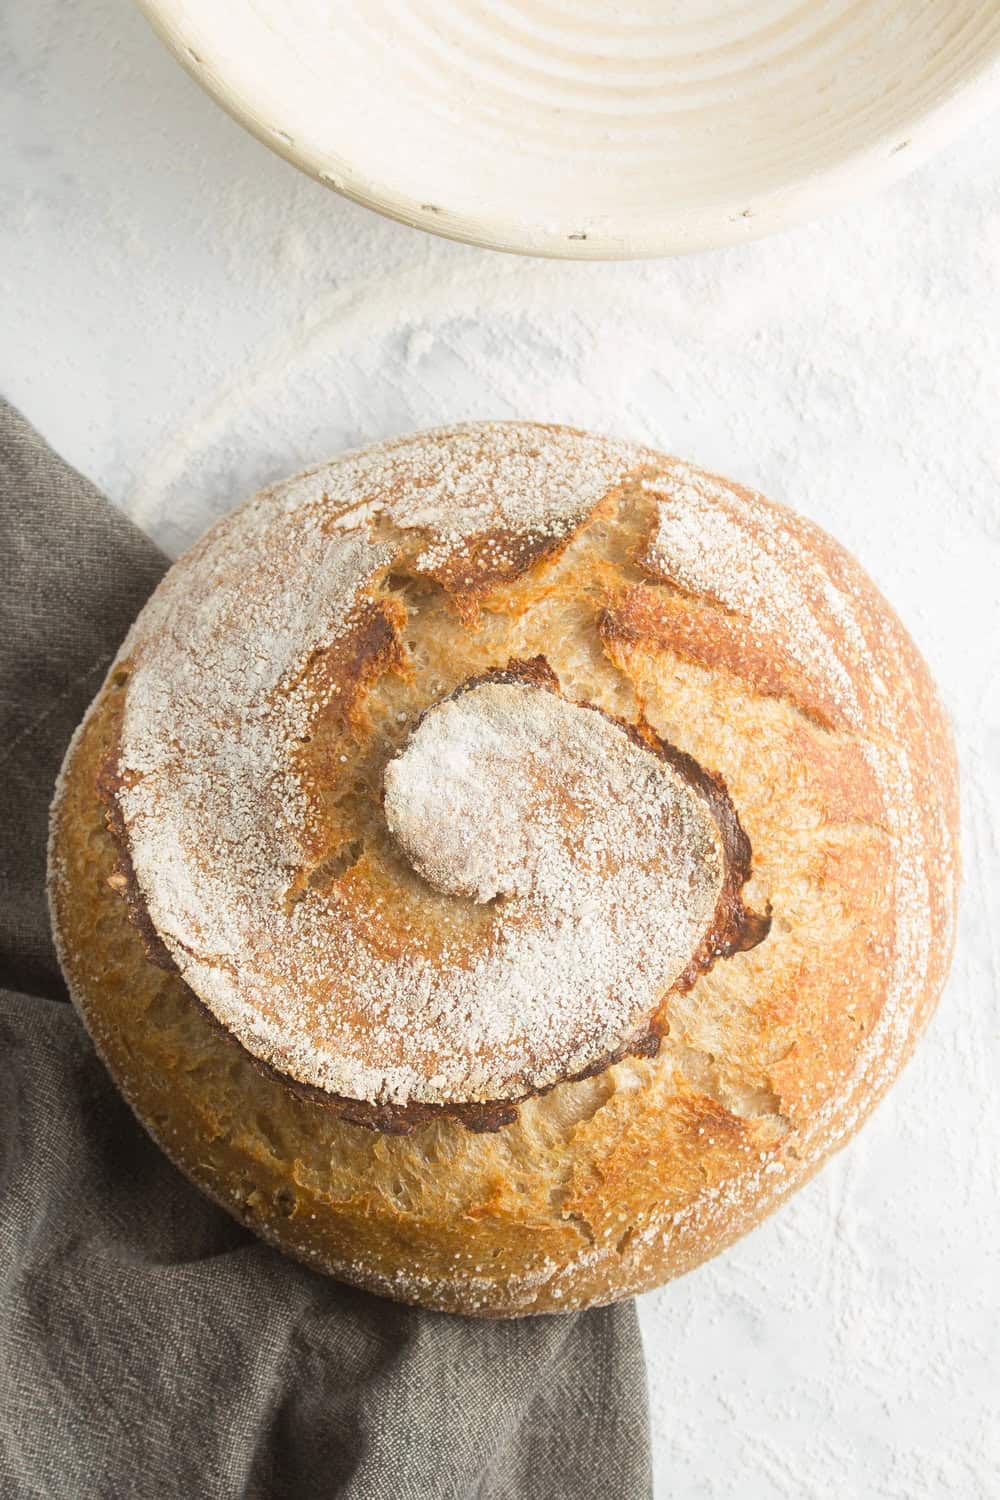
- Generously sprinkle the flour mix all over your dough. After that place it into a flour-dusted basket seam side up. The best flour to use for sprinkling and dusting is rice flour mixed with all-purpose flour. This mix will keep the dough from sticking to the basket because rice is gluten-free.
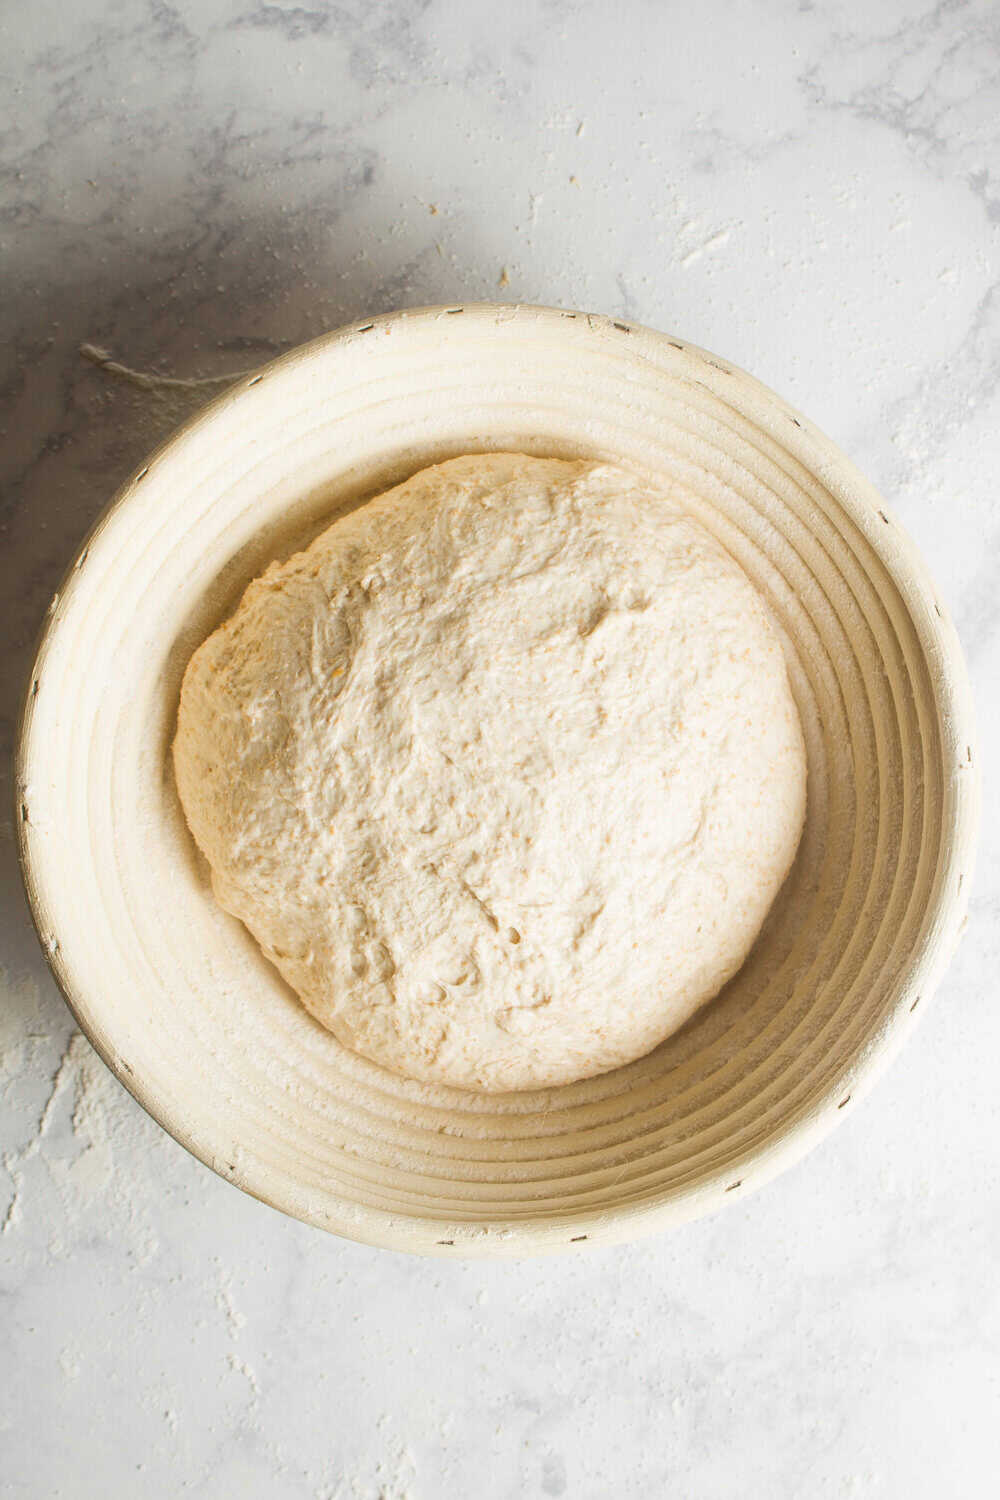
- Place the dough in the fridge overnight so as to develop deep flavor, or for about 4 hours. This step is known as the final proof. If you like, you can line the basket or bowl with a cloth and then generously sprinkle it with the flour mix. This will guarantee that the dough won’t stick to the sides of the bowl.
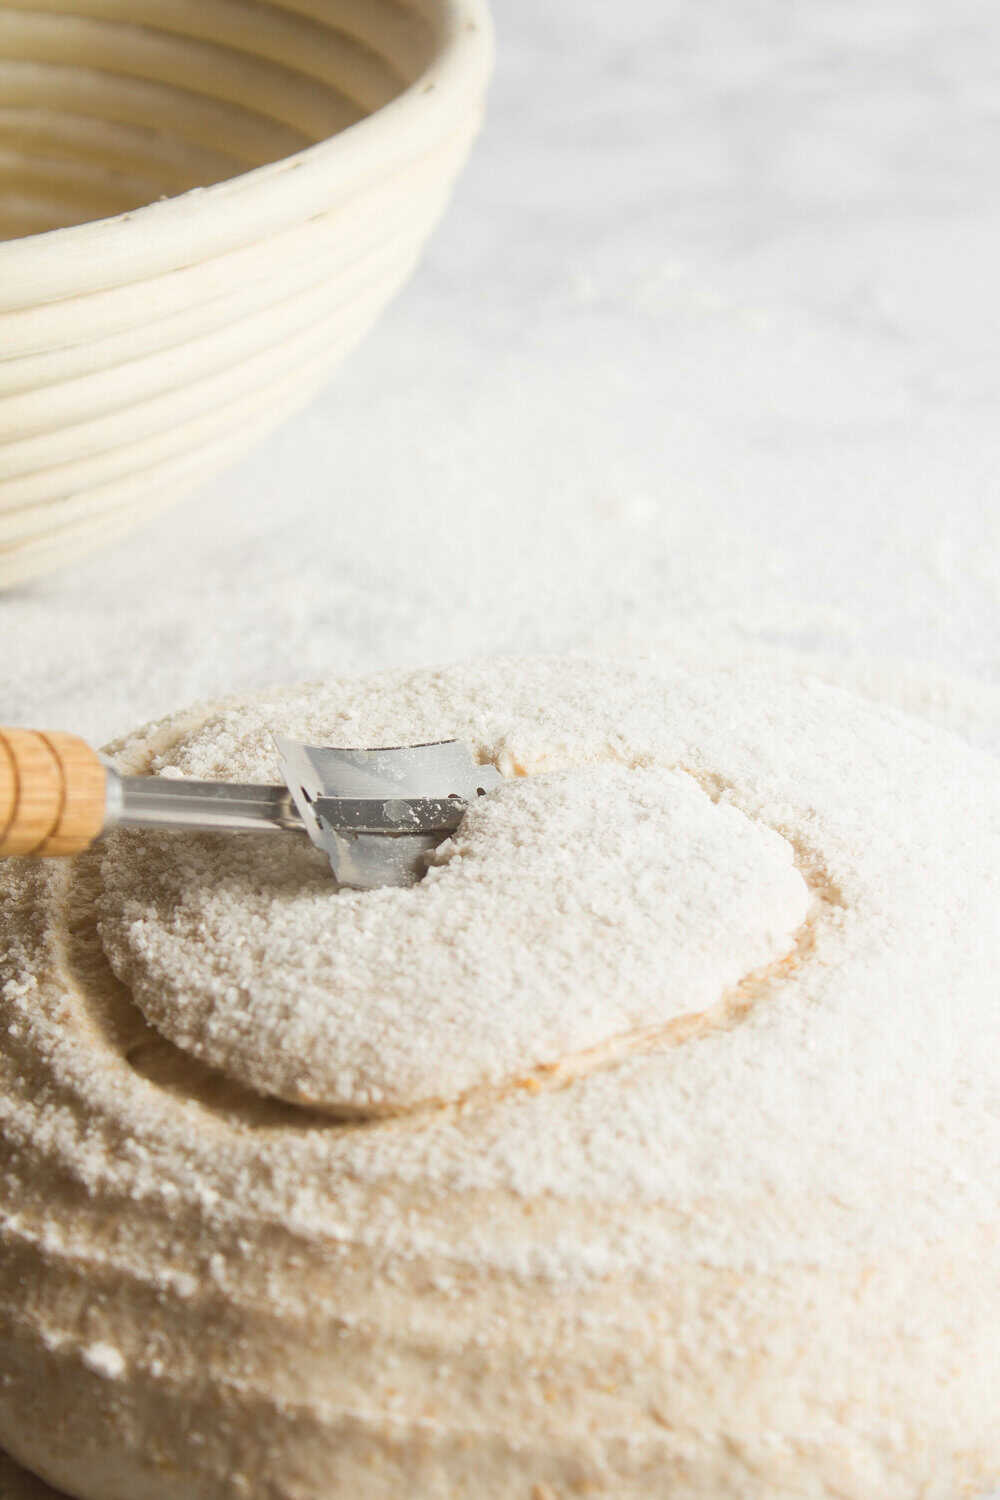
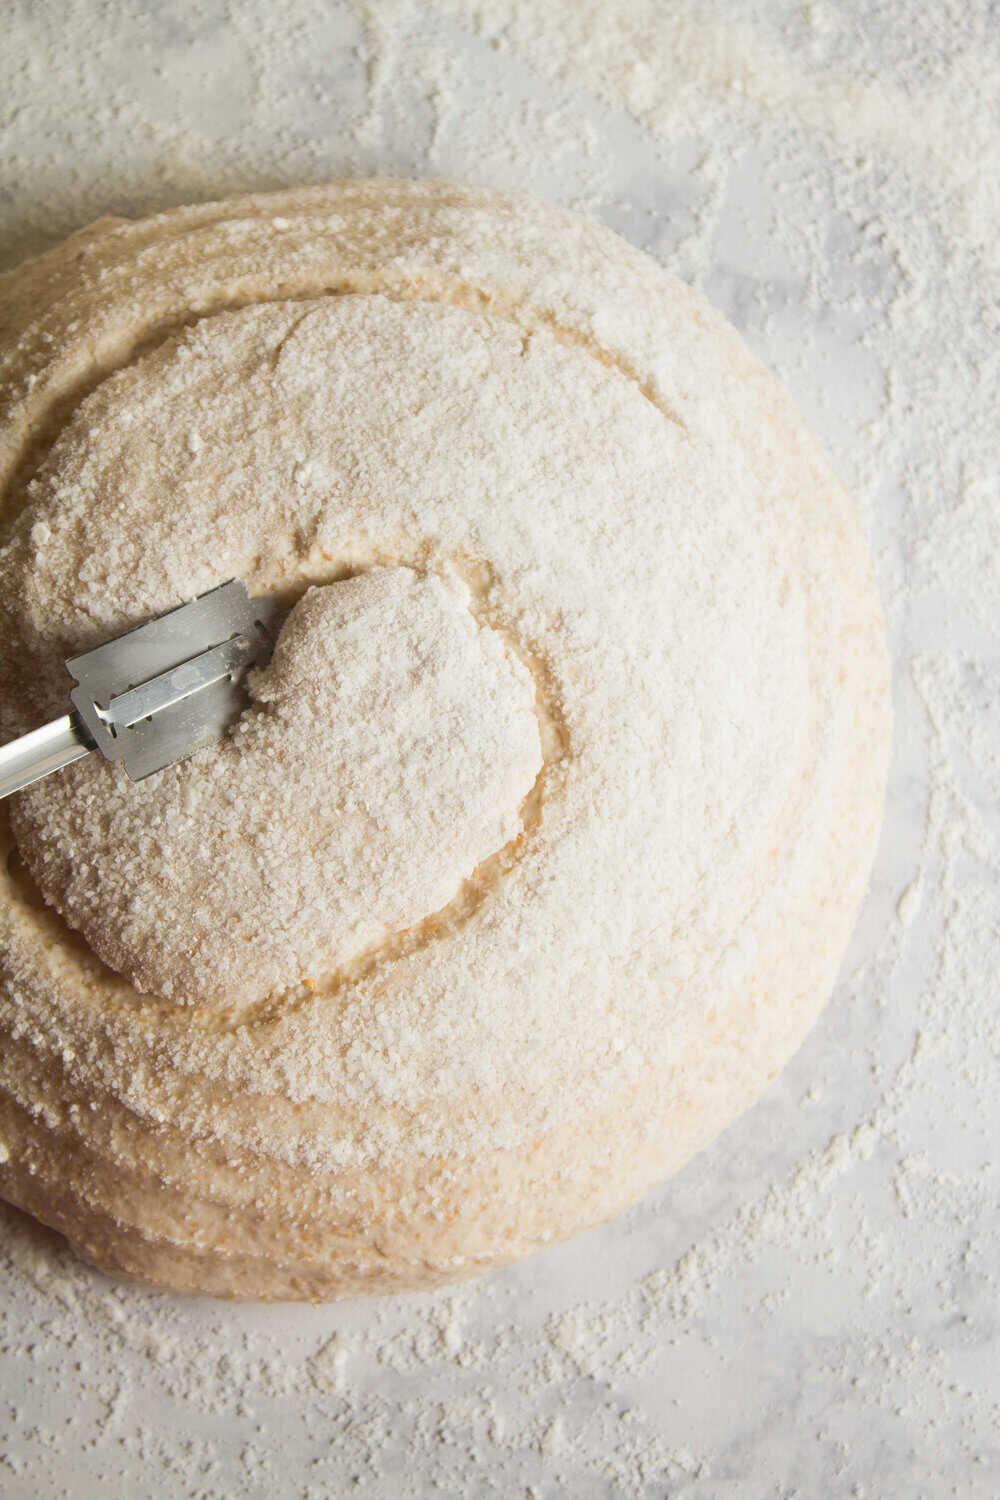
- After 4 hours, or the next day, preheat your oven temperature to 500 degrees and then sprinkle some rice flour in your Dutch oven. Preheating the Dutch oven itself at this point is optional. Flour your work surface and then remove the dough from the refrigerator.
- Place the dough on the surface seam side down. Slash the top of the loaf at about a 45-degree angle at 1/4 an inch depth using a sharp knife or bread lame. This doesn’t have to be perfect – it’s a rustic loaf!
- Place dough in the Dutch oven and then cover it. Repeat this same process with your second piece of dough.
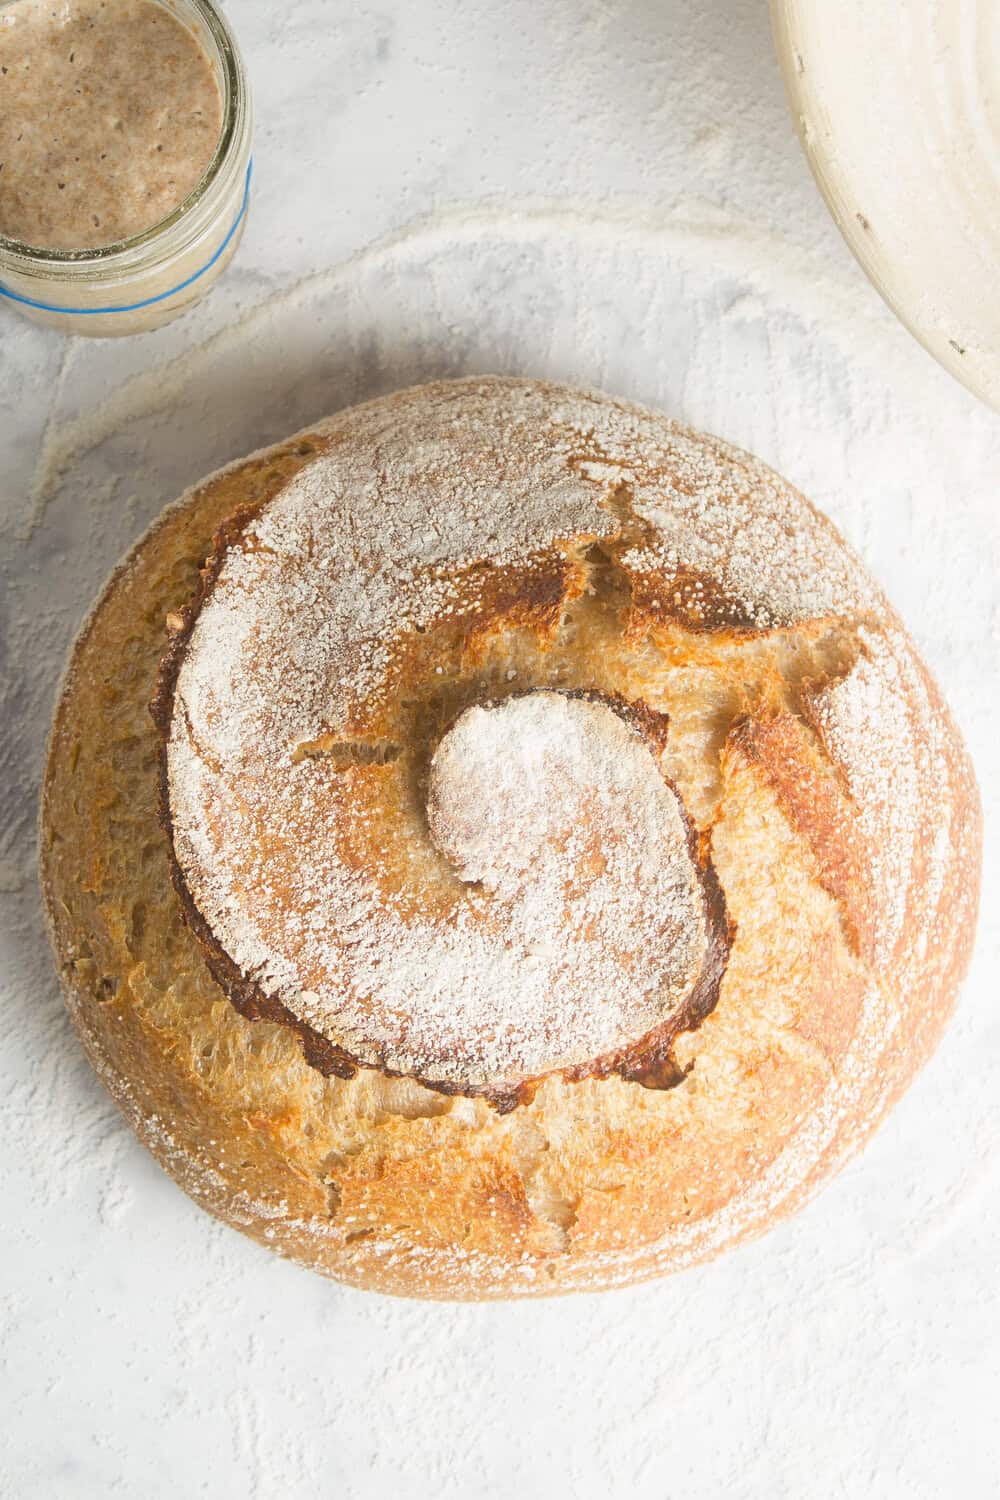
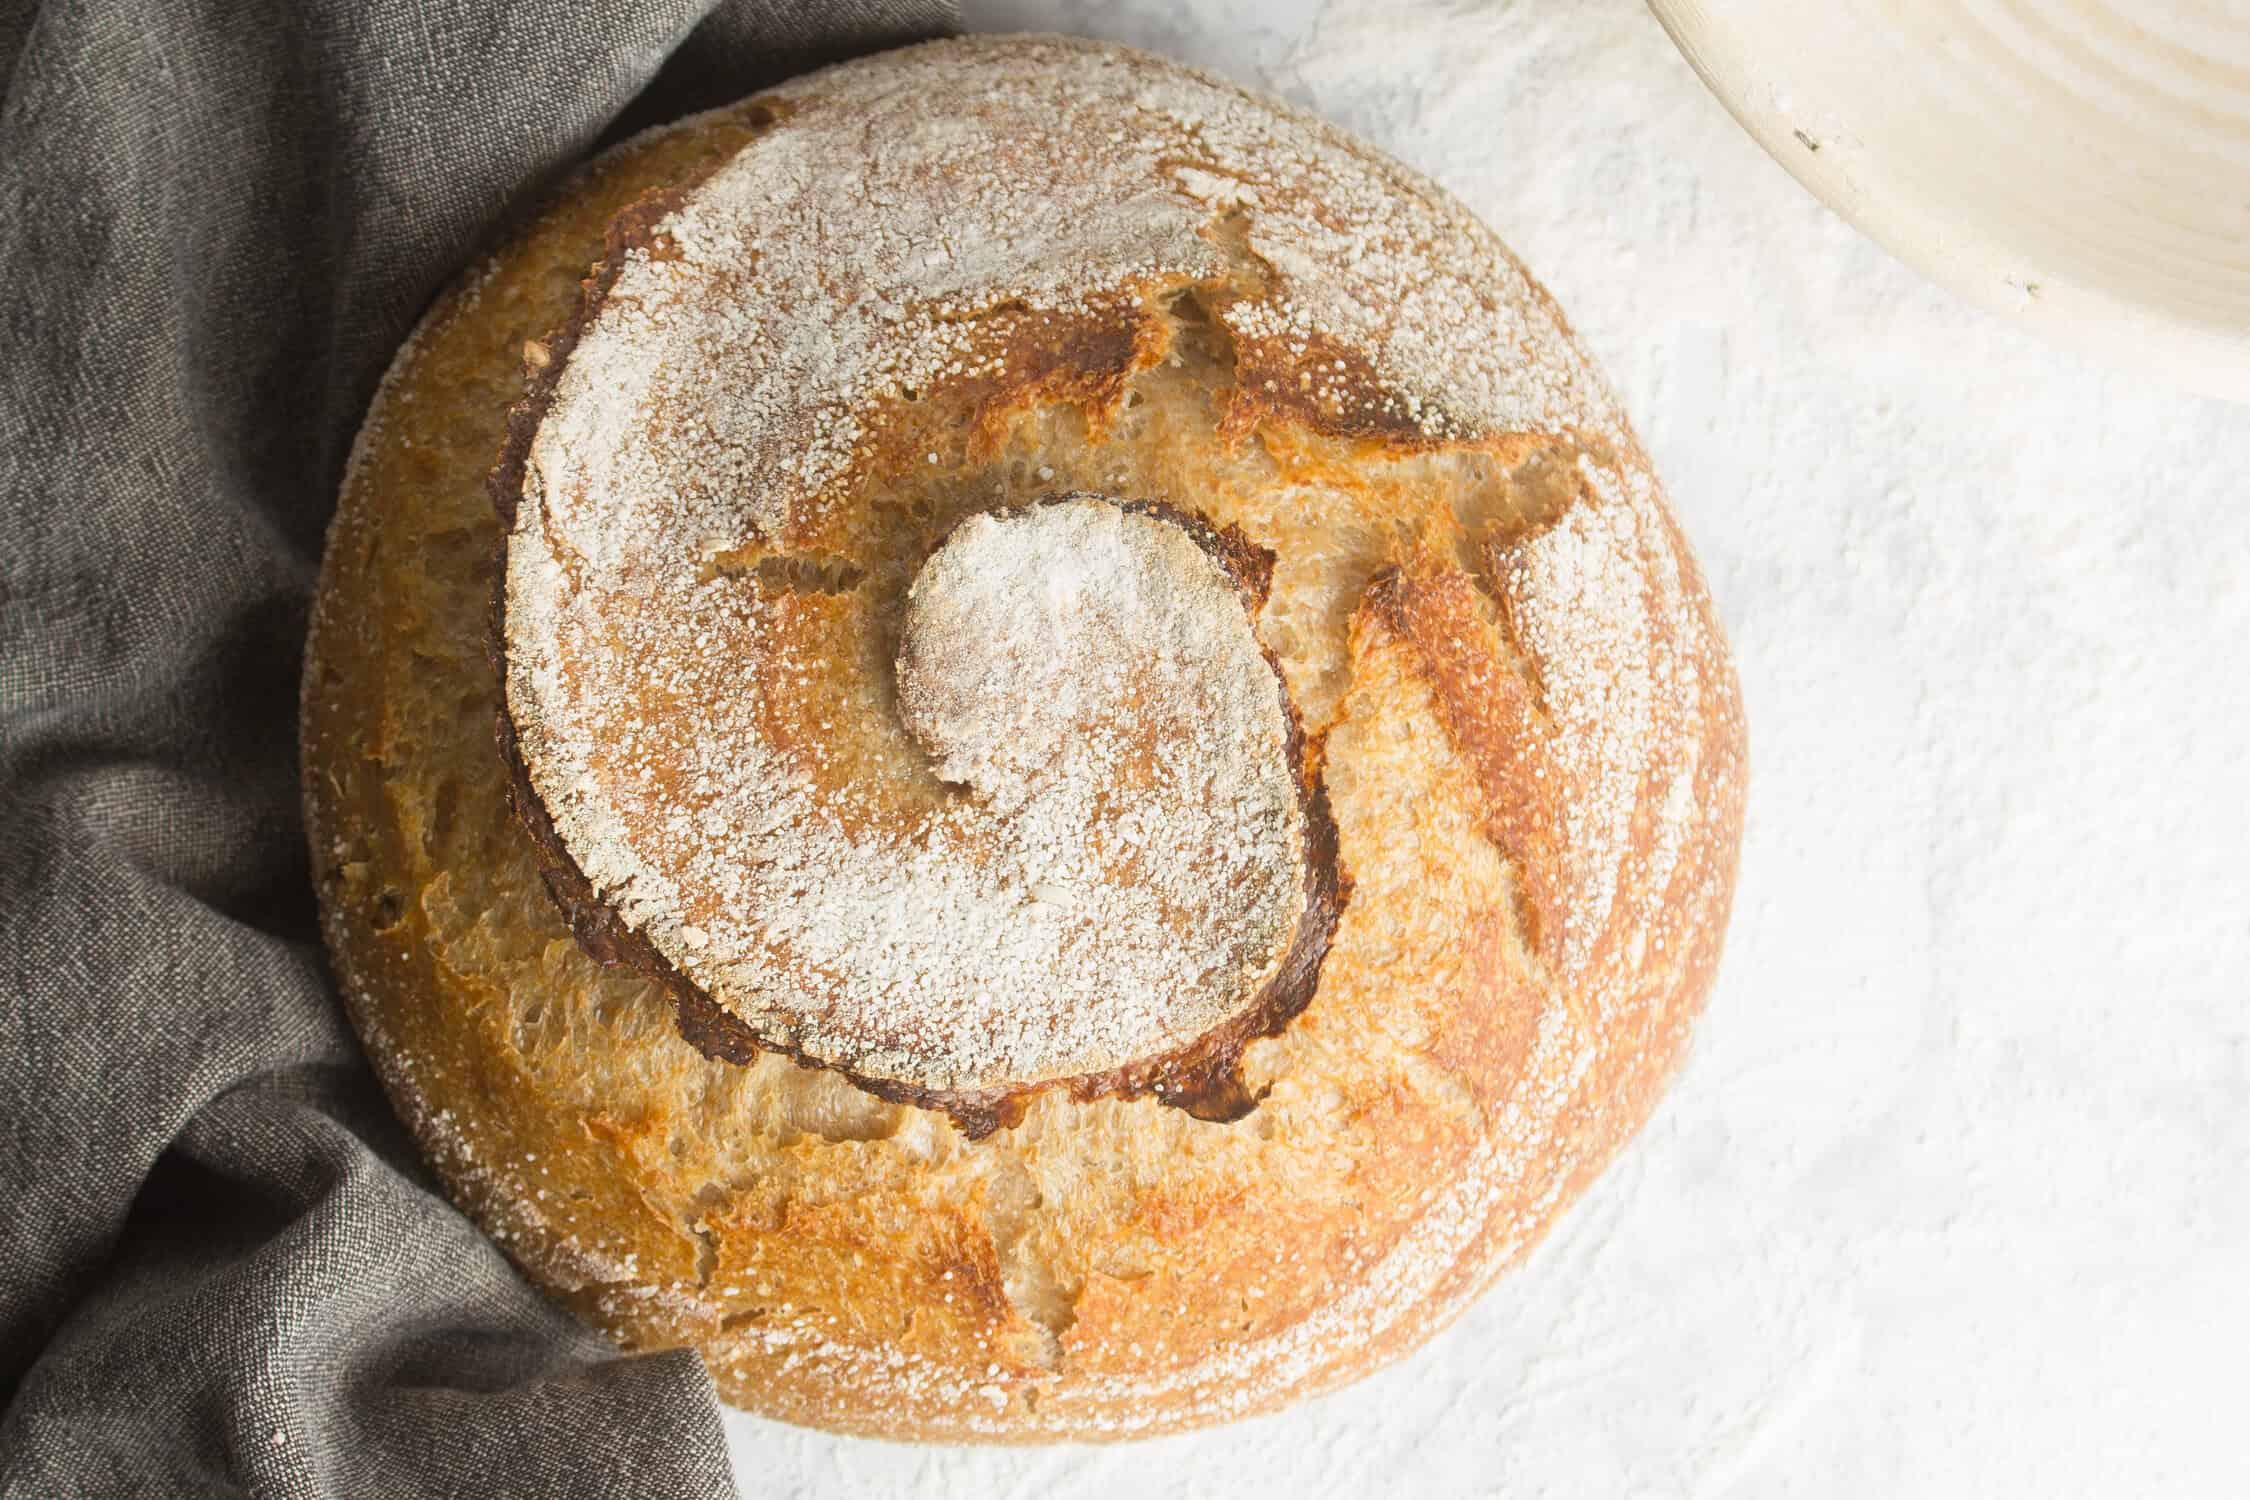
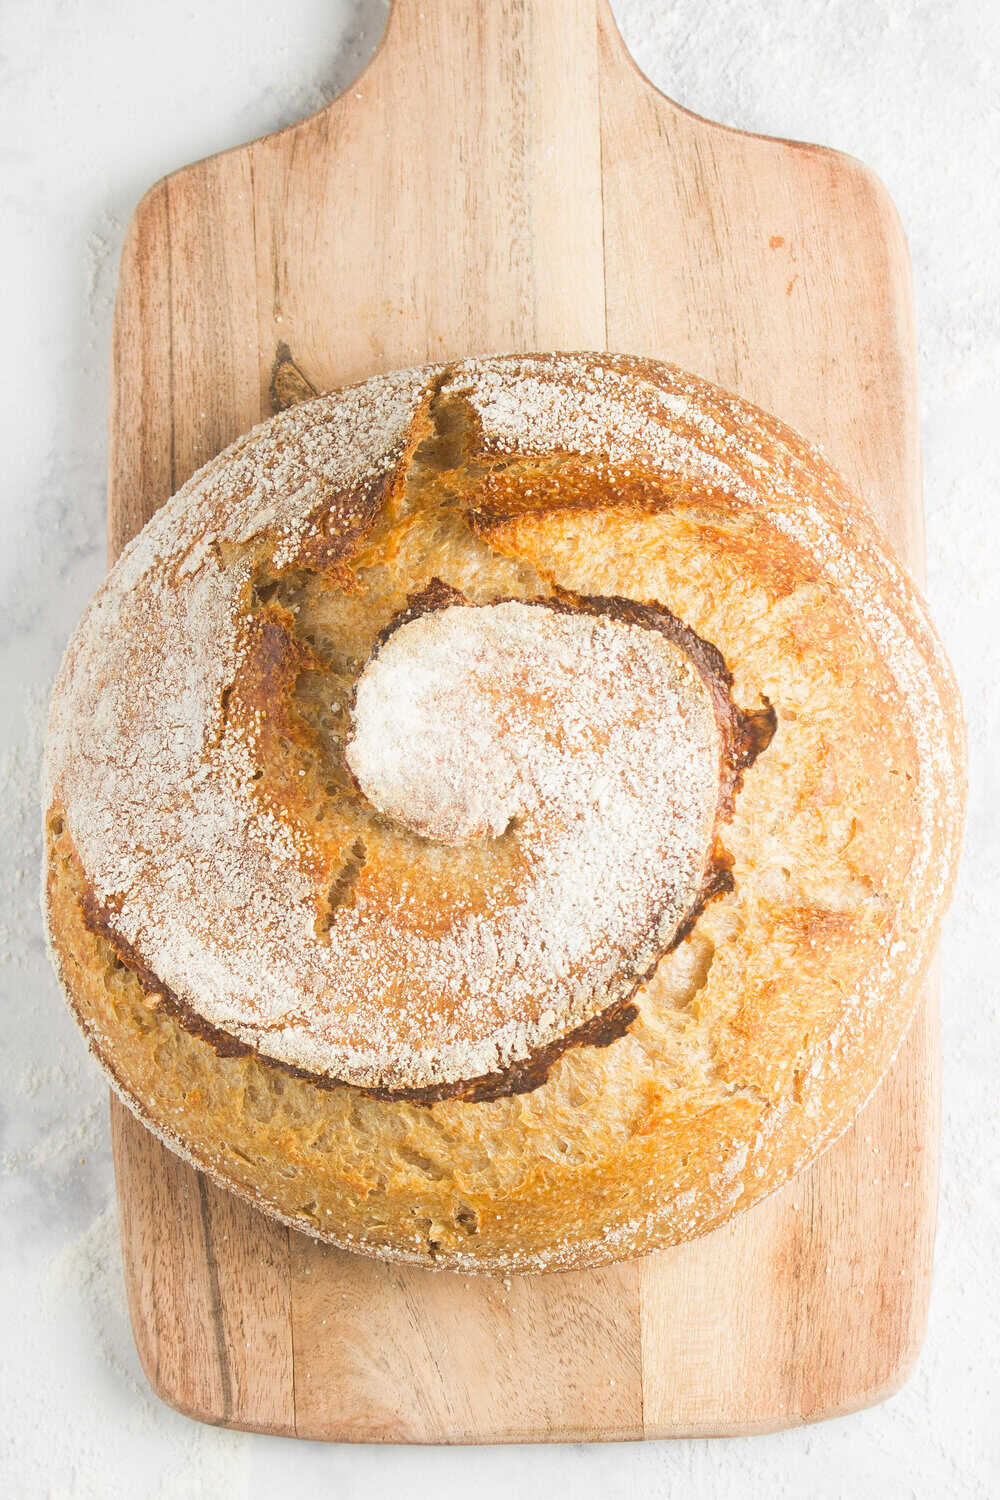
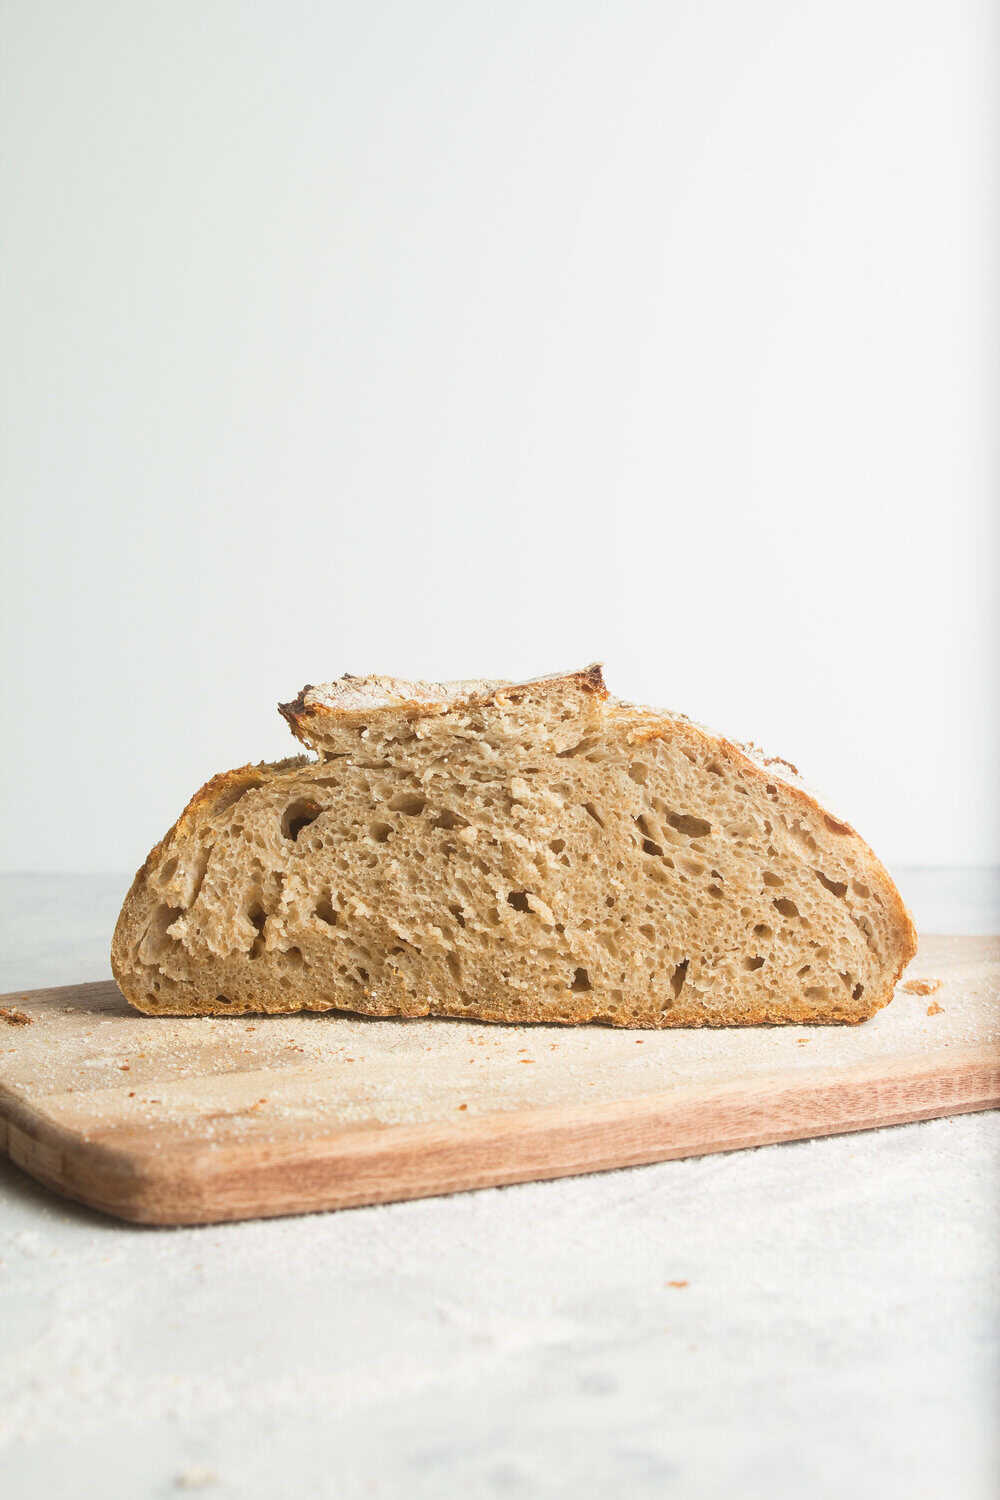
- Slide the Dutch oven into your preheated oven and shut the oven door. Bake the bread until it looks deep golden brown. This will take about 40 minutes. Remove the lid and if your sourdough loaf is still not deep golden brown. Keep the lid off and let it bake for another 10-15 minutes or until it’s deep golden brown. Dutch ovens are popular among home bakers because they trap in the heat and moisture and form steam. Steam helps the bread rise and gives it that signature rustic sourdough look and crust.
- Carefully remove your loaf of bread with a spatula and let it cool on a wire rack or upside-down muffin pan. You could also slightly tip the loaf over for about 30 minutes to 1 hour. If you cut into the loaf immediately after baking, the loaf will become gummy in texture. Always use a sharp serrated bread knife to cut your bread.
- Congratulations! You have one or two beautiful, round loaves of Rustic Sourdough Bread!
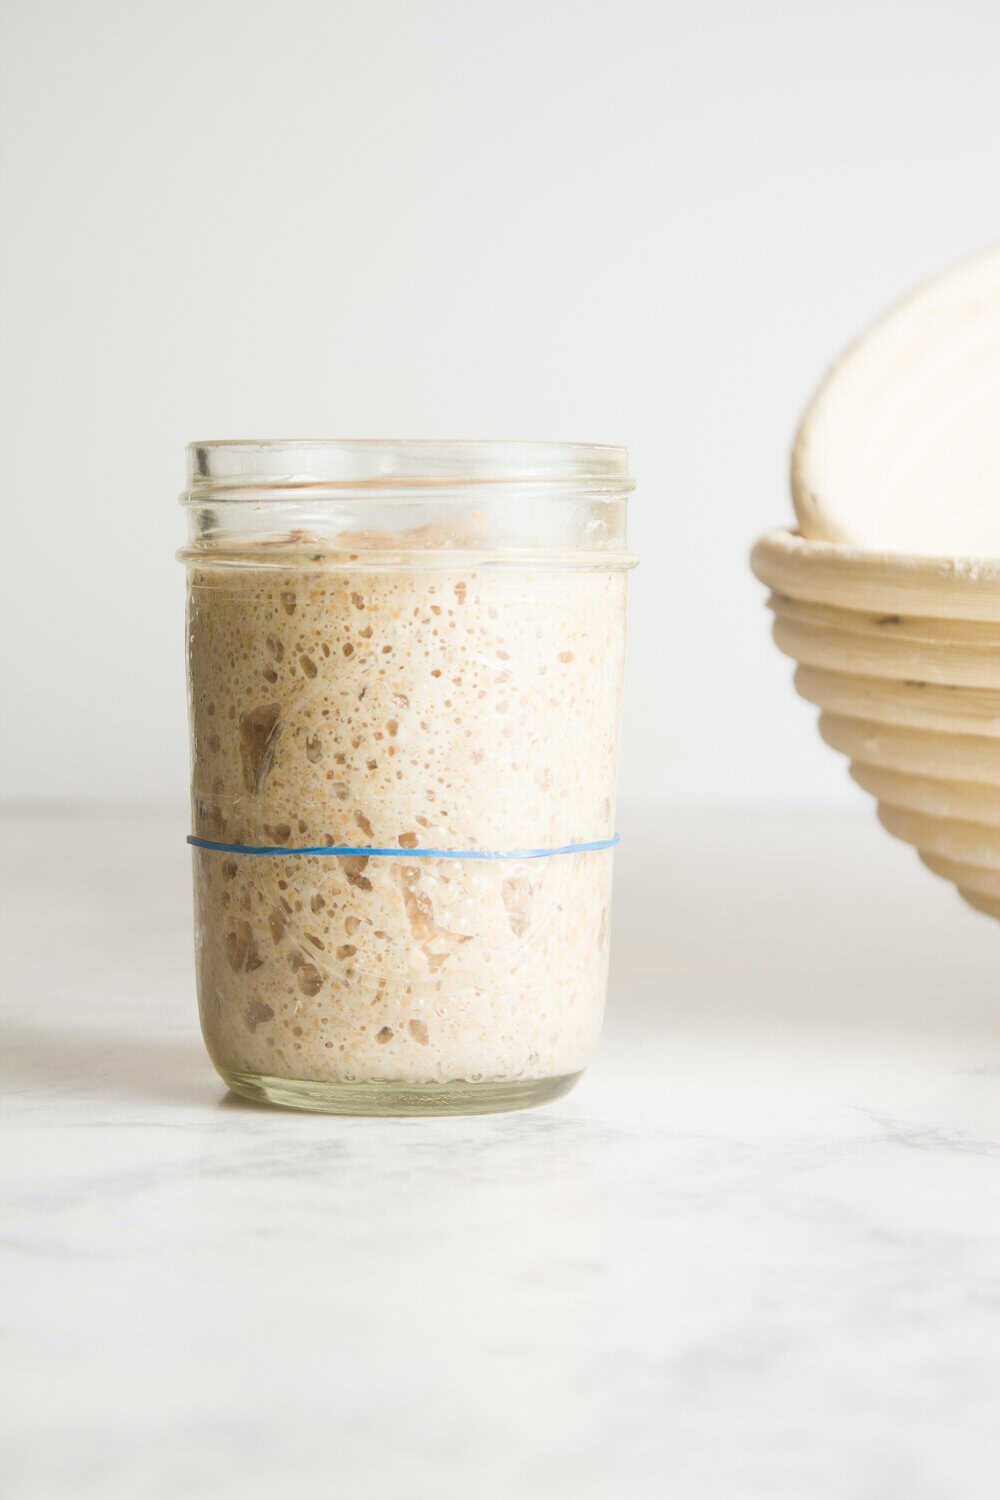
How to Make Sourdough Starter
This is, by no means, a comprehensive guide to making sourdough starter, but it’ll give you a jumping off point:
- Day 1: Mix 50 g whole-wheat (or rye) flour + 50 g water in a jar. Stir smooth, scrape the sides, loosely cover.
- Day 2: You might see a few bubbles (or not—fine either way). Discard all but 50 g, feed 50 g water + 50 g flour (you can switch to all-purpose now).
- Days 3–7: Repeat the discard → feed 1:1:1 by weight (starter:water:flour) every 24 hours. If it starts rising and falling within a day, move to twice-daily feeds. Keep it in a warm place (around 70-78°F).
- Ready when: It doubles in 4-6 hours after a feeding, smells pleasantly tangy, and can pass the float test (a spoonful floats in water).
- Maintain: Room temp = feed daily. Fridge = feed, let it start to rise, then chill and refresh weekly.
Storage Instructions
This rustic bread can be kept in a Ziploc bag at room temperature. You can also put it in the freezer after wrapping it in aluminum foil and placing it in a freezer bag.

FAQ
You can get sourdough starter online from places like King Arthur Baking, Cultures for Health, or Amazon. Many local bakeries or health food stores will share or sell some, and you can often find it for free by just asking on Facebook if any local friends have some. You can also make your own sourdough starter with just flour and water in about a week (see above section).
You can do a float test. If a spoonful of starter floats in a glass of water – it’s likely ready. If it sinks to the bottom, it needs more time to ferment.
It certainly is. Most store-bought breads have so many suspicious ingredients in them. Many of which are hard to pronounce. Sourdough bread just has water, flour, salt, and natural yeast. All of which are so easy to read and pronounce. And digest.
Either 8-inch, 9-inch, or 10-inch baskets will do. These baskets are also known as Banneton baskets and can be bought online in stores like Amazon.
This basic sourdough bread recipe doesn’t require you to place the dough in a hot Dutch oven. Not preheating the Dutch oven is a safer way to bake sourdough for newbie sourdough bakers.
It’s ready to bake when you poke it and it slowly springs back. It’s also ready when it looks like it has puffed up.
You can put it in a Ziploc bag and keep it at room temperature. You can also put it in the freezer after wrapping it in aluminum foil and placing it in a freezer bag.
This happens when the dough has excessive gas because of being over fermented or over-proofed. Over-proofing can be prevented by not allowing the dough to go too long during the final proof. If you still want to bake your over-proofed dough I’d suggest you don’t score it.
Move the Dutch oven to a higher level in the oven. Also, place a baking tray or baking stone on a rack underneath the Dutch oven. This will help to evenly distribute the heat in the oven and keep the bread from burning at the bottom.
More Delicious Bread Recipes
Easy Rustic Sourdough Bread (Only 5 Ingredients!)
Description
This Easy Rustic Sourdough bread recipe is a great recipe for beginners! It has only 5 ingredients (including the sourdough starter) and I’ve included almost 20 step-by-step photos to make this the easiest of sourdough recipes to follow!
Ingredients
- 800g All-Purpose Flour
- 300g Whole Wheat Flour
- 800g Lukewarm Water
- 17g Salt
- 100g Active Sourdough Starter
Instructions
Step 1 MIX INGREDIENTS
In a large bowl, mix all the ingredients together using your hands or a wooden spoon. Mix until they are well combined. The dough should feel wet and shaggy.
If your dough is too wet, add a little more flour 1/4 cup at a time until it gets to the right consistency. If your dough is too dry, add in a little water, 1 tablespoon at a time until it gets to the right consistency.
Step 2 LET DOUGH REST
Cover the large bowl with plastic wrap, lid, or kitchen towel. Allow the dough to rest at room temperature for about 30 minutes. During this time the flour will absorb the water and begin to develop gluten.
Step 3 STRETCH & FOLD DOUGH
Stretch up the dough and fold the dough over its middle. Give the bowl a quarter turn and repeat the stretch and fold around 5 times or until the bowl comes full circle.
Cover the bowl and take a 10-minute break. Repeat this Stretching and folding and take another 10-minute break. Repeat this one more time.
The process of stretching and folding strengthens the gluten in the dough and ensures that the dough will rise and have a more open crumb.
Step 4 LET DOUGH RISE
Let the dough do its first dough-rise for 2-3 hours at room temperature. Next, put it in the fridge overnight, or for 1 1/2 hours to bulk ferment. Bulk fermentation is a very important step and should not be rushed.
If the dough doesn’t double in size, don’t be sad, sourdough takes a little longer to rise compared to commercial yeast bread doughs. The speed at which the dough rises usually depends on the temperature of your room. Typically, sourdough takes longer to rise in the winter than it does in the summer.
Step 5 SHAPE THE DOUGH
Dust your work surface with flour and then scoop out the bread dough from the bowl and onto the work surface.
Divide the dough into 2 equal parts and then shape it by shaping the dough into a smooth ball. This is how you do it:
Visualize a diamond shape with 4 corners and pull the top “corner” up and to the bottom “corner”.
Next, pull the bottom corner up and to the top corner.
Pull the left corner to the right.
Then pull the right corner to the left.
Step 6 CREATE TENSION ON THE DOUGH
Shape the rustic sourdough dough into a ball by cupping your hands around the ball dough and then gently pulling it towards you. This creates surface tension on the top of the dough. Rotate the dough and gently pull it again towards you. Do this a few more times till you form a smooth dough ball that has a tight surface.
Step 7 DUST THE DOUGH
Generously sprinkle the flour mix all over your dough. After that place it into a flour-dusted basket seam side up. The best flour to use for sprinkling and dusting is rice flour mixed with all-purpose flour. This mix will keep the dough from sticking to the basket because rice is gluten-free.
Place the dough in the fridge overnight so as to develop deep flavor, or for about 4 hours. This step is known as the final proof.
If you like, you can line the basket with a cloth and then generously sprinkle it with the flour mix. This will guarantee that the dough won’t stick to the basket.
Step 8 SCORE THE DOUGH
Preheat your oven temperature to 500 degrees and then sprinkle some rice flour in your Dutch oven. Preheating the Dutch oven itself at this point is optional.
Flour your work surface and then remove the dough from the refrigerator. Place it on the surface seam side down. Slash the top of the dough at about a 45-degree angle at 1/4 an inch depth using a sharp knife or bread lame.
Place it in the Dutch oven and then cover it. Repeat this same process with your second piece of dough.
Step 9 BAKE THE BREAD
Slide the Dutch oven into your preheated oven and shut the oven door. Bake the bread until it looks deep golden brown. This will take about 40 minutes.
Remove the lid and if it’s still not deep golden brown. Keep the lid off and let it bake for another 10-15 minutes or until it’s deep golden brown.
Dutch ovens are popular among home bakers because they trap in the heat and moisture and form steam. Steam helps the bread rise and gives it that signature rustic sourdough look and crust.
Step 10 REST THE BREAD
Carefully remove your loaf of bread with a spatula and let it cool on a wire rack or upside-down muffin pan. You could also slightly tip the loaf over for about 30 minutes to 1 hour.
If you cut into the loaf immediately after baking, the loaf will become gummy in texture.
Always use a sharp knife to cut your bread. Enjoy!


Nutrition
- Serving Size: 2 slices
- Calories: 175
- Sugar: 0.3 g
- Sodium: 301.9 mg
- Fat: 0.7 g
- Carbohydrates: 36.6 g
- Fiber: 2.3 g
- Protein: 5.5 g
- Cholesterol: 0 mg