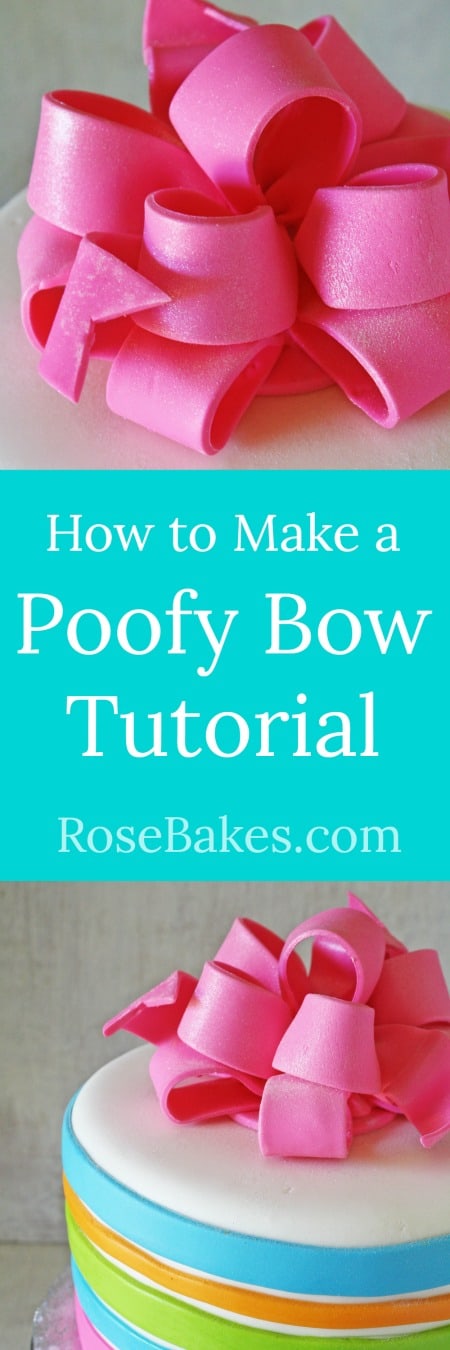
How to Make a Poofy Bow {Fondant or Gum Paste}, Part 2 + Gender Reveal Cake


You’ll want to start by melting some white chocolate. If you have candy coloring on hand, you can color the chocolate to match your fondant, but if not, the white shouldn’t show up after all the loops are there. Ignore the fact that mine was orange – I already had it on hand so I figured I’d use it up instead of waste it.

I used a squirt bottle to put a circle of white chocolate on my dried circle. You could also just do this with a spoon, then just spread it around. Don’t skimp on the white chocolate, you’ll want to have enough for your first set of loops to stick to!

After this, you’ll want to start by adding 6 of the flat-bottom loops in a circle (shown in part one).

I won’t include a lot of dialogue here, but you can see the step-by-step…


Now that all of those loops are set, you’ll want to take a ball of leftover gum paste (or fondant) that is colored to match your bow, and wet it.

I stick mine directly under running water and squish it around until it’s good and sticky. It should be about 2″ in diameter (I don’t know how else to tell you the size).


It should look like this:

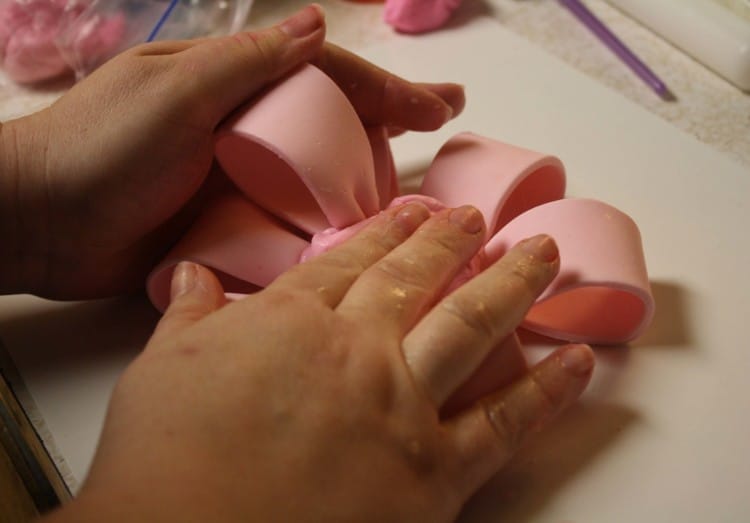
Next you’ll take the non-flat bottom loops and start sticking them into the wet fondant. This second layer will get 5 loops. Don’t worry if there are a few spaces here and there – that’s where you can stick the tails (or even an extra loop if you want to at the end).

After each loop, you’ll want to squish it all back together tight. Do this each time so it doesn’t start to spread out on you…
Again.. not a lot of dialogue, but here are a few step-by-step (loop-by-loop) pictures!


See how I turned that last one up on it’s side a little? You can do that too! Or you can alternate them laying down and on their sides to give the bow a little more random look!
After you’ve got 5 loops added, it’s time to do the top center loop. Do it the same way, just push it into the wet fondant…

Lastly, add your tails. If you remember from part one, I forgot to pinch the ends of my tails, but if you’ve done that, it’ll be really easy to push them into any empty spaces on your bow…

Then squish it all together tight again…


Now you’re done! You’ll want this to sit awhile and and let that soft squishy ball in the middle dry/harden up. Again, I prefer overnight, but if you don’t have that sort of time, just be careful applying it to your cake and it should be fine!

By the way, to attach this to a fondant covered cake, I really like to use royal icing, but you could also just use water or sugar glue (talked about in part one). If it’s a buttercream covered cake, you’ll definitely want to use royal icing.
As soon as my cake is delivered this weekend, I’ll post pictures of the final cake!
This is perfect as a topper for a 6″ round cake or to center on a larger round or square cake. You can see how I used this bow on a wedding cake here and here (the two colored bow is a little more complicated) or this gender reveal baby shower cake here (I think I used 1-1.25″ wide ribbons for this one)…
You can experiment with different length and width ribbons to get your bows to look different, but this is the bow I make most often!

Oh.. and for this cake…. they were having a GIRL!!!
Do you have any questions about this tutorial? Please leave them in the comments and I’ll do my best to answer and help out!


I just wanted to let you know that I love this step by step tutorial! I have a baby shower cake coming up and I am putting a bow like this on it as the topper. I have looked at many tutorials and even made two test bows, both were failures. The first one, I made out of MMF and it did not get hard and the loops wilted flat. The second one, I made out of gumpaste, but I didn’t pinch the ends together or use the gumpaste blob! I actually was using the cake boss’s tutorial and I like your so much better! I will be going home this evening and trying it!
Thanks so much Nicole!! Let me know if you have any trouble or questions – I’ll help if I can 🙂
Rose,
I have two successful bows with this tutorial! Thanks again for this.
This is flipping amazing , im attempting this bow next week , thank you so much ! Your instructions are great . Nice use on the word POOFY. !
Do you have a tutorial on making and coloring fondant ?
Your new fan
Lisa
Yay!!! SO glad to help Lisa! I do have a marshmallow fondant tutorial here: How to Make Homemade Marshmallow Fondant. I have to warn you… it’s very old and outdated, but I think it still hits all the major points! I hope to update it sometime soon!!
Hi! I’m making a baby shower cake and am using this bow as a topper, well trying to at least! lol I used chocolate fondant mixed with gumpaste and the color is really dull. Any ideas on how to shine it up a bit?
Rubbing shortening on it will make it shine, but it’s not a permanent fix. The shortening will eventually absorb, so you’d want to do it not long before serving. I also know that water will make it shiny… painting on a tiny bit or spraying with a steamer, but I’m not sure if it would weaken the loops, so if you don’t have extras – I wouldn’t try it unless you have time to make another!
Thanks! I’m putting the bow together tomorrow. Fingers crossed!! : )
i know it’s way too late…but i like to put luster dust or pearl dust (found at michael’s or walmart) to get beautiful shine!
Thank you!! I can’t wait to try this!
Whaow, this is lovely but i will like to ask of vegetable shortening can be use insteady of a chocolate candy for rose making
Great tutorial, I’ll try this out anytime this week. Weldone Rose
Great tutorial! i loooove the bow it turned out amazing! But some loops cracked in the middle and some dropped because of humidity i guess… any ideas how i can fix it?
I don’t know if they can be fixed – I usually just have to start over if my loops start to break. 🙁 If you happen to have extra loops, you might could figure out a way to get the broken ones out and replace them, but I’m not sure. Did you use gum paste or fondant?
Fondant only! I figured I had to start over 🙂 Do you have a trick to make it dry faster?
This is fantastic. So much detail is given, it would be really hard to mess up. I will be doing this for my daughters birthday..
Heyy Rose 🙂
Hope you are doing good and your tutorials seem like easy peasy.. lovin it..
I wanted to ask that I could not find tylose powder in my local stores, so would it be good enough just to make the bow only with the fondant?
Waiting for your reply.. Thank you 🙂
I would not advise it. The fondant will not dry hard on it’s own and the bow will crack or break or sag. You could alternately use gum paste to make it, or add CMC powder or gum tex to fondant.
Hi, your tutorial is great!
I made a poofy bow like this using gumpaste, left it over night, placed it on top of the cake and put it in an air tight container. When I looked at it the next morning, the bow had sagged and some cracked!!:-( do you have any ideas as to why this happened? I’m making another one for a 50th birthday and dont want it to happen again!!
Also, when using the wet gumpaste in the middle of your bow, does it make the loops soggy and saggy?
Thank you :-):-) xx
Is it humid where you live or in your home or even just raining on the days you made it? Also, I don’t recommend storing it in a closed container. That actually traps in any humidity and will cause it to soften instead of dry (as the “wet” evaporates out of the bow or center of the bow, it has nowhere to go). The wet fondant or gum paste in the center hasn’t caused me any trouble, but my loops are usually really dry and hard by the time I put them all together and again, I don’t put it in a close container so that the center can dry. I do hope that helps!
Great tutorial!! I am attempting my first bow next week on top a zebra print cake. I have a question….instead of using a ball of really soft fondant in the middle to attach the loops could I use Buttercream icing (putting a large swirl and sticking the loop ends into the buttercream icing of the same color as the loops?
Thanks for any advice!
Sally
I made this bow with a mixture of fondant and gumpaste and it seems really heavy. Will it sink into the top of the cake once I put it on? The bow is made of only 13 loops and each one is about 1/8in thick.
I’ve never had a bow sink. I sure hope not!
Did you make the small blue bows or order them?
I made them! They’re super easy with a bow cutter like this one: JEM Bow Cutters.
Hi, could I use sugar paste for the bow? Thanks!
I’m not sure exactly what you’re calling sugar paste, so I don’t know. It needs to be a product that will dry hard.
I cannot wait to try this weekend! Thanks!
Thanks for this tutorial Rose. I’ve just made the bow using normal fondant with Tylo powder added. It’s beautiful.
I tried to make this bow this weekend using store bought gumpaste. I made the loops and let them dry overnight. They were completely hard. I started putting it together and the gum paste glob dried too quickly before i could get the loops stuck in, so they started cracking. I ran the gum paste under running water and it was very sticky and then less than 5 mins later it was almost completely dry. Do you have any tips? Thanks!
I would recommend either wetting the ball more or instead using melted candy melts to put it together.
I made the bow. I’m making cake in about 5 days. Is bow alright to sit that long in open air? Will it be ok when transporting in car on top of cake or should I place on top after reach destination?
I always transport my cakes completely assembled so it should be just fine.
Hi thanks for the tutorial. I am going to make a cake covered in smbc or imbc . Can i attach the bow on top the buttercream? Or wil it sink? Thank you
I don’t use meringue buttercreams so I’m not sure how it would hold up under the bow. I have put bows on American Buttercream.
Thank you so much Rose. Your instructions for this were so clear. My one suggestion to others trying this would be to make the loops very soon or almost immediately after cutting the gum paste strips. I lost some of mine because they hardened before I could start looping them. I have only recently started working with fondant and gum paste and I have one quick question (not bow related). When I attached colored fondant cut outs to a cake (I cover my cakes with buttercream, mousse or italian meringue) the colors bled slightly onto the cake. Have you ever encountered this? Any tips?