How to Smooth Frost a Cake and How to Get Sharp Buttercream Edges {Video Tutorial}
Other than How to Charge for Cakes, one of the most frequently asked questions asked is How to Smooth Frost a Cake and How to Get Sharp Buttercream Edges {Video Tutorial}. So to answer that, I’m sharing a detailed (and long) video showing you my exact process for how to get super smooth buttercream frosting with sharp edges!
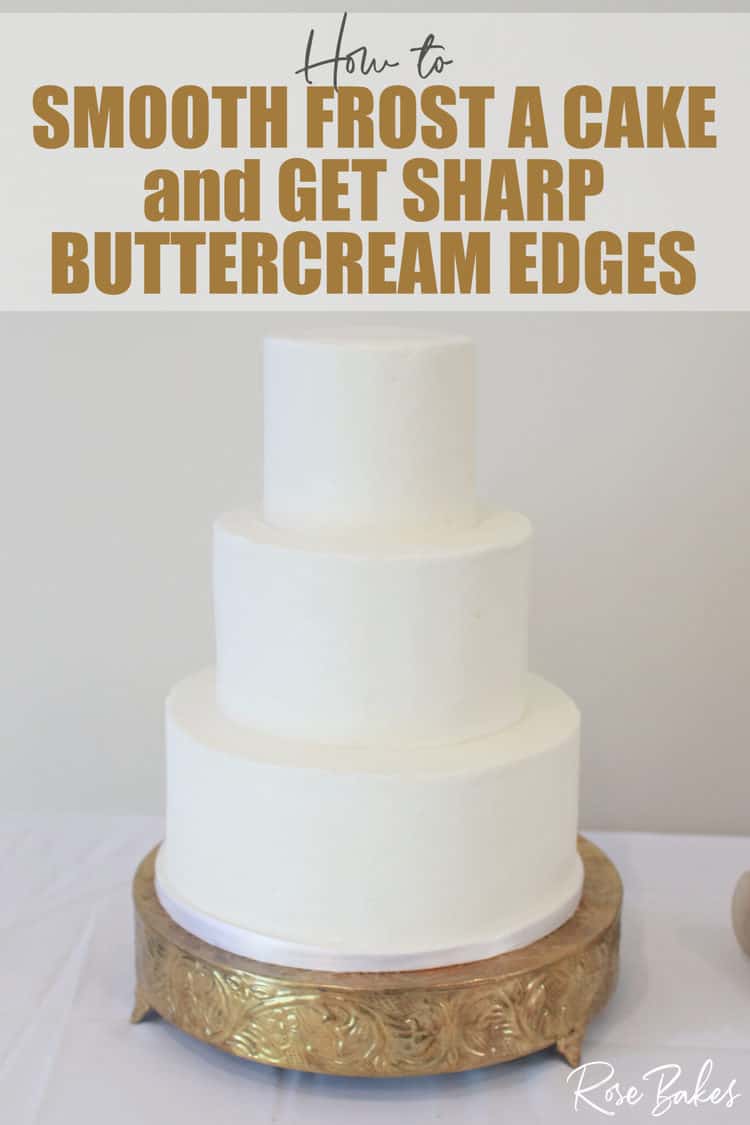
One of the most important skills a cake decorator can master is how to smooth frost a cake and get those clean, sharp edges. And I’m gonna be honest – it can be a challenging skill to master.
It took me years to feel like I had good buttercream skills and even now, I’m not always happy with my finished cakes. But I’m a lot more confident with my work than I used to be so I want to share my process!
How to get Perfect Buttercream… or not.
But first let me tell you what I don’t do. I do not stress over my buttercream being perfect. I don’t know if it’s because I live in a small town where mostly, people are easy-going and laid back. Or if my personality is not driven to perfection. Or if maybe I’m just too practical… in a few hours it’s going to be eaten and gone forever, so why stress over it?
Either way, my process is pretty simple with very cheap tools. Tools that aren’t even all considered “cake” tools. I don’t use acrylic plates. I don’t flip anything upside down. And I don’t use any other fancy tools. Here’s what I use:
Tools for Sharp Edges and Smooth Buttercream
 Buy Now →
  Buy Now →
A couple of years ago I made this Facebook live video (below) of me actually making a cake with smooth buttercream (and stacking the cake and a tour of my cake room, but I left off that last bit for this post) and I thought it might help some of you to see me actually doing the work.
How to Smooth Frost a Cake and How to Get Sharp Buttercream Edges {Video Tutorial}
The video is not polished because I didn’t intend to use it on the blog, but I’m sharing anyway because I think it might help and because I love you, my readers! 😘 So here it is… How to Smooth Frost a Cake and How to Get Sharp Buttercream Edges {Video Tutorial}.
And if the video is not your thing, I’m also sharing some step-by-step photos below!
Tools you’ll need for this method:
Okay… so here’s where we’re gonna start today. You’ll need a cake that is filled and crumb-coated and preferably chilled. You’ll also need the following tools:
- a small angled spatula
- a bench scraper
- Viva papertowels
- a fondant smoother
- a cake turntable (not 100% required but it will make your life so much easier)
- a small level
Now… for the step-by-step pics and tutorial. But first – a few notes. These pictures were not taken at the same time as the video NOR were they all taken of the same cake. I’m sort of piecing together some photos from different cakes to give you the full picture Okay? Okay.
How to Smooth Frost a Cake and How to get Sharp Buttercream Edges
Before I get too far into this, let me emphasize one important thing. During this process, you will need to clean your bench scraper and/or small spatula over and over again. Every time you scrape and acquire buttercream, clean your tool. This will make it much easier to get a smooth finish with sharp edges in a short amount of time.
I usually keep a damp washcloth nearby or I use paper towels. Either way works perfectly!
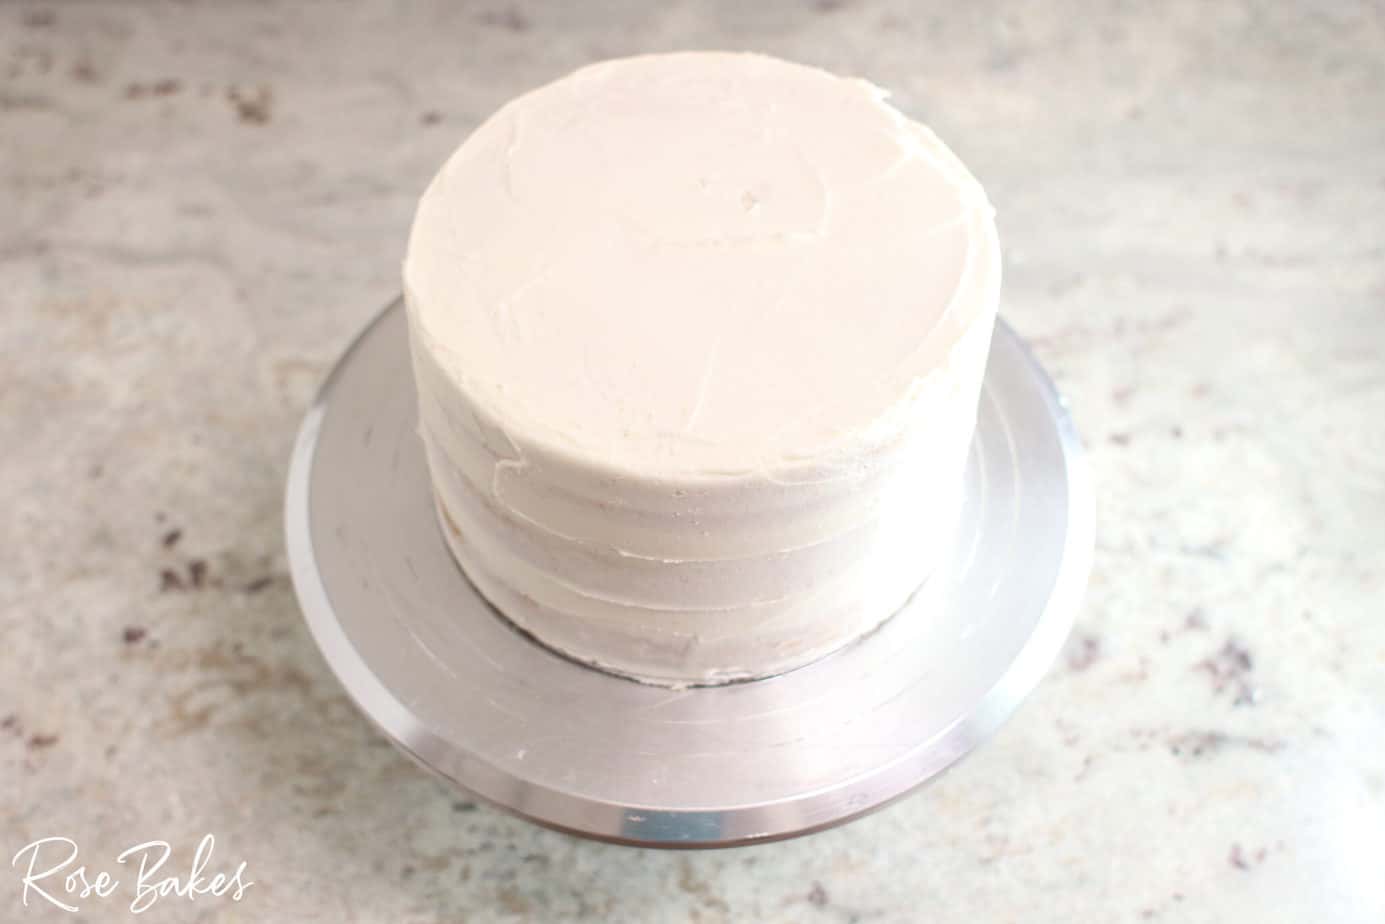
1. Start with a crumb-coated cake. This one is 3 layers and it’s an 8-inch round cake. It’s been filled and crumb-coated with vanilla buttercream, and it’s sitting on an 8-inch round cake board, then on a turntable.
My favorite cake recipes:
- White Almond Sour Cream Cake (aka Wedding Cake)
- The BEST Vanilla Cake Recipe (from scratch!)
- One Bowl Chocolate Cake (from scratch)

2. Place approximately 1 cup of buttercream on top of the cake. This amount may vary for smaller or larger cakes but you will be scraping away extra or you can add more if needed.

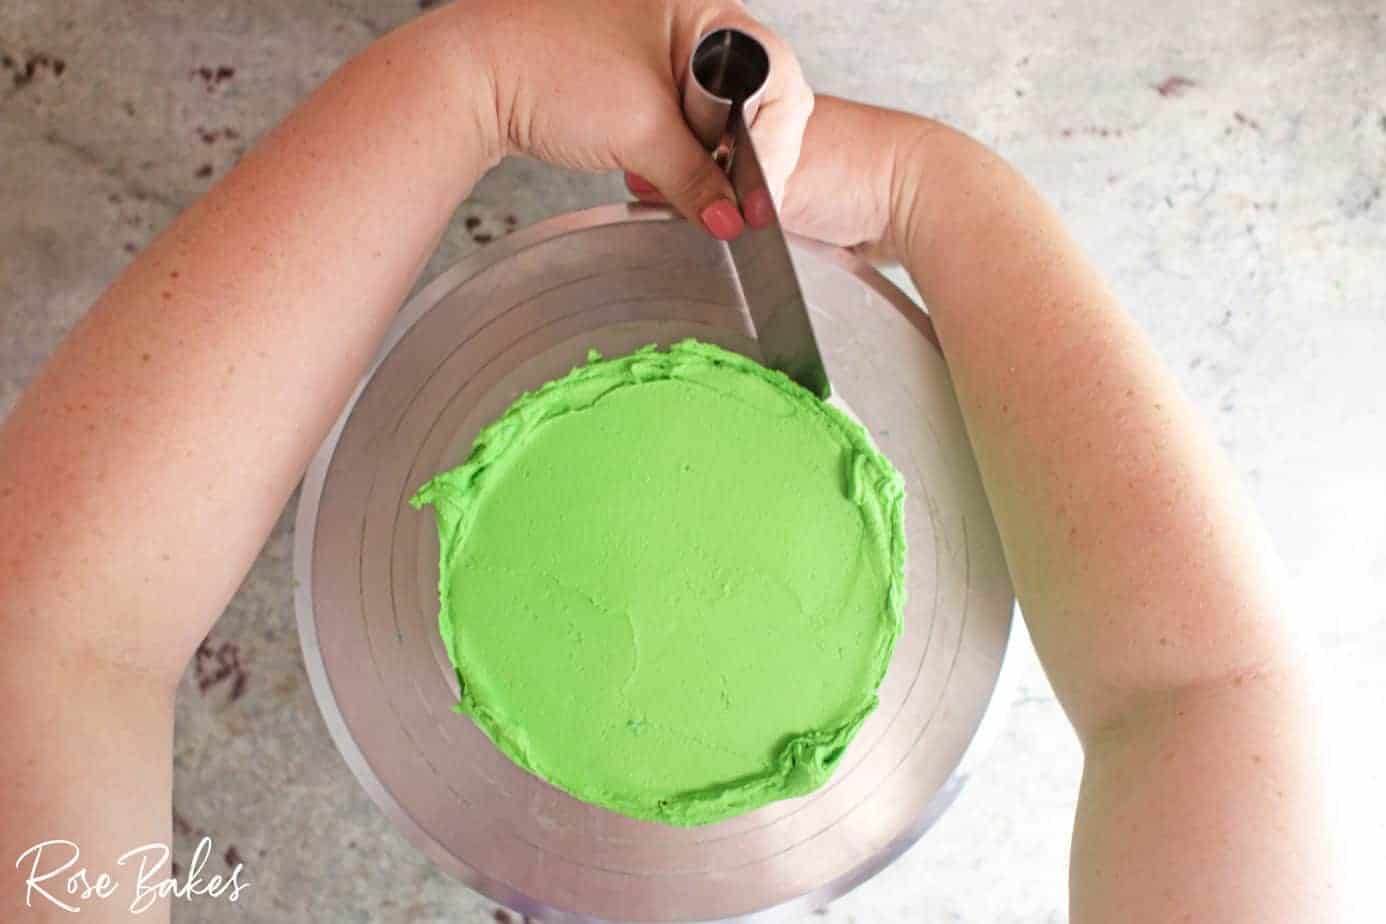
3. Using your small offset spatula, spread the frosting toward the edges of the cake. Rotate the cake as needed until the top is evenly coated and you have a layer of frosting around 1/4-inch thick.

If you don’t have enough frosting, add more. But if you have more than you need, it’s perfectly fine if frosting hangs over the edges as you can see above.

4. Next, begin to add frosting to the sides of the cake in small sections. Smooth it out as you go and rotate the cake until the crumb coat is completely covered.
The frosting does not need to be smooth at this point. You just need a good thick covering of frosting in preparation for the next step.
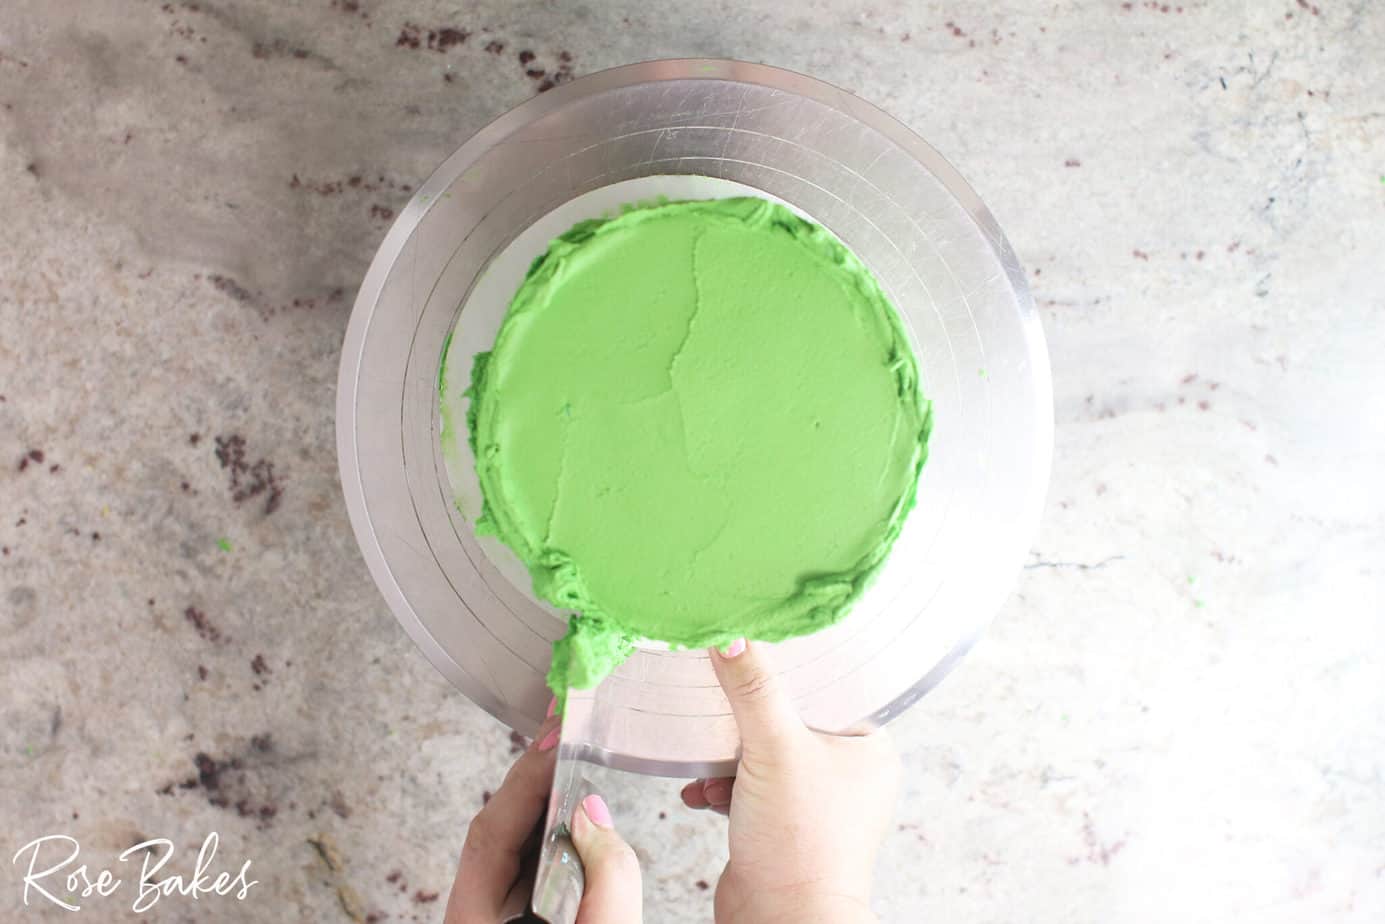
Now is where my secret weapons (aka cheap and not even all “cake” tools) come into play! And for just a minute, I switch to a green cake 💚.
How do I get the sides of my cake smooth?
Using a good quality turntable plus a bench scraper, you can quickly and easily get a super smooth and nearly flawless finish on the sides of your buttercream cake. Here’s how:

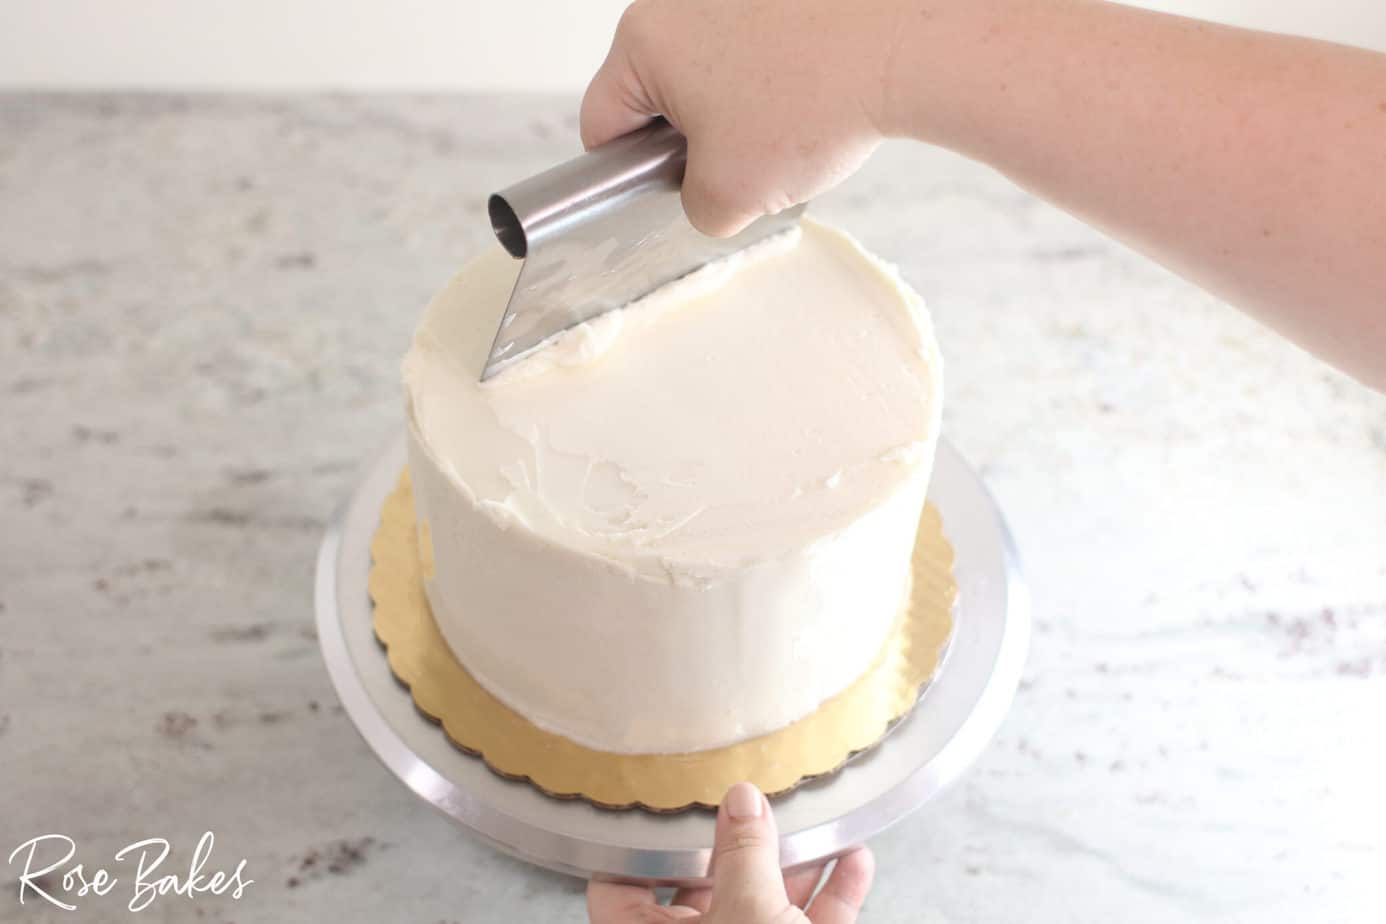
5. With the cake centered on the turntable and the bench scraper in your non-dominant hand, reach around to the backside of the cake with both hands. Place the bench scraper on the cake with the edge slightly pressed into the frosting and grab the edge of the turntable with your other hand. Make sure the bench scraper is straight up-and-down at a 90°angle to the cake.
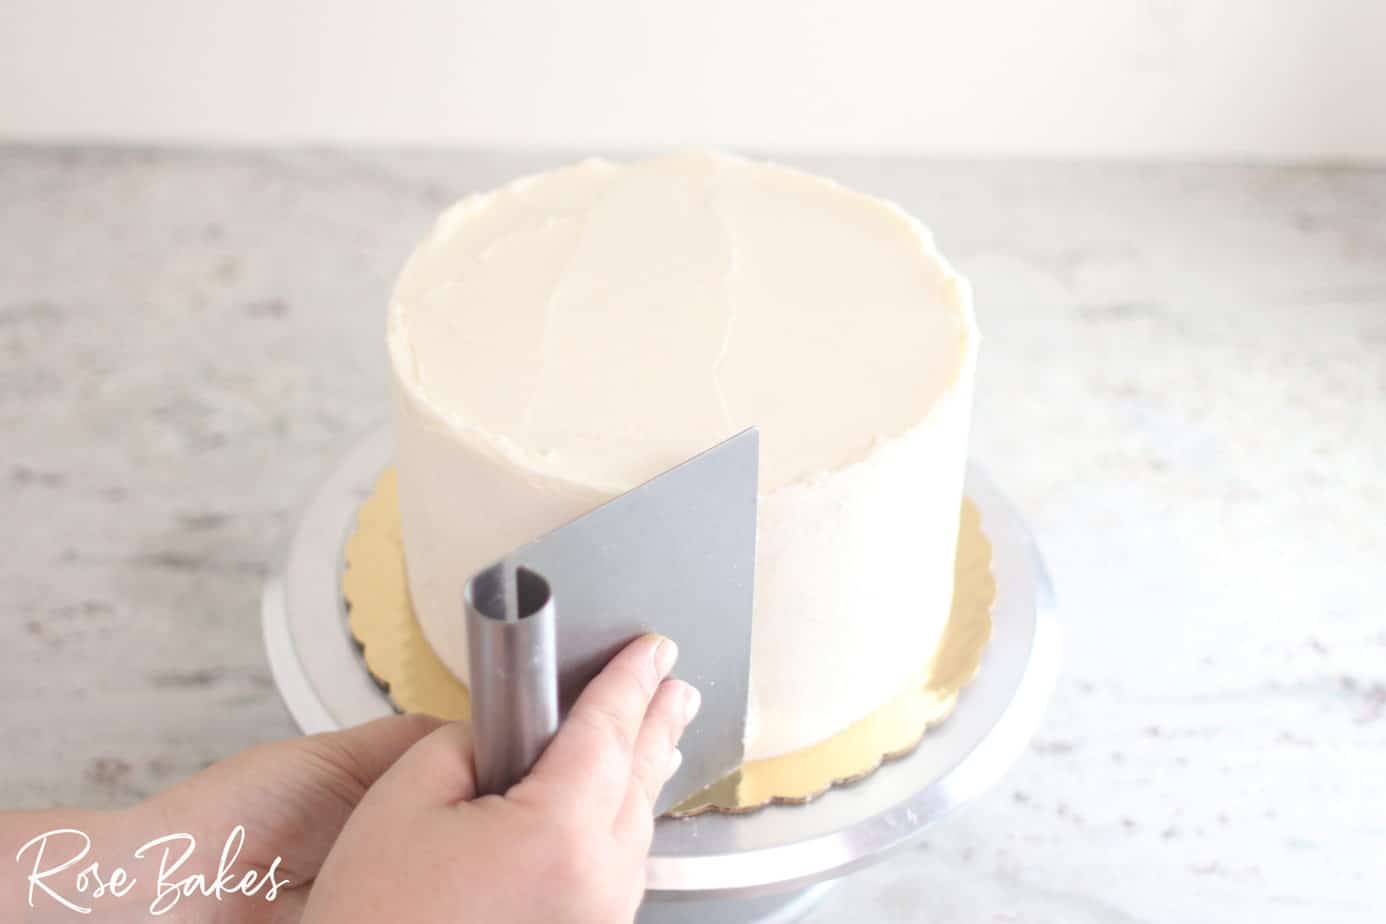
6. Now here’s the good stuff. Begin rotating the turntable clockwise, while pulling the bench scraper toward you in the counterclockwise direction. Continue to turn for a full rotation until your hands meet on the front side of the cake.
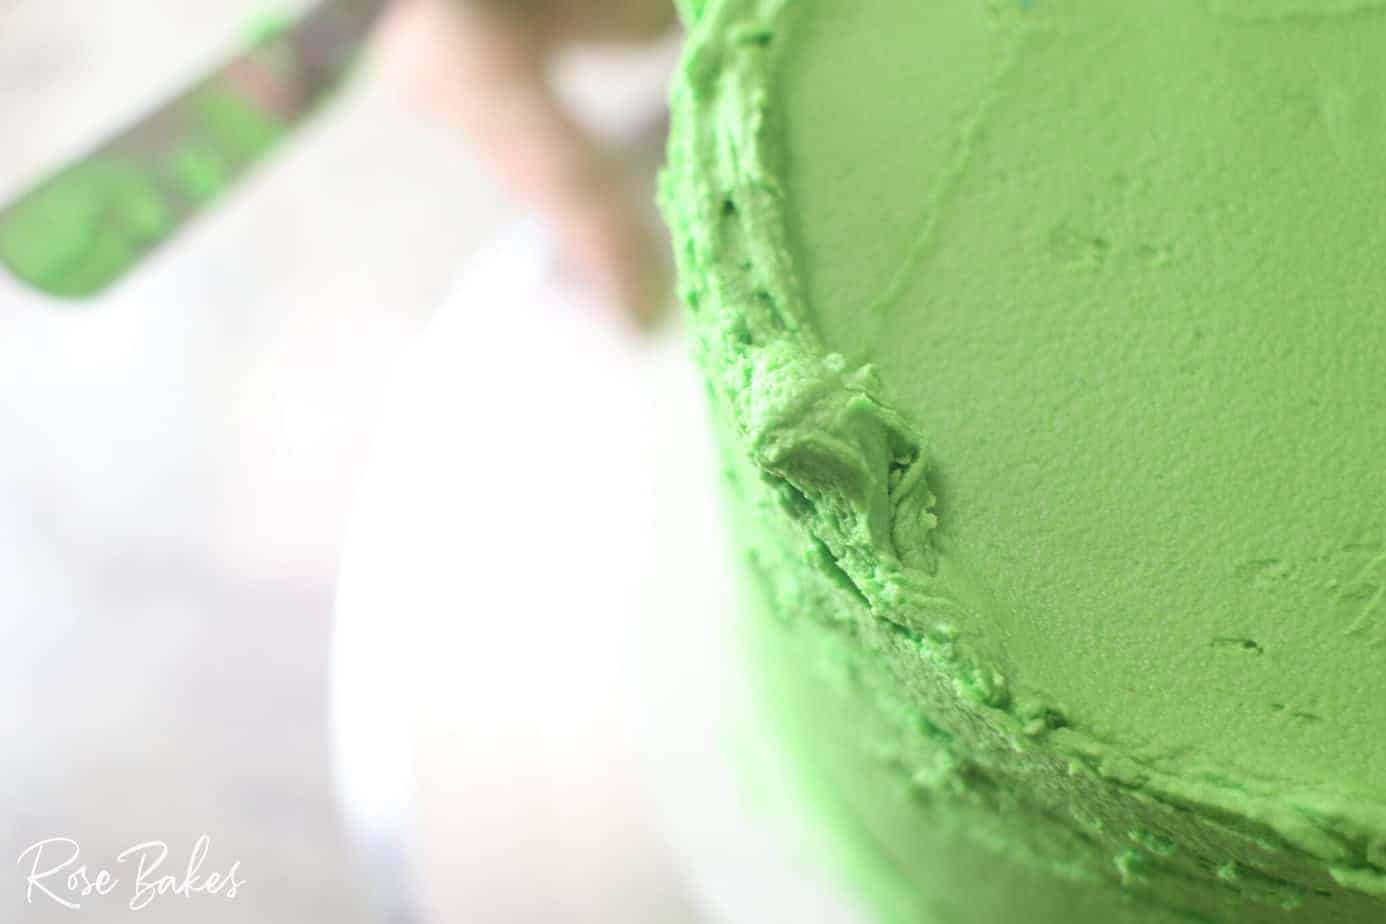
This may sound complicated or be confusing but if you practice (even with a dummy cake), I think you’ll be able to figure out this method. When you’re done, you will have an almost perfectly smooth frosted cake, at least on the sides. Here are a couple of shots from above that might help as well:
I say almost because I have one more tool in my pocket to get an even smoother, perfect finish! Keep reading!
Some problems you might encounter:
- If your frosting was not evenly applied before you started smoothing, you may find pockets or gaps in the smooth frosting. To fix this, you’ll need to add more buttercream to fill in those gaps, then repeat the turntable method to get it smooth.
- If your buttercream has any air pockets or chunks of sugar, you may find drag marks around the side of the cake. Again, you’ll need to add more buttercream to fill in those gaps or pick out the chunks of butter or sugar, then repeat the turntable method to get it smooth.
- Is the cake shining through? This means you didn’t apply enough buttercream to begin with OR you scraped off too much with the bench scraper. Either way, you’ll need to apply another generous layer of buttercream, then start again.
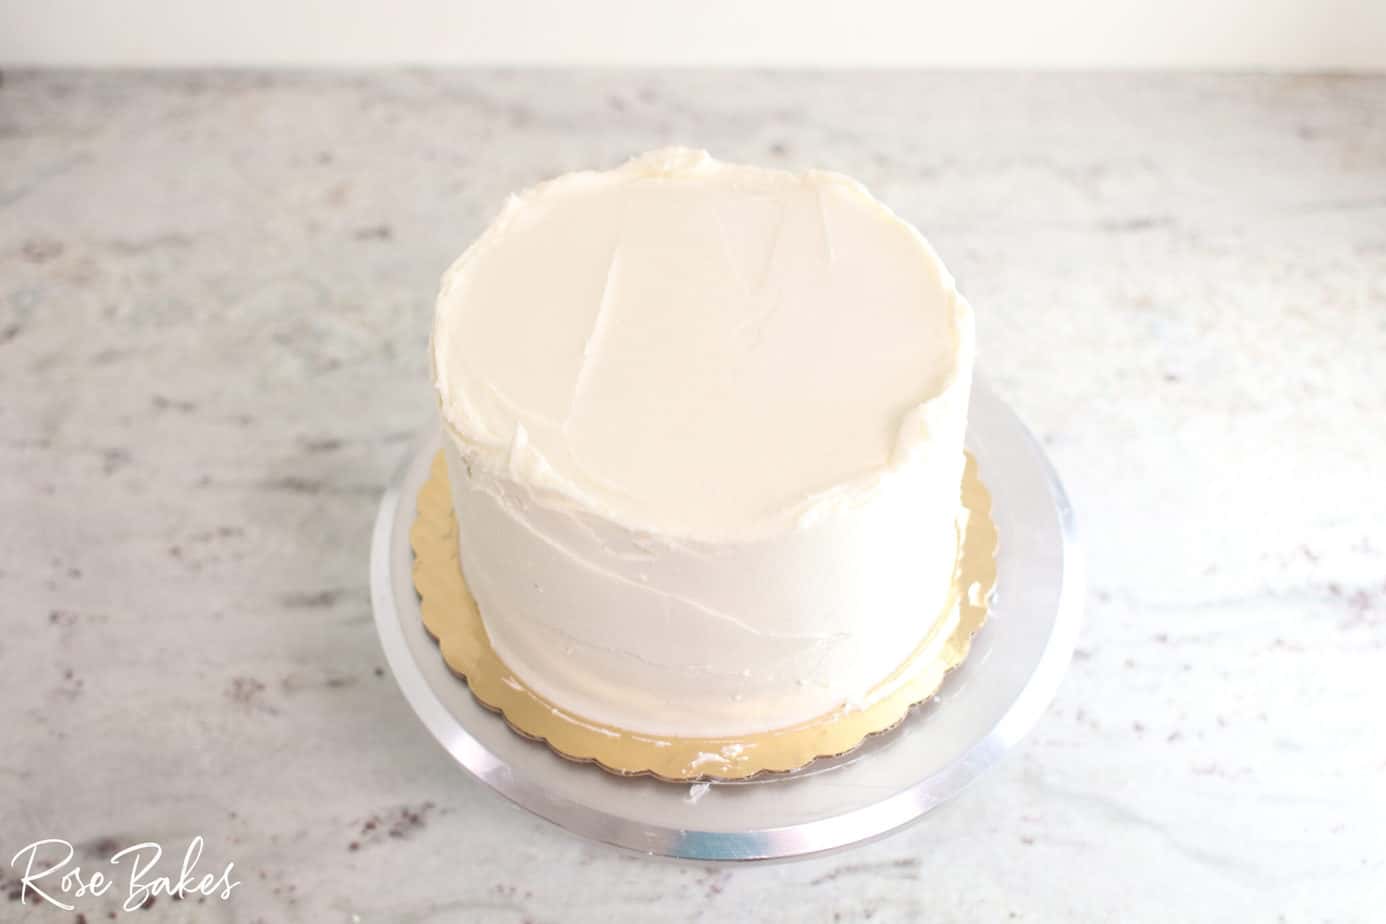
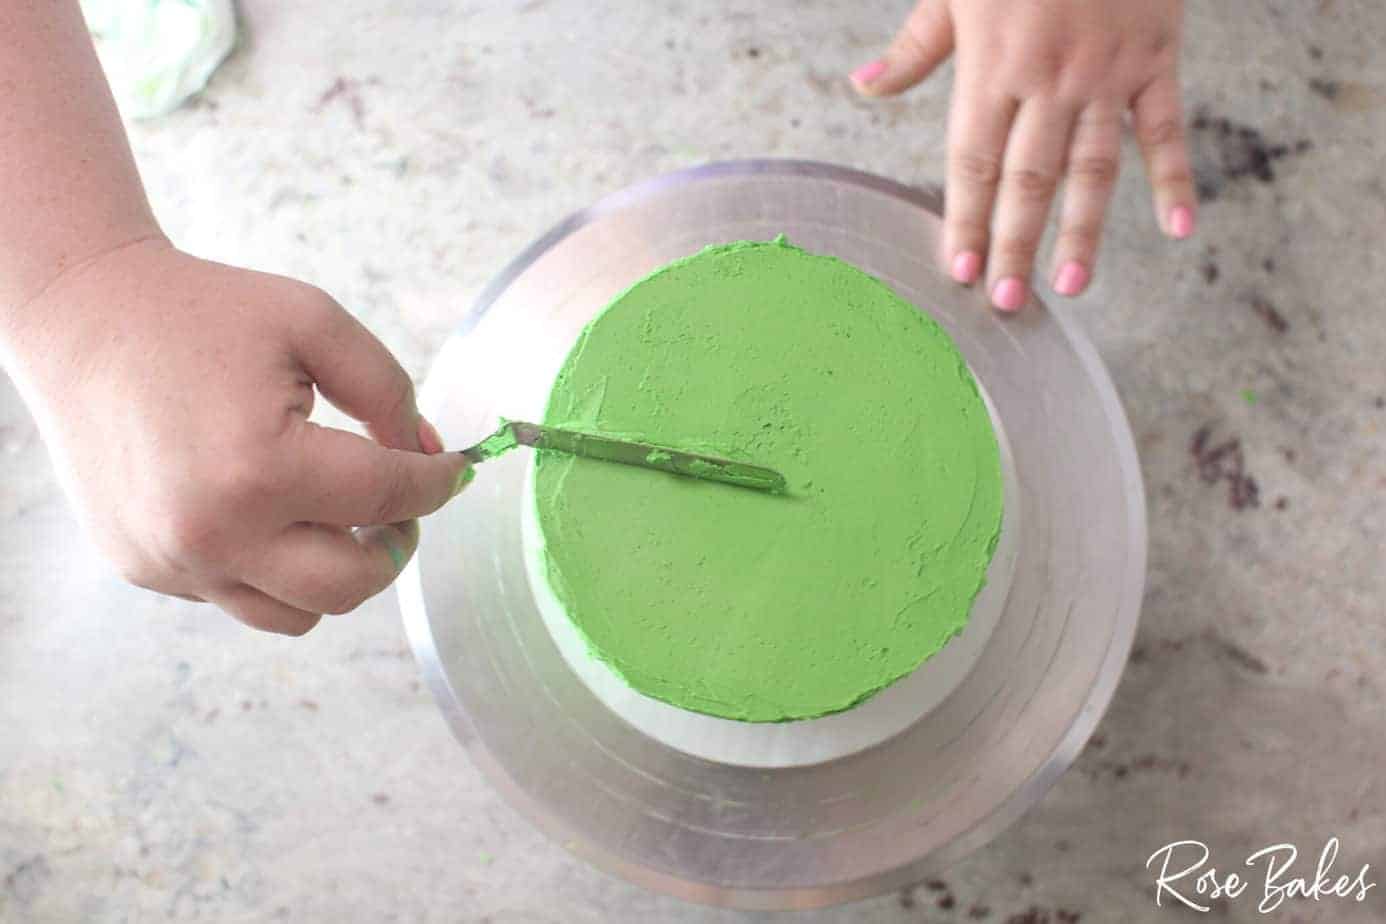
Now that you have the sides mostly smooth, it’s time to smooth the top. You will most likely have a lip of frosting standing up on the top edge of the cake and now we’re going to fix this.
Most of the time I use a small offset spatula for this step. But I have also used the bench scraper.
7. Using a small offset spatula, hold the small offset spatula on the outside top edge of the cake and begin dragging the “lip” of frosting toward the center of the cake. Smooth as you go and clean the spatula between each swipe of the spatula.
This process will create a sharp edge and remove any excess frosting. Repeat these steps as you rotate the cake until the entire top edge is sharp.
If you feel like the edges still aren’t as sharp as you’d like, you can heat up some water and use a “hot spatula” method to get it even smoother and sharper. To do this, dip your clean spatula steaming or boiling water, then quickly dry it and scrape from the edge as described above. Repeat all the way around until your top surface and edges are clean and smooth.
If you prefer, you can also use your bench scraper for this method. I like the smaller blade of an off-set spatula but you should try both and see what works for you!
Smoothing Cake with a Viva Paper Towel
You can stop after the step above and you will have a really great smooth finish. But the final step in smoothing a cake for me to get a flawless finish involves using a Viva Paper Towel. Note: you can only do this final step if you’re using a crusting buttercream.
Viva is the only brand I’m aware of that is completely texture-free and that is what you need. Please do not use any other patterned paper towels! In my opinion, seeing a paper towel pattern in frosting immediately makes it look cheap and amateur!
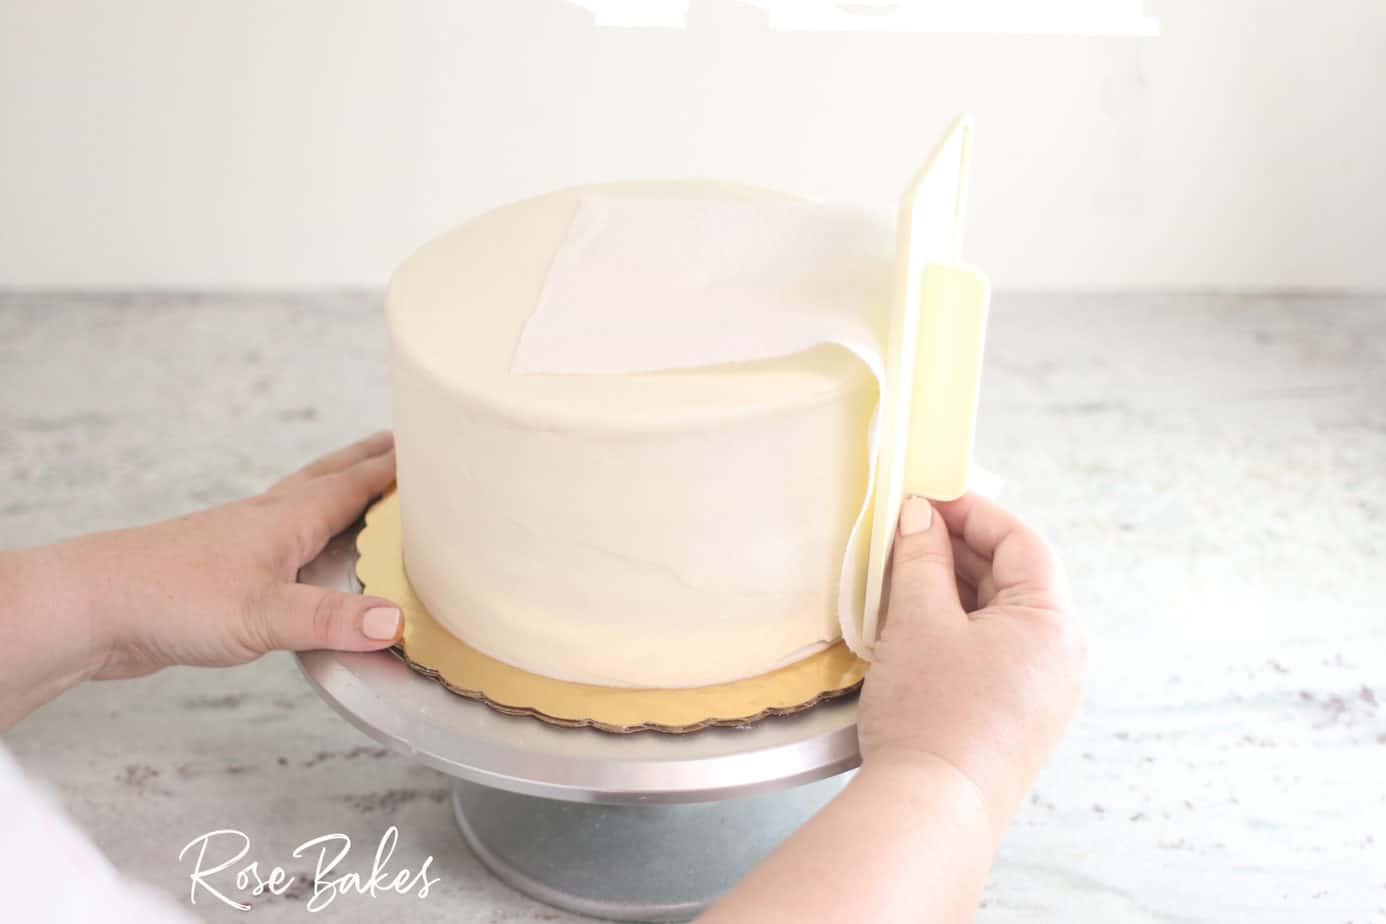
8. Start by allowing the frosting on your cake to “crust” at room temperature for at least 15 minutes. Then you’re going to lay the smooth side of a Viva paper towel against the side of the cake. Then using a fondant smoother, gently press and apply pressure as you move the fondant smoother over the paper towel, smoothing the frosting underneath.

Rotate the turntable and continue smoothing around the cake until you’ve smoothed all sides. Repeat this process on the top of the cake and you’re done!
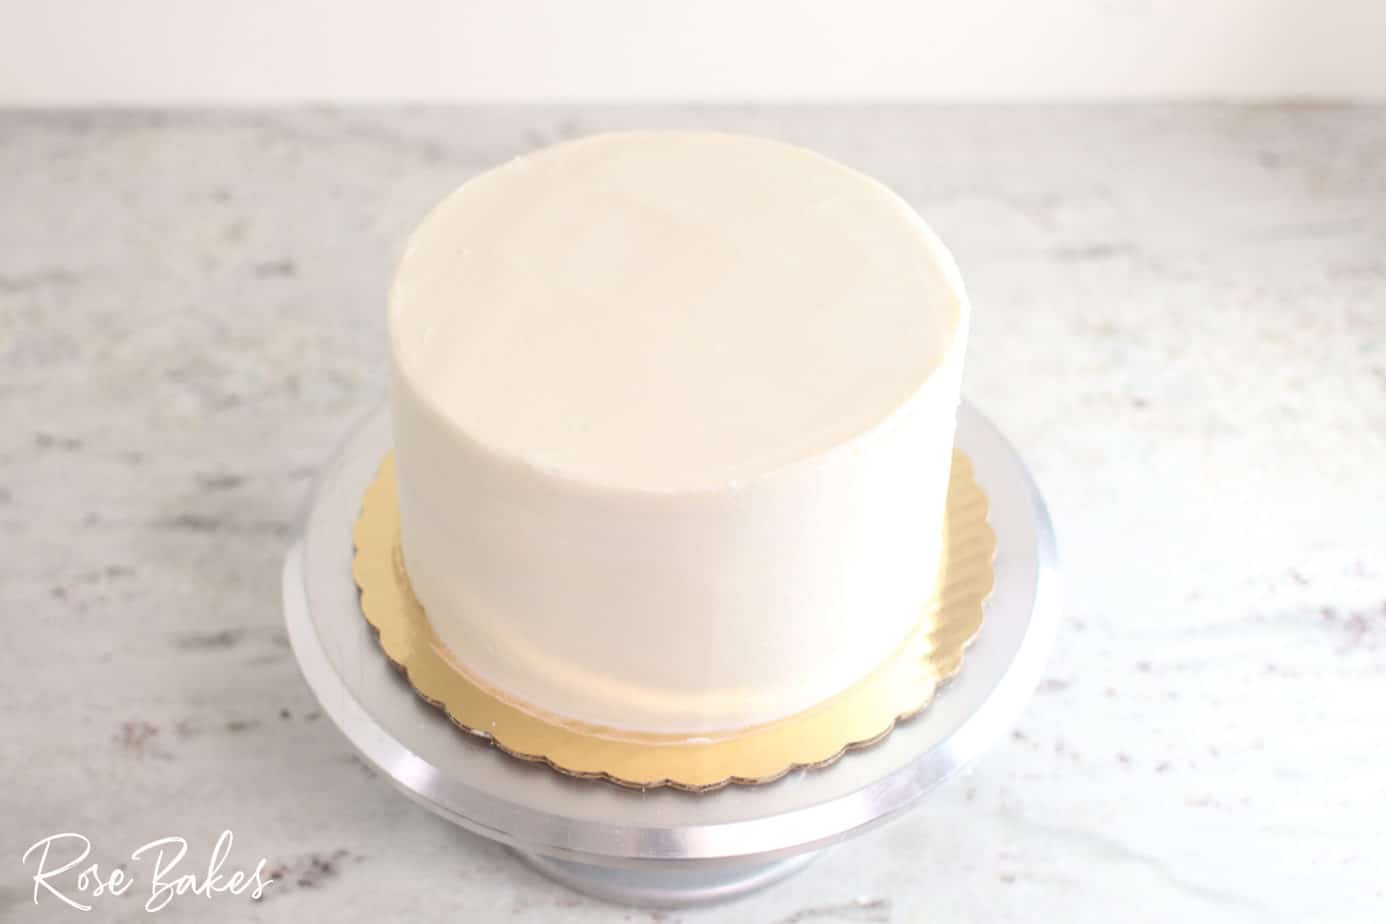
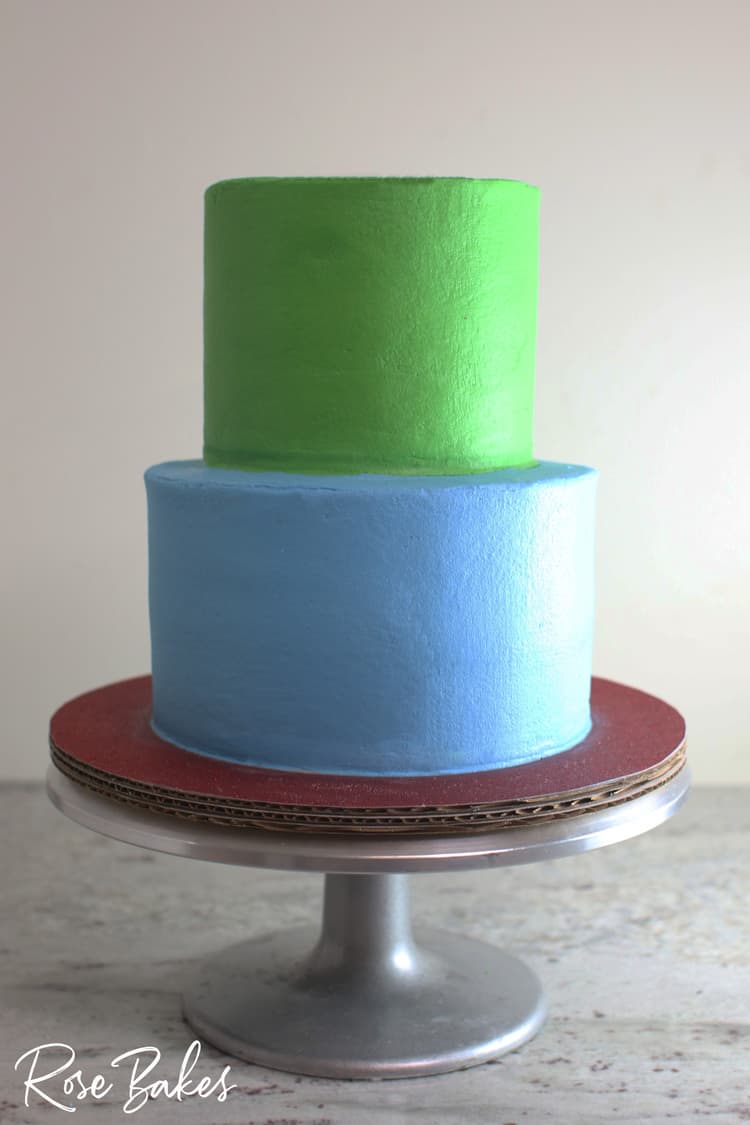
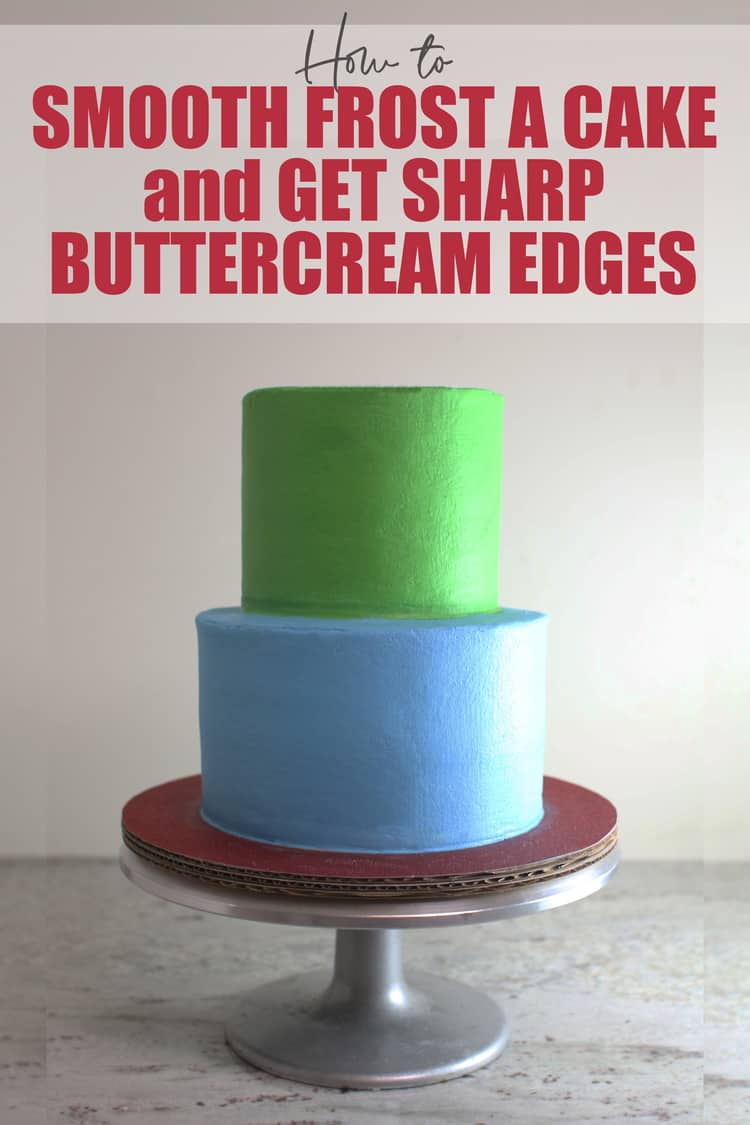
It might be difficult to see how smooth the cake is on the white finish above, but here’s a blue and green cake below that I smoothed using these same methods:
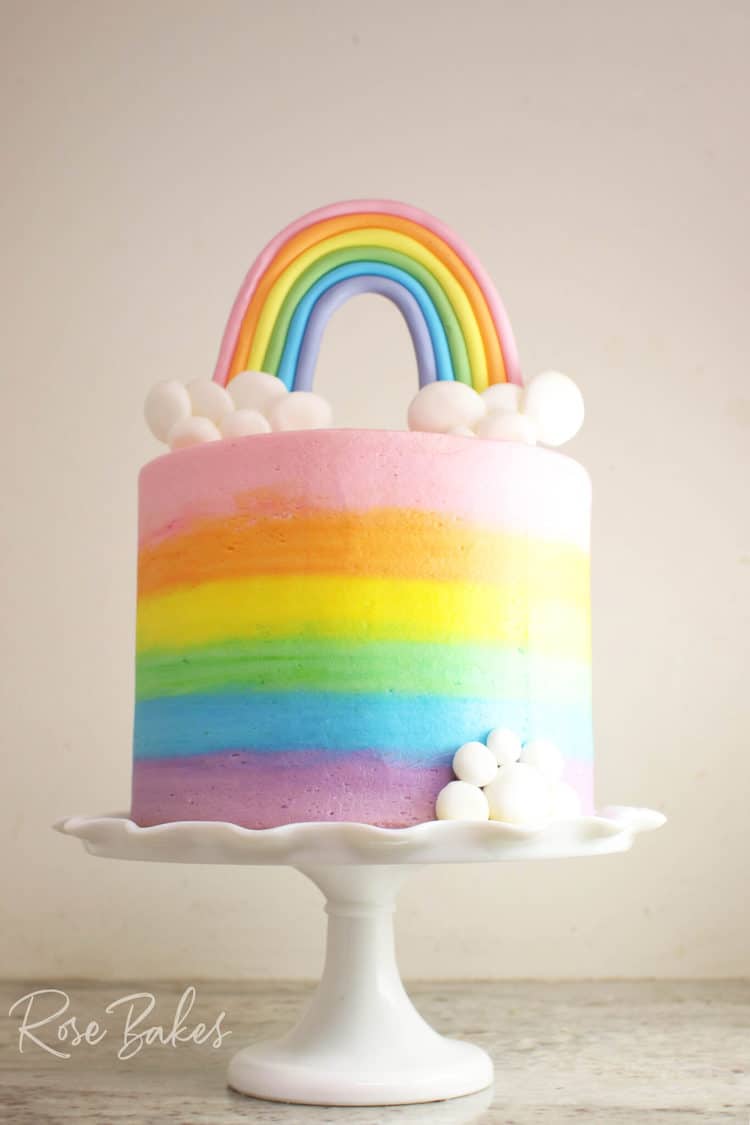
And even better… a beautiful rainbow cake! This one makes my heart SO happy!! (the obvious difference with this one is I piped multiple colors around the cake before smoothing, but I still used a bench scraper & Viva paper towel!)
That’s it! At this point, I usually chill the cakes for a couple of hours or overnight before decorating. I really love to work on cold, cold cakes so that I can minimize damage to the buttercream while working.
Love Cake Tutorials? Check out these other popular posts or order a copy of my book!:
- How to Make Lines Texture on Buttercream Cakes
- Messy Ruffles Cake Decorating Video Tutorial
- How to Make Homemade Vanilla Extract
- How to Make a Drip Cake with Canned Frosting
- Can You Freeze a Fondant Decorated Cake?
Do you have any questions or comments about this method for how to smooth frost a cake and how to get sharp buttercream edges? Leave me a comment or question!


Thank you Rose! This is so clear and helpful. Your blog is such a treat to read, it is a blessing to me.
Thank you Rose for such detailed instructions. It’s obvious you love your readers and want them to succeed in their cake decorating as well! You are such a blessing. I enjoy reading your emails!
You’re very welcome! Thank you for your kind words ❤️️
This video is great!!! Thank you so much!
Thanks SO much!
Hi Rose. Great tutorial and really easy to understand and follow. I’d like to watch the video too but there doesn’t seem to be any link!
It should auto-load within the blog post. If it doesn’t, it might be because you have an ad-blocker enabled.
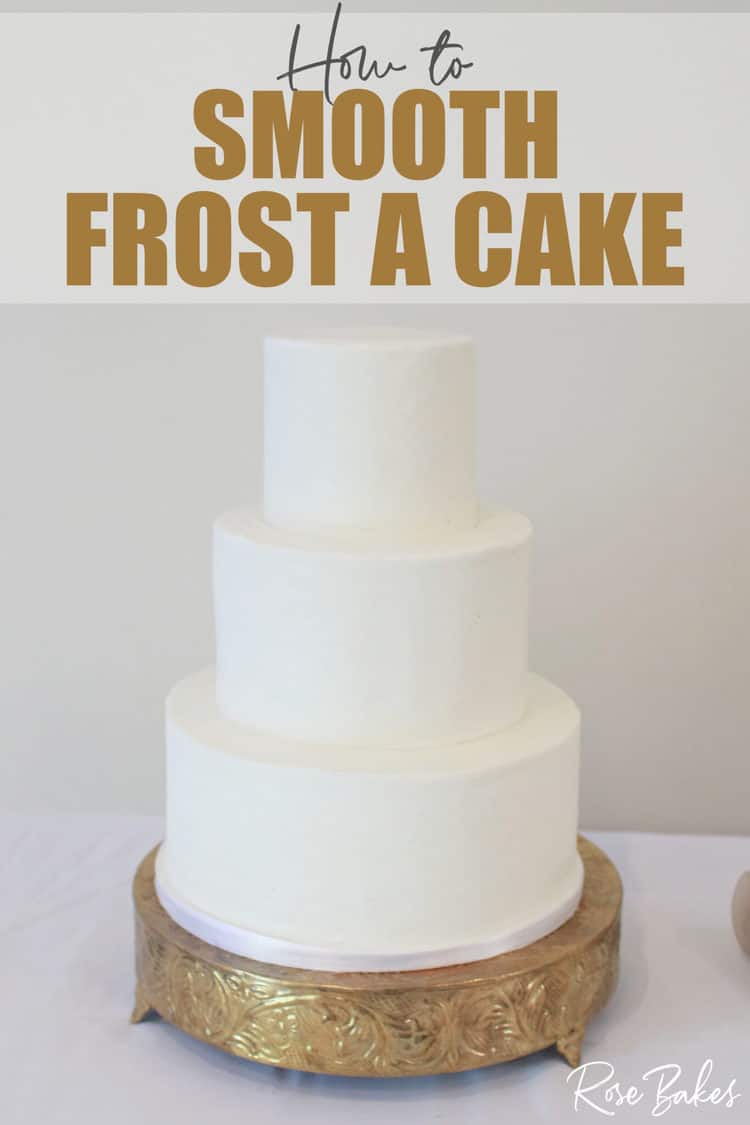
Great video! Easy to understand. What size cakes did you use for the white buttercream cakes and what recipe do you use for your buttercream? Thank you!
Hi Mary! The tiered white cakes are 10″, 8″, 6″ rounds. This is the crusting buttercream recipe: https://rosebakes.com/crusting-buttercream-frosting-for-decorating/
Thank you! Can I use a 9” and a 6”?
What do you mean? You can do a tiered cake that’s 9-inch bottom and 6-inch top tier.
Rose, thank you so much for the tutorial! I am a total rookie/ amateur learning and you are so good at teaching and explaining. Can’t wait to try your method. Looking forward to viewing your other videos.
Hi Rose! This is great thank you so much. One big problem I have is that I have a horrible time stacking the cakes and making that edge where they meet look great. Like on your blue and green cake. how do you make the seam where they come together look so good?
Thanks so much! You do great work!!
I pipe a small line of frosting in there if there’s a gap, then use a small flexible smoother to make it disappear. The kind I use is here -> https://amzn.to/3N6xHMI .
Hi! I am having a hard time with my buttercream. Sometimes it crusts before I can get the cake frosted and smoothed. Then, it ends up all messed up. My other problem is after mixing all the ingredients together and adding color the frosting looks grainy. The color is not right.