Santa Charcuterie Board (Perfect Christmas Charcuterie)
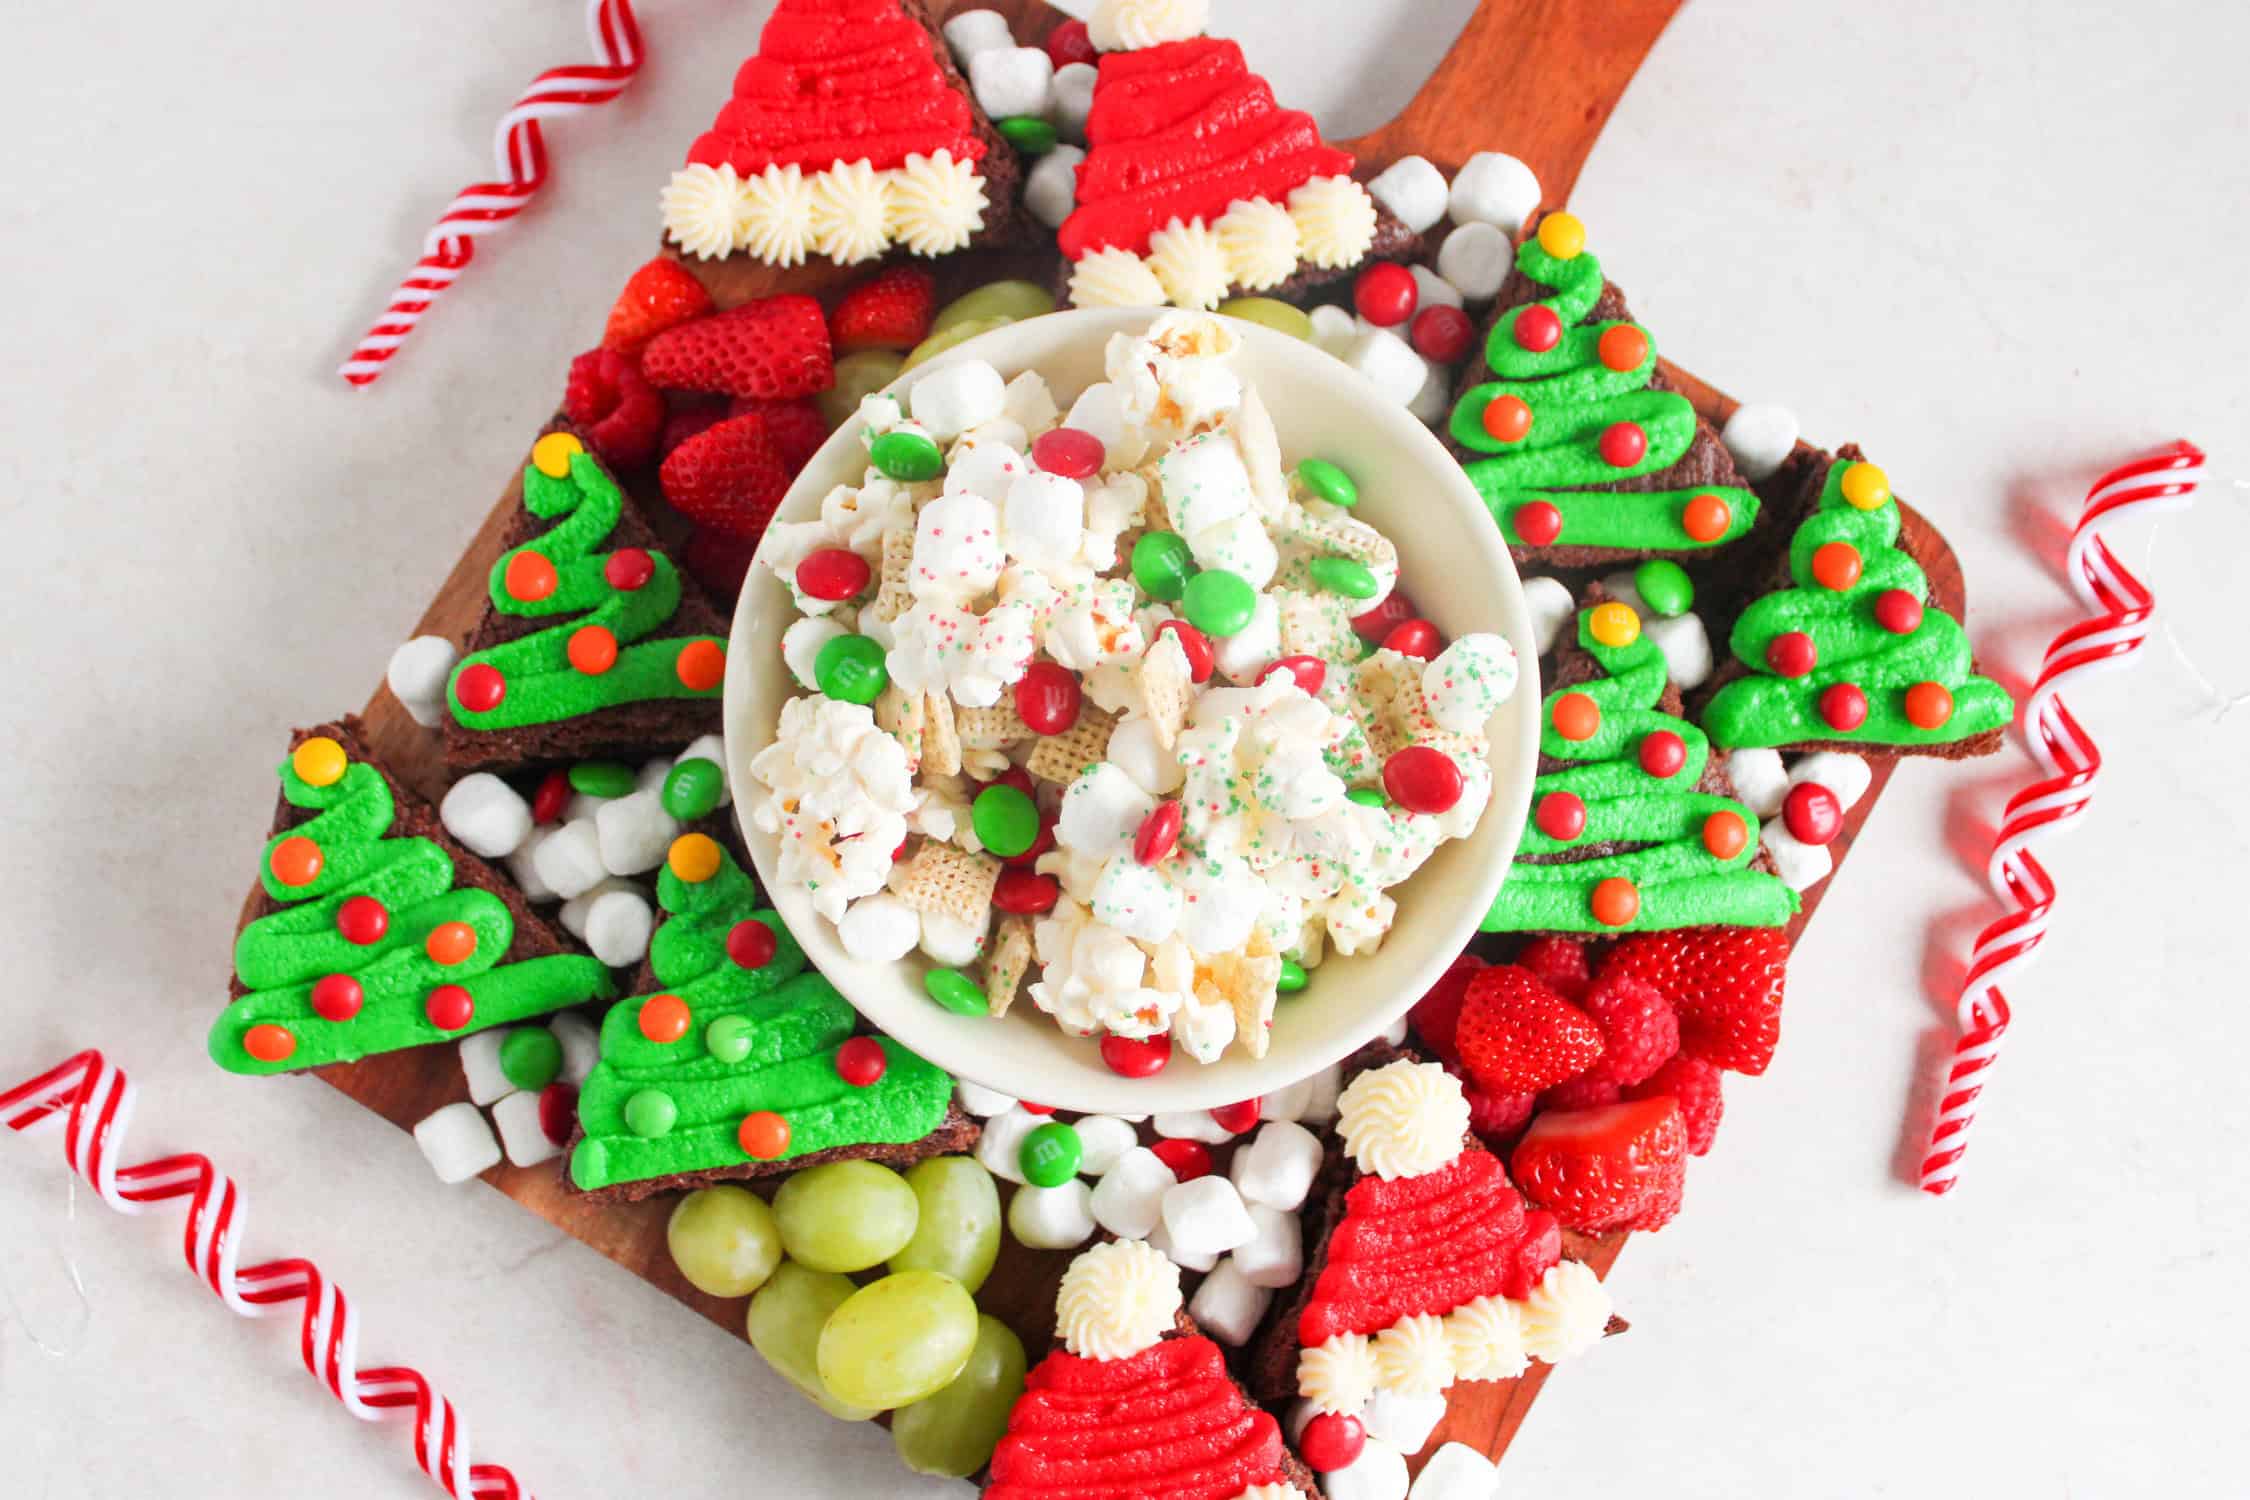
This Santa Charcuterie board is perfect for Christmas! This cute board brings me so much joy! What’s not to love? It’s yummy brownies, Christmas popcorn and lots of fresh fruit – it’s so festive and fun!. If you’re looking for a new centerpiece idea for your holiday parties, this sweet Santa Charcuterie Board is perfect.

Santa Charcuterie Board
This festive dessert board combines the fun of Santa with the yummy-factor of a Christmas dessert board. It will be a huge hit at any Christmas party or holiday party.
The beauty of this Santa Claus charcuterie board is you’re not tied specifically to the ingredients I use. There are so many ways you can change it up to fit your family’s favorite snack foods while still looking like it’s Santa-inspired.
And this board is great for lots of holiday gatherings – it’s so much fun for kids, but also very appealing to adults at an office party or other events during the holiday season.
Tools Needed
- Baking Sheet
- Parchment Paper
- Microwave-safe Bowl
- Platter or Cutting Board
- Mixing Bowls
- Hand Mixer
- Measuring Cups and Spoons
- Sharp Knife
- Piping Bags
Ingredients
This Santa Hat Dessert Board is really easy to put together and all of the ingredients are very common.
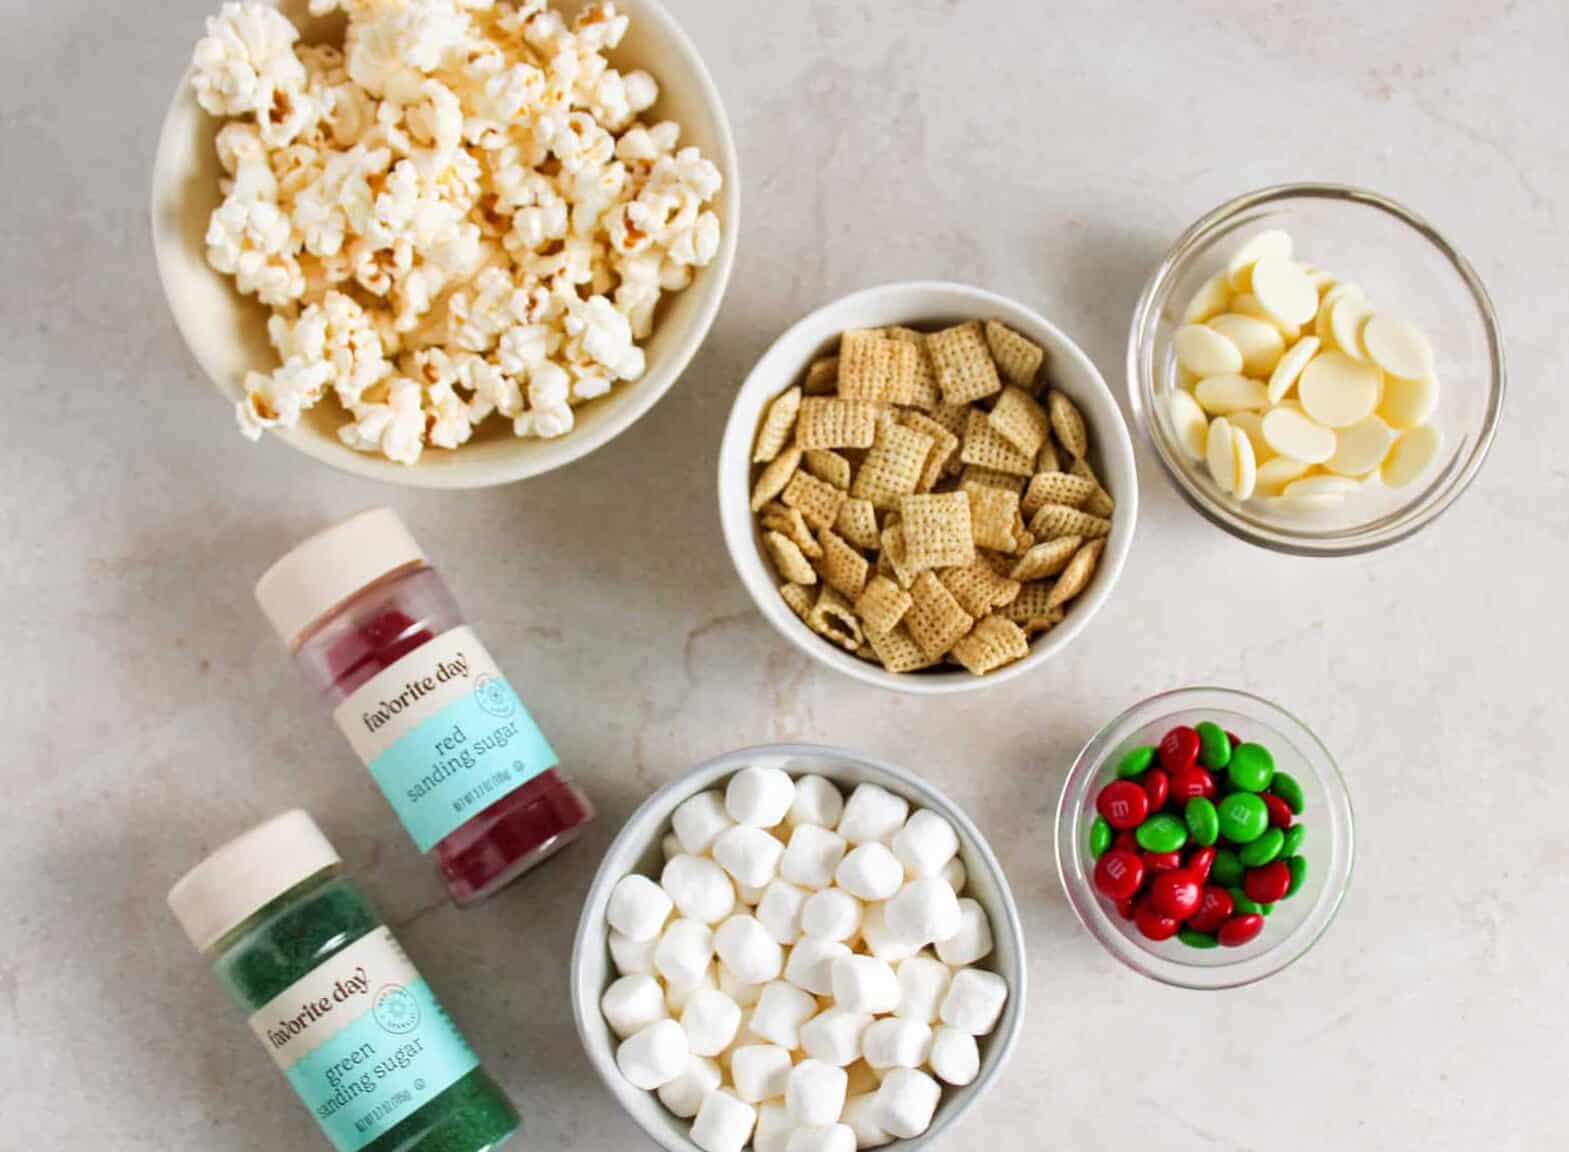
Christmas Popcorn
- Popped popcorn
- Chex cereal
- Mini marshmallows
- White melting wafers or white almond bark
- Red and green M&Ms
- ‘Red and green sanding sugar or sprinkles
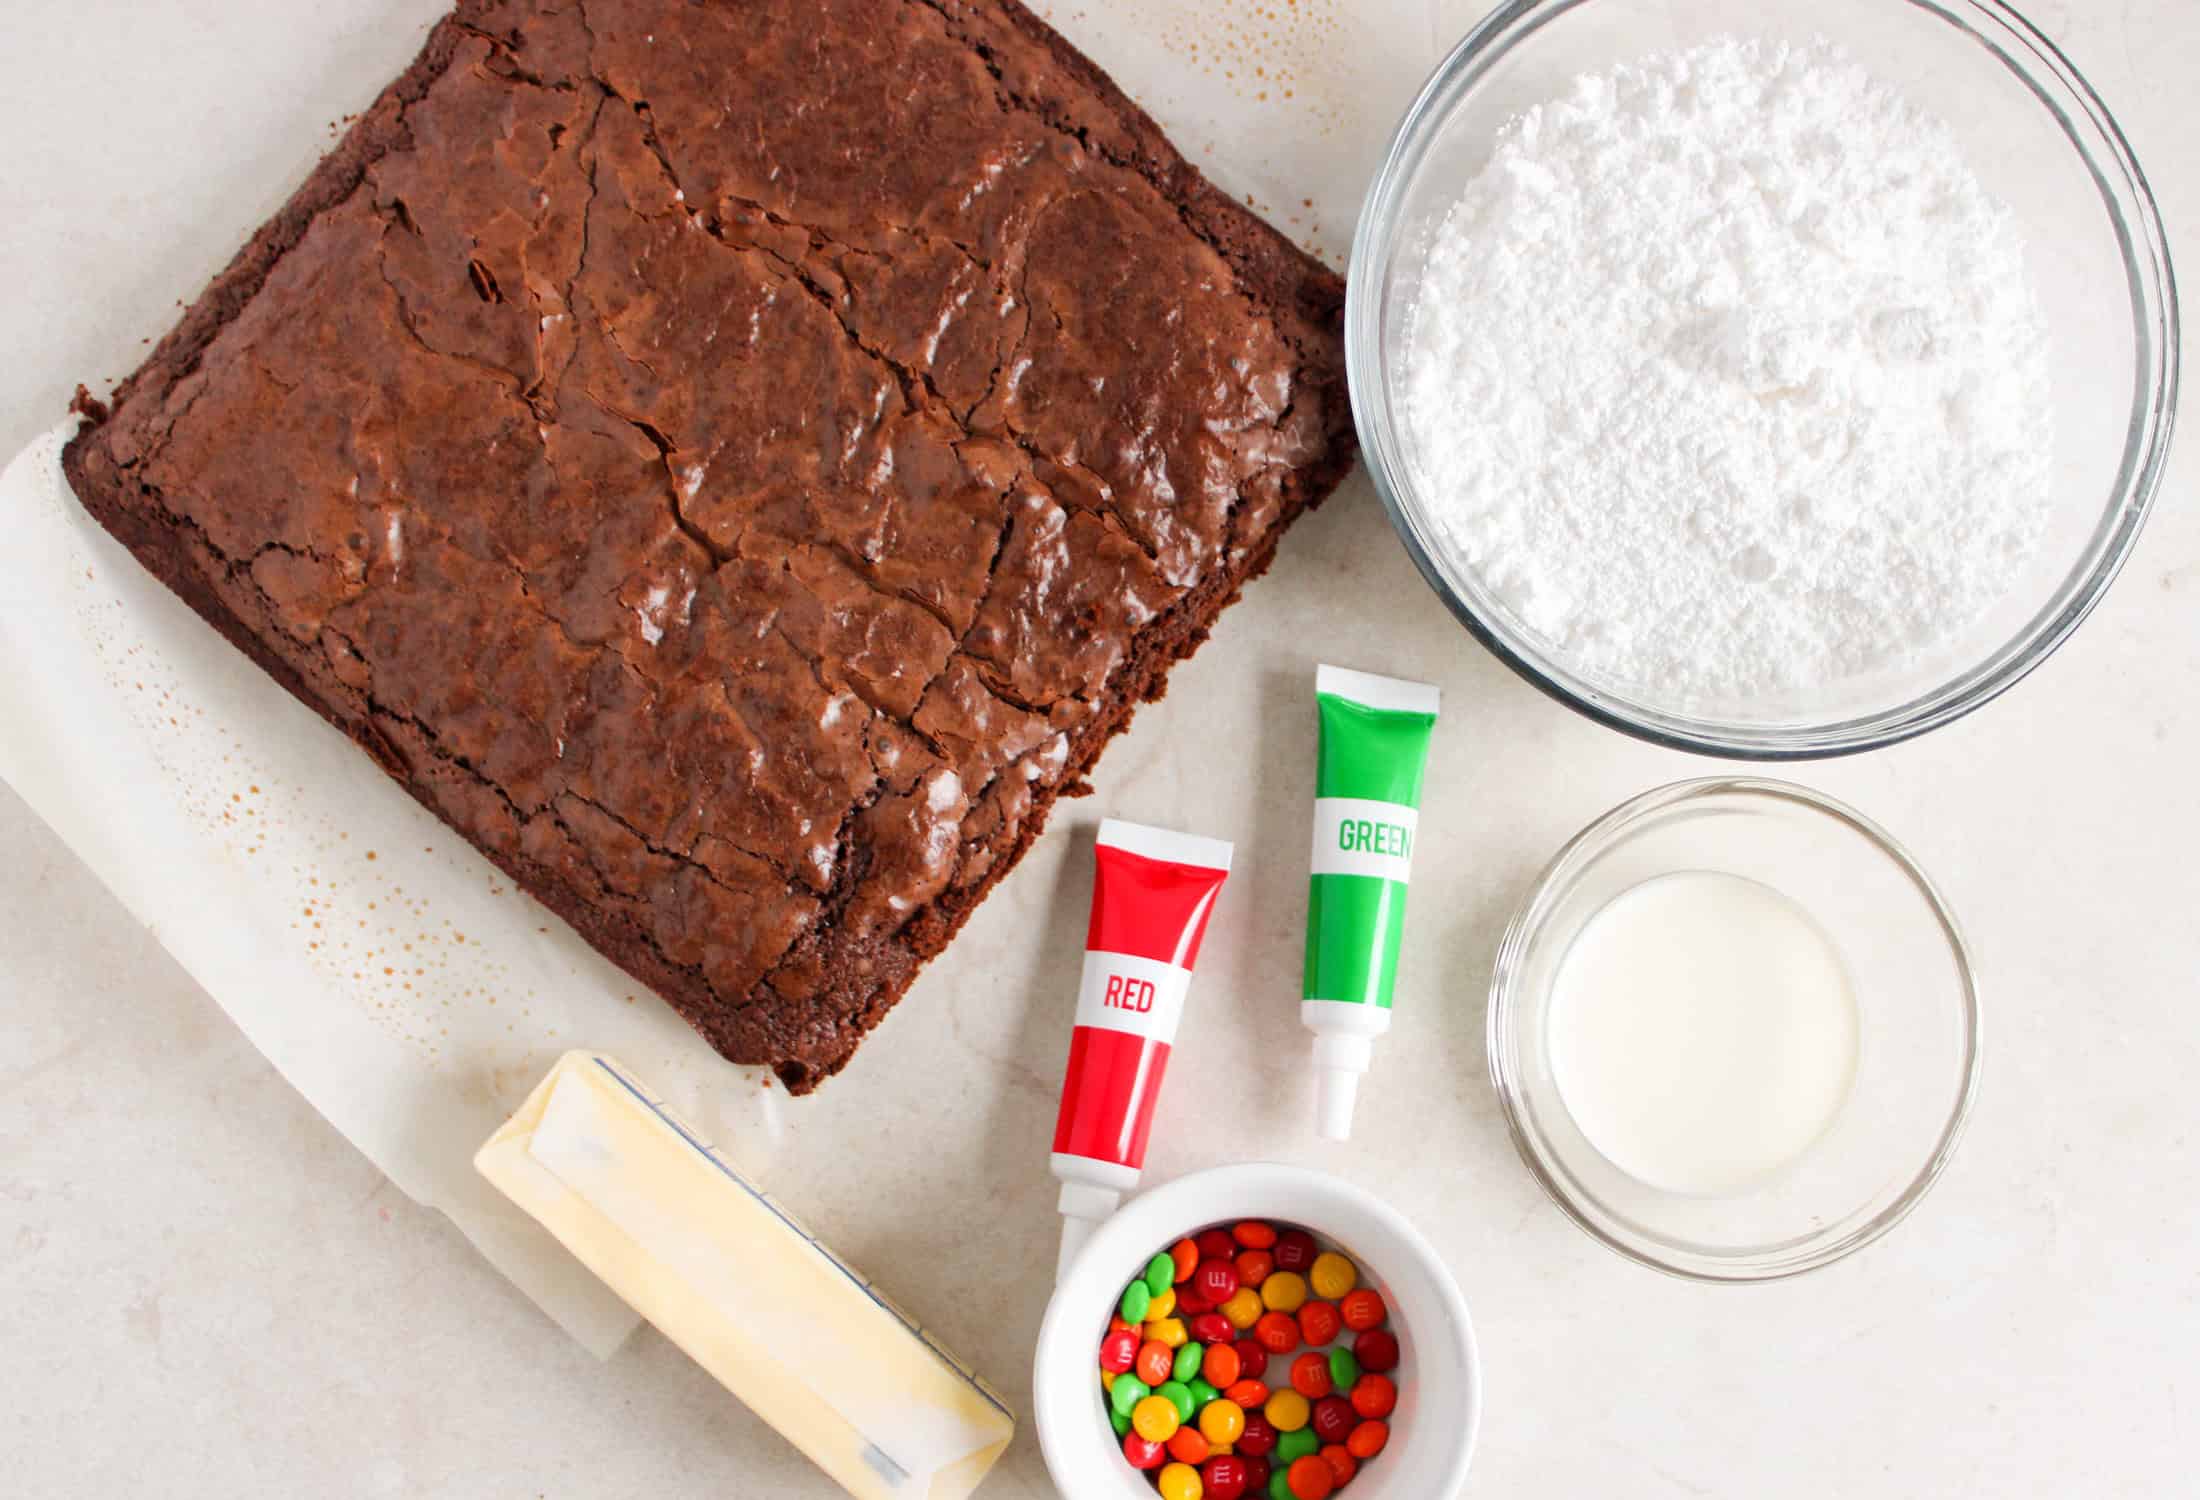
Brownie Christmas Trees and Santa Hats
- Premade pan of brownies, cooled
- Unsalted Butter, room temperature
- Powdered sugar
- Heavy cream
- Red food coloring
- Green food coloring
- Mini M&Ms
- Piping bags and tips to decorate the brownies
Additional Ingredients to Fill the Board
- Strawberries
- Raspberries
- Green fruits (green grapes, kiwi, green apple slices, etc.)
- Mini marshmallows
- Red and green M&Ms
How to Make a Christmas Charcuterie Board
The fun thing about this Santa-themed Charcuterie Board is that it focuses on Santa’s iconic red hat but also has lots of texture (crunchy items) and the bright Christmas colors.
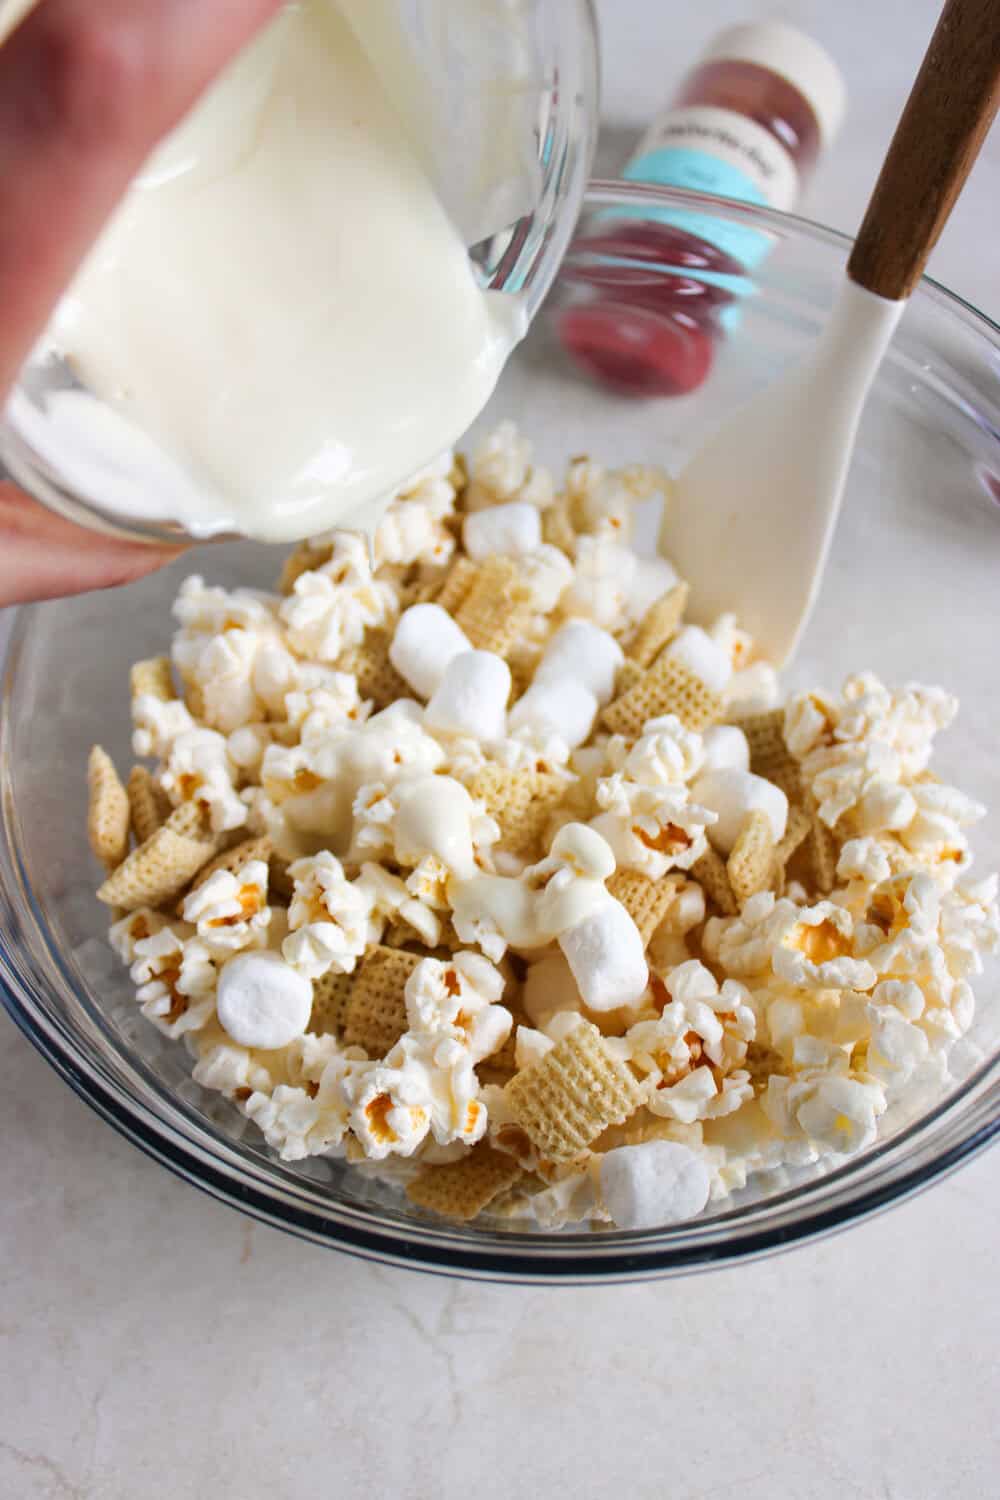
- For the Christmas popcorn: Line a baking sheet with parchment. In a large bowl, combine the popcorn, Chex cereal, and mini marshmallows.
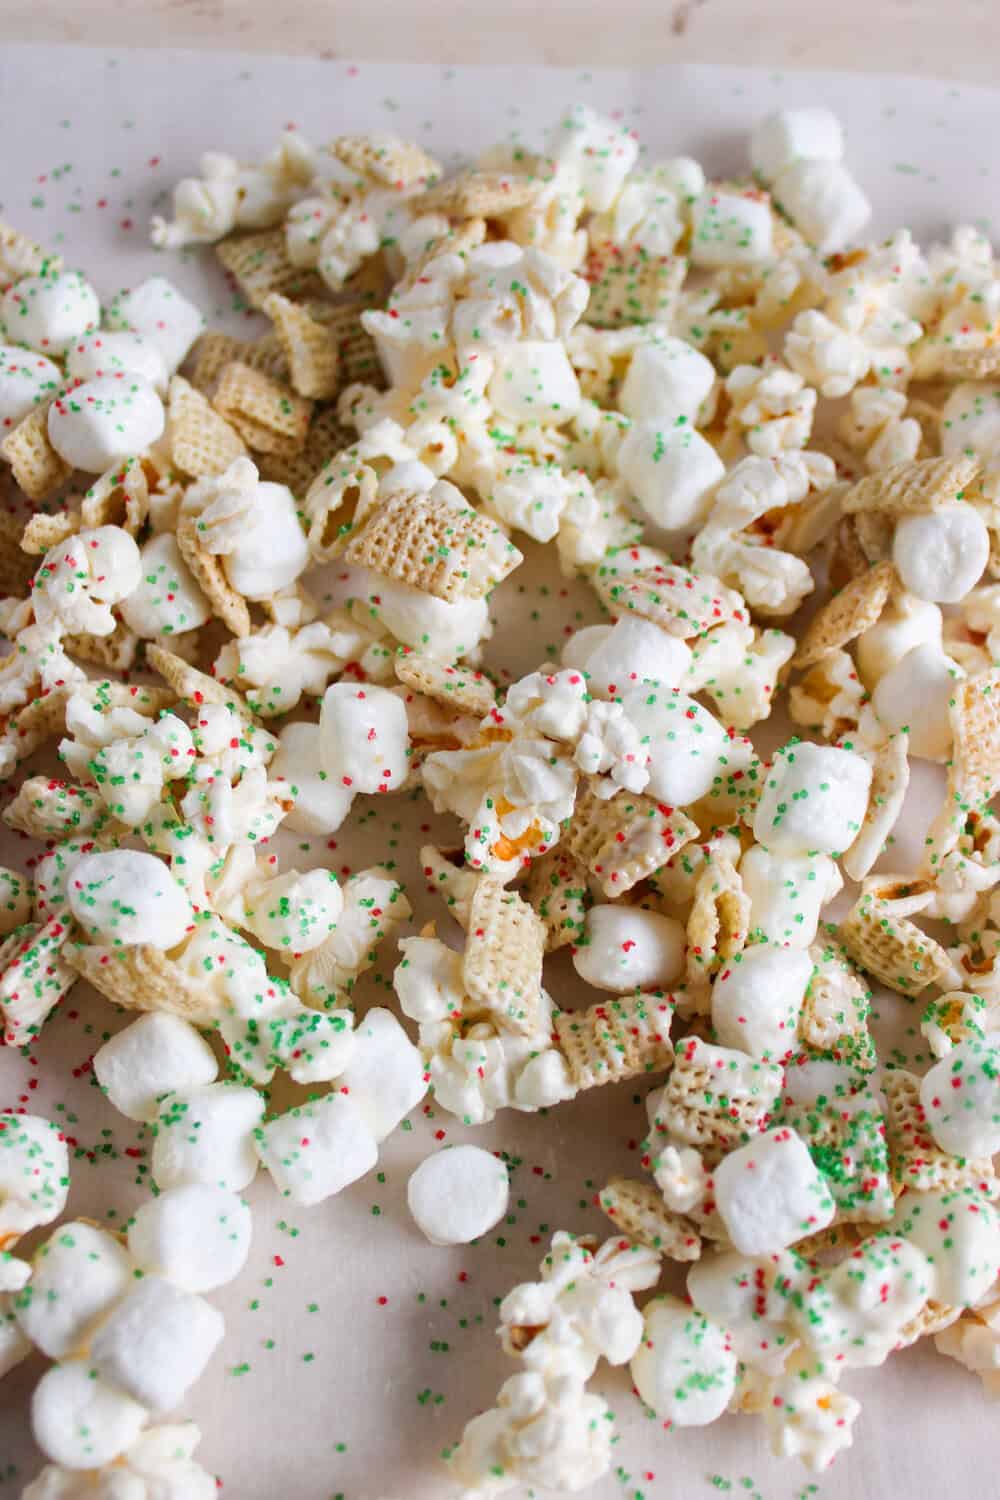
- Melt the candy wafers according to the package, then drizzle over the mixture. Spread onto the prepared baking sheet, sprinkle with red and green sanding sugar, and let cool completely.
I have another variation of Christmas Crunch Popcorn Snack Mix here.
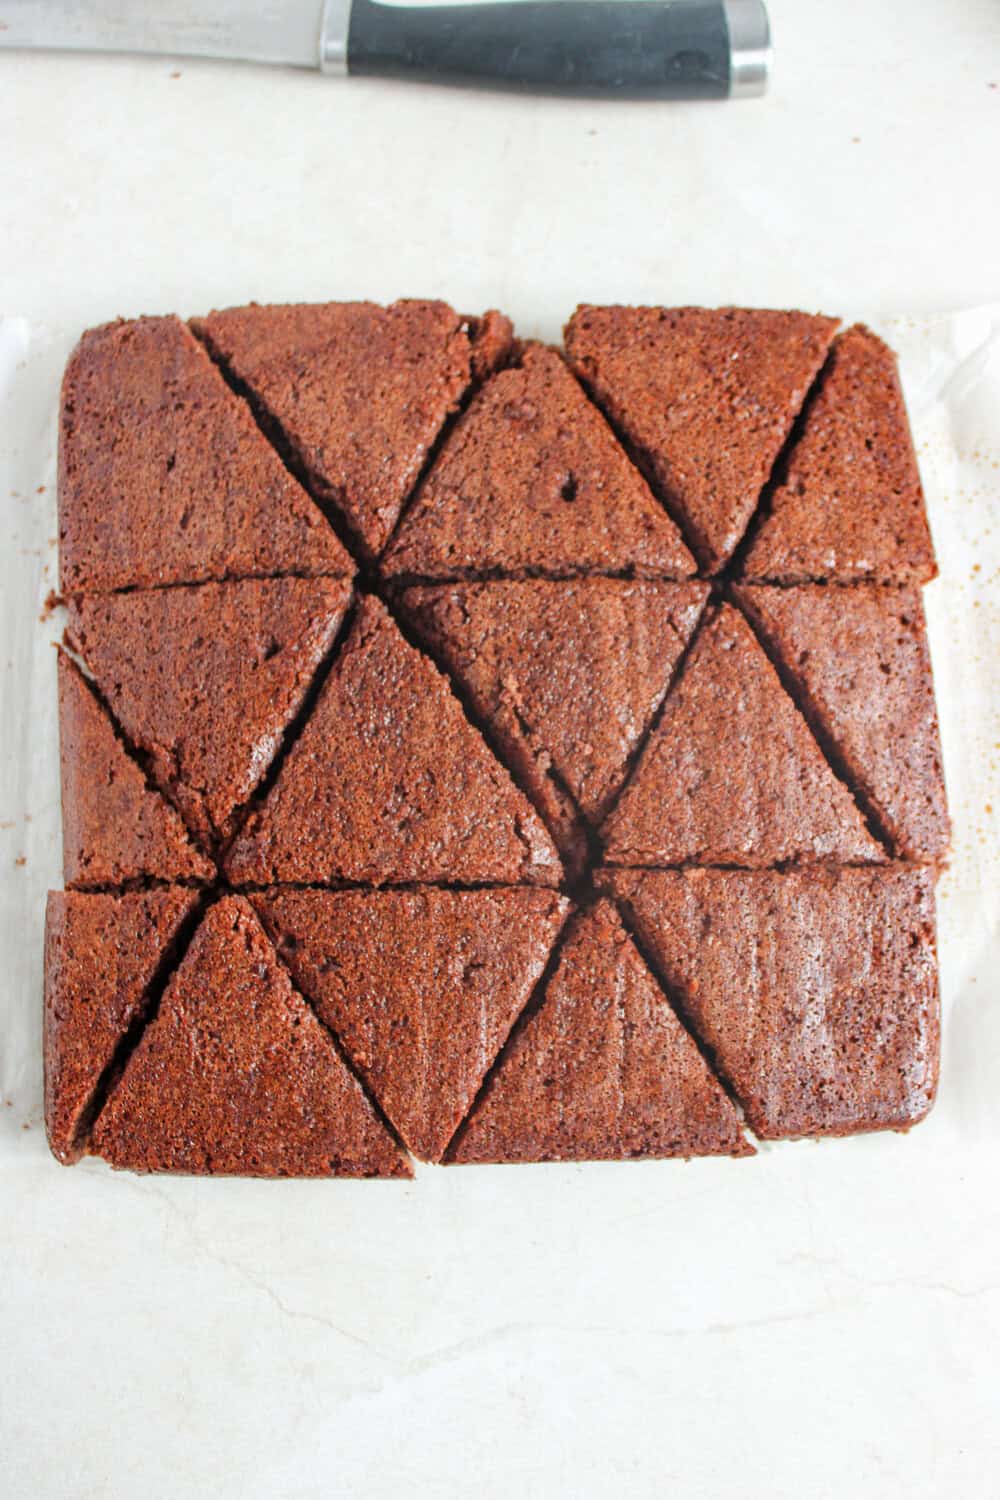
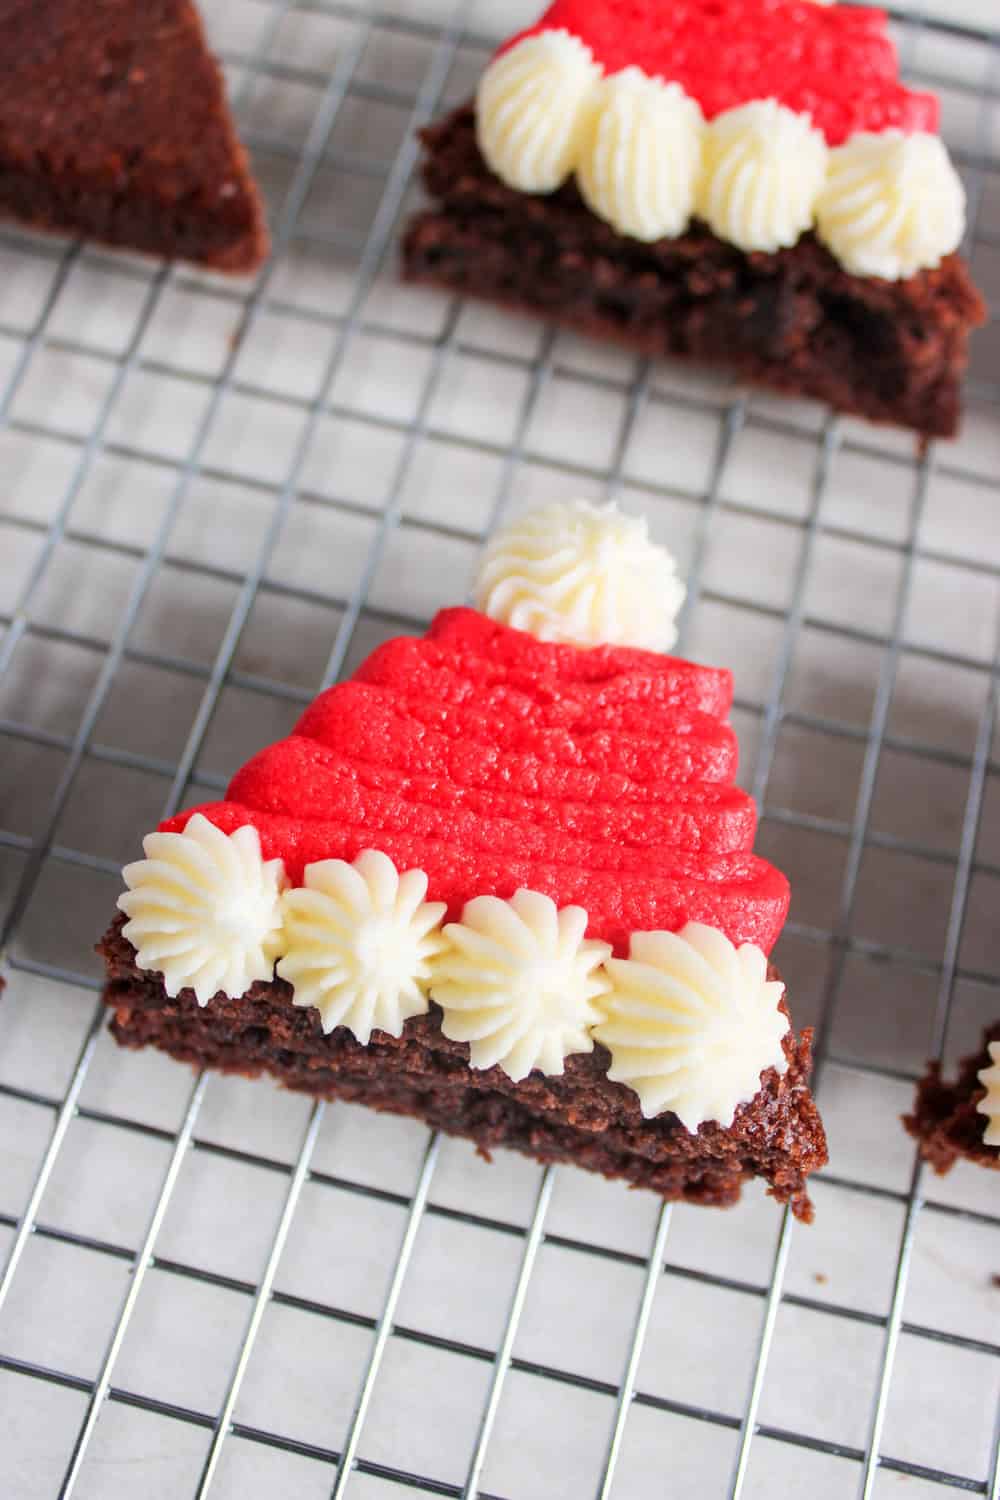
- For the brownie trees and Santa hats: Cut the baked brownies into triangles as shown. You should be able to get at least 10-12 triangles.
- Make the frosting by beating softened butter for 1 minute with a hand or stand mixer. Slowly mix in powdered sugar and heavy cream, scraping the bowl as needed, until the frosting is smooth and fluffy.
- Divide the frosting into three bowls – color one green, one red, and leave one white.
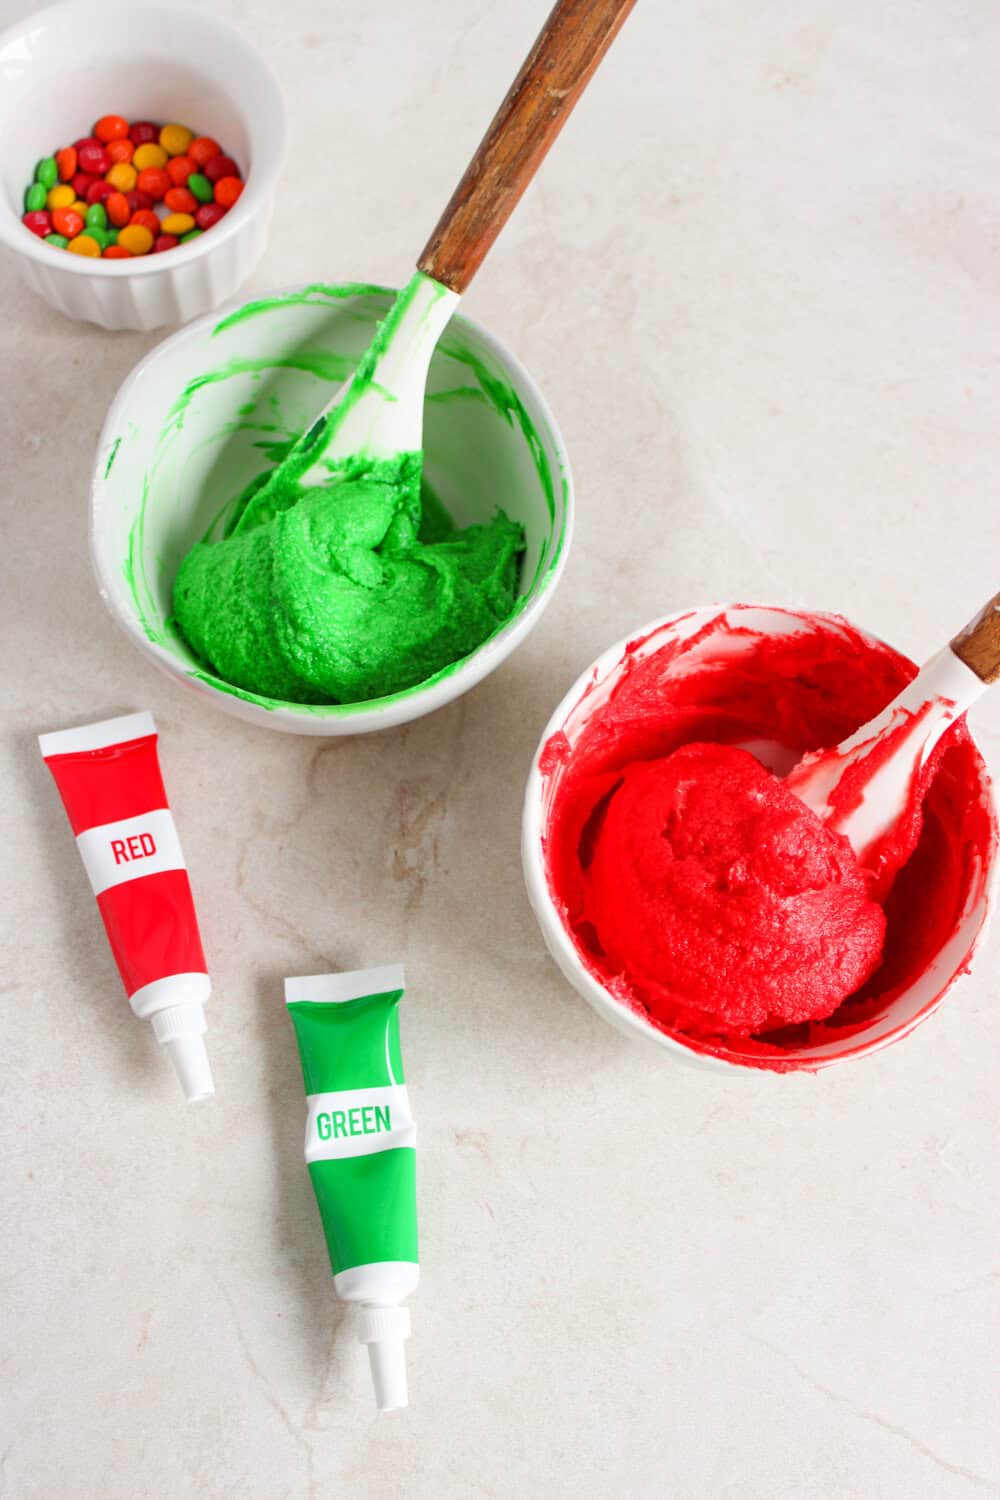
- Stir well, then place each frosting into separate piping bags.
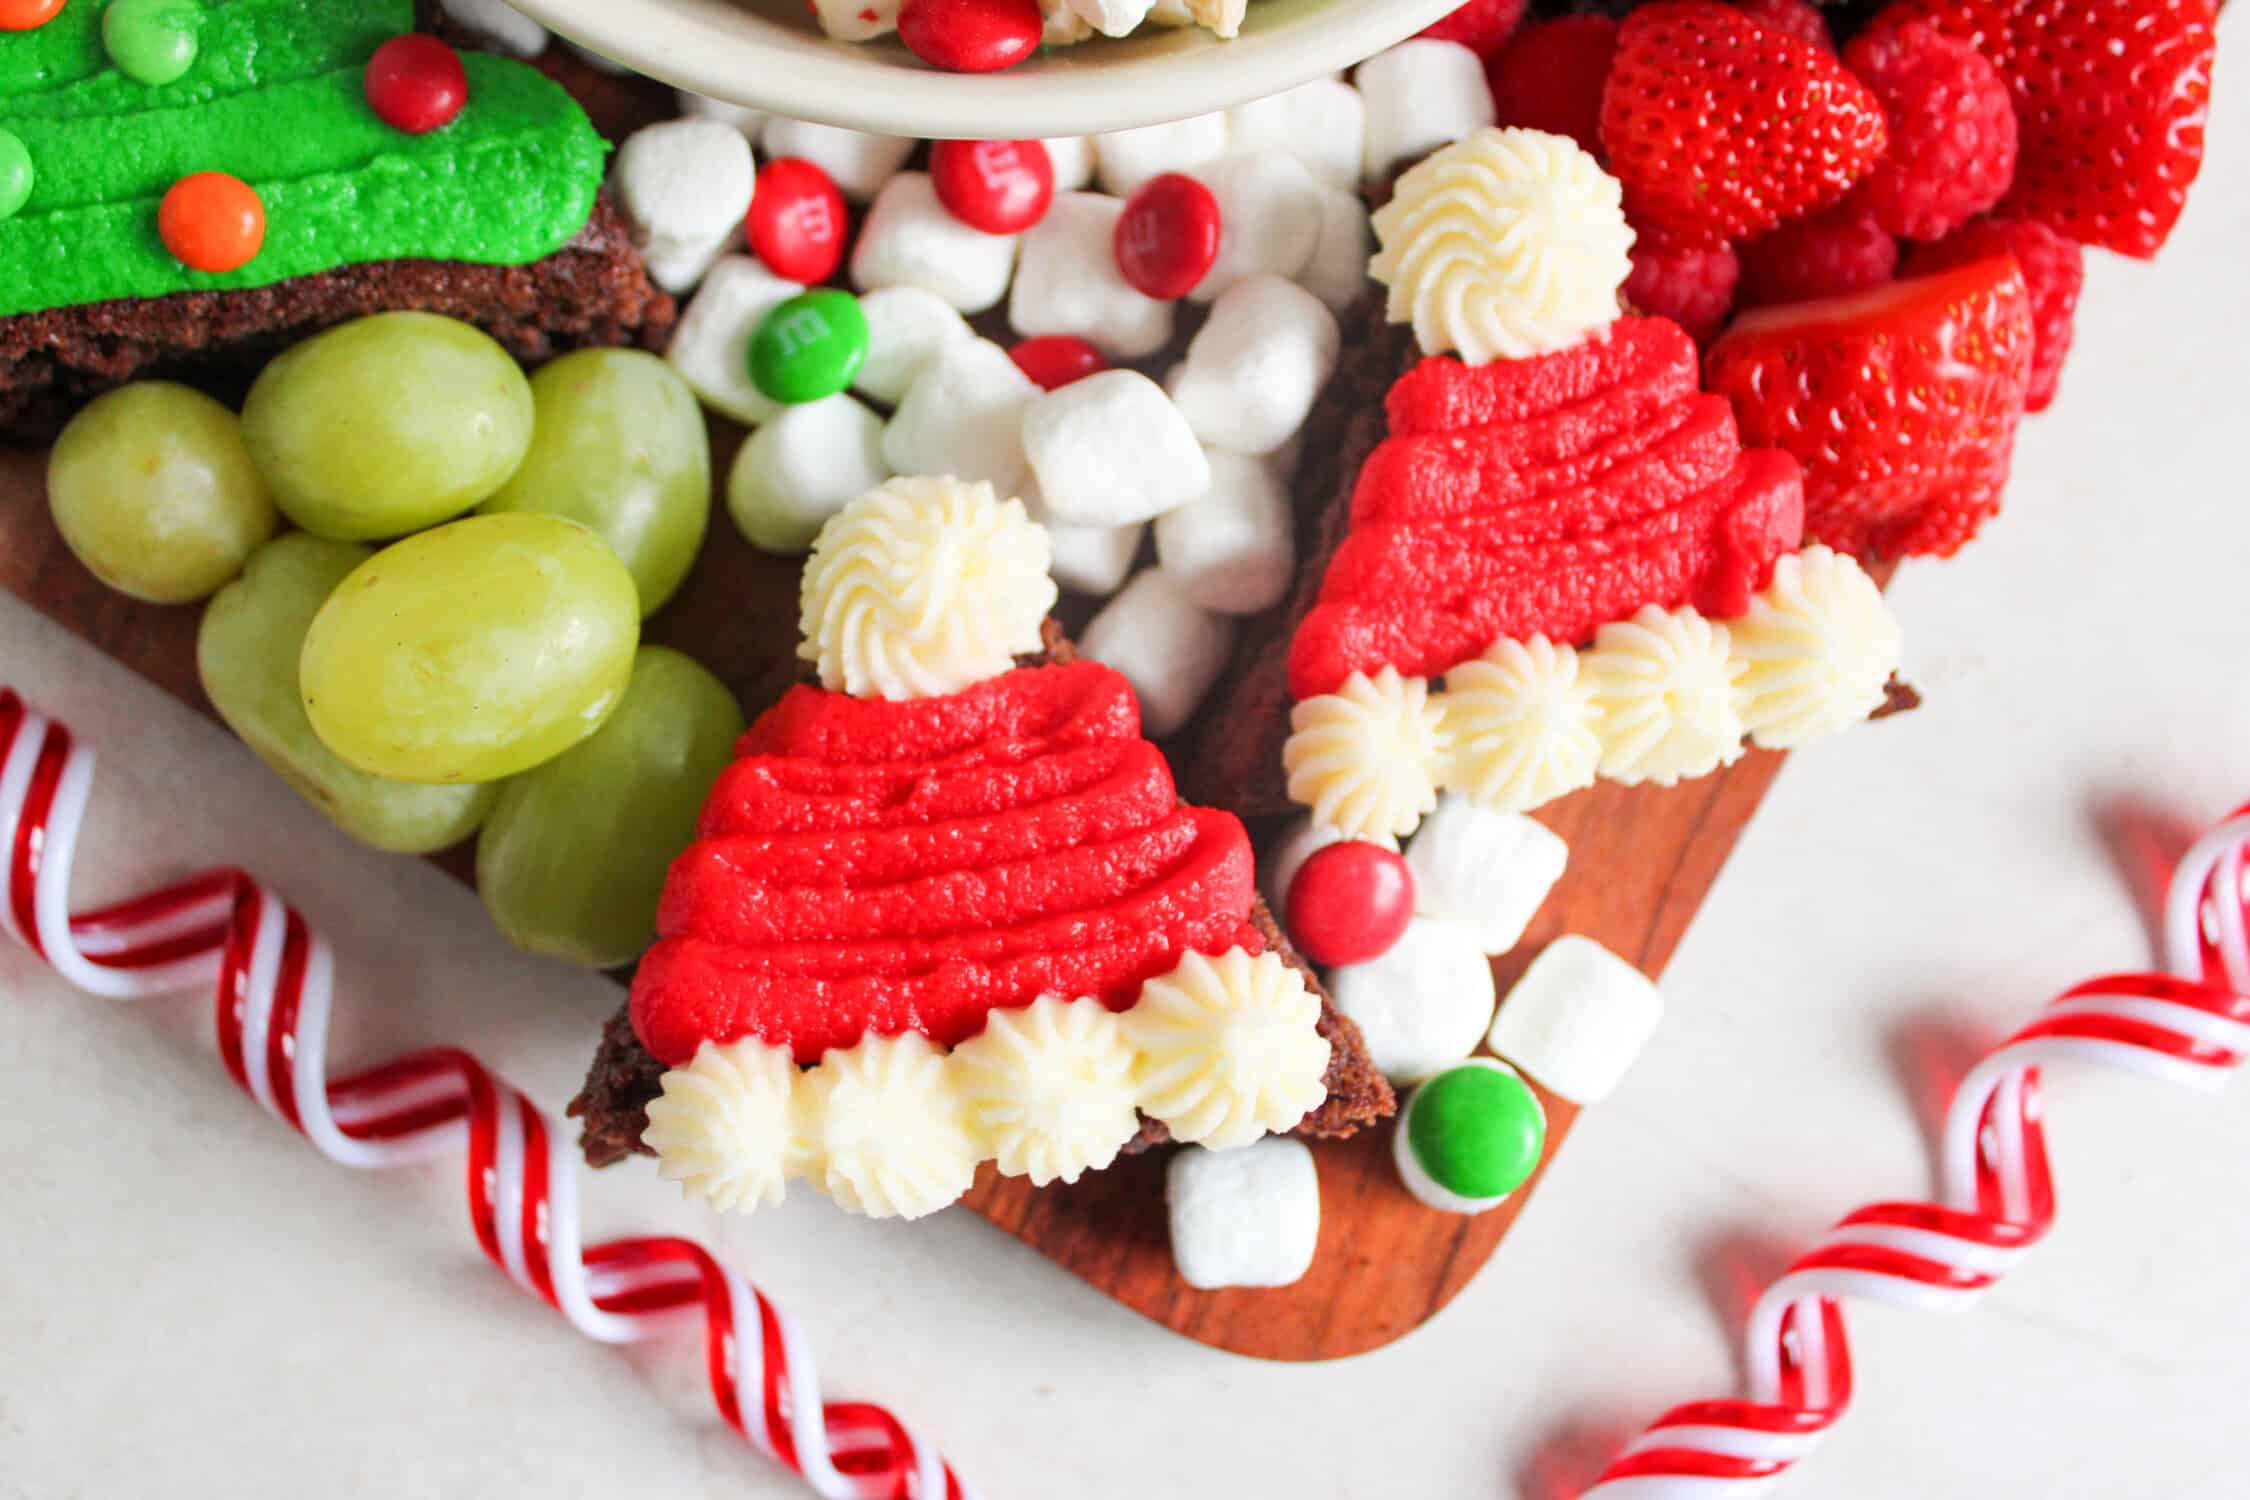
- Decorate half the brownies as Santa hats with red frosting and a white rim of the hat.
- Decorate the other half of the brownie triangles as Christmas trees using the green frosting and mini M&Ms.

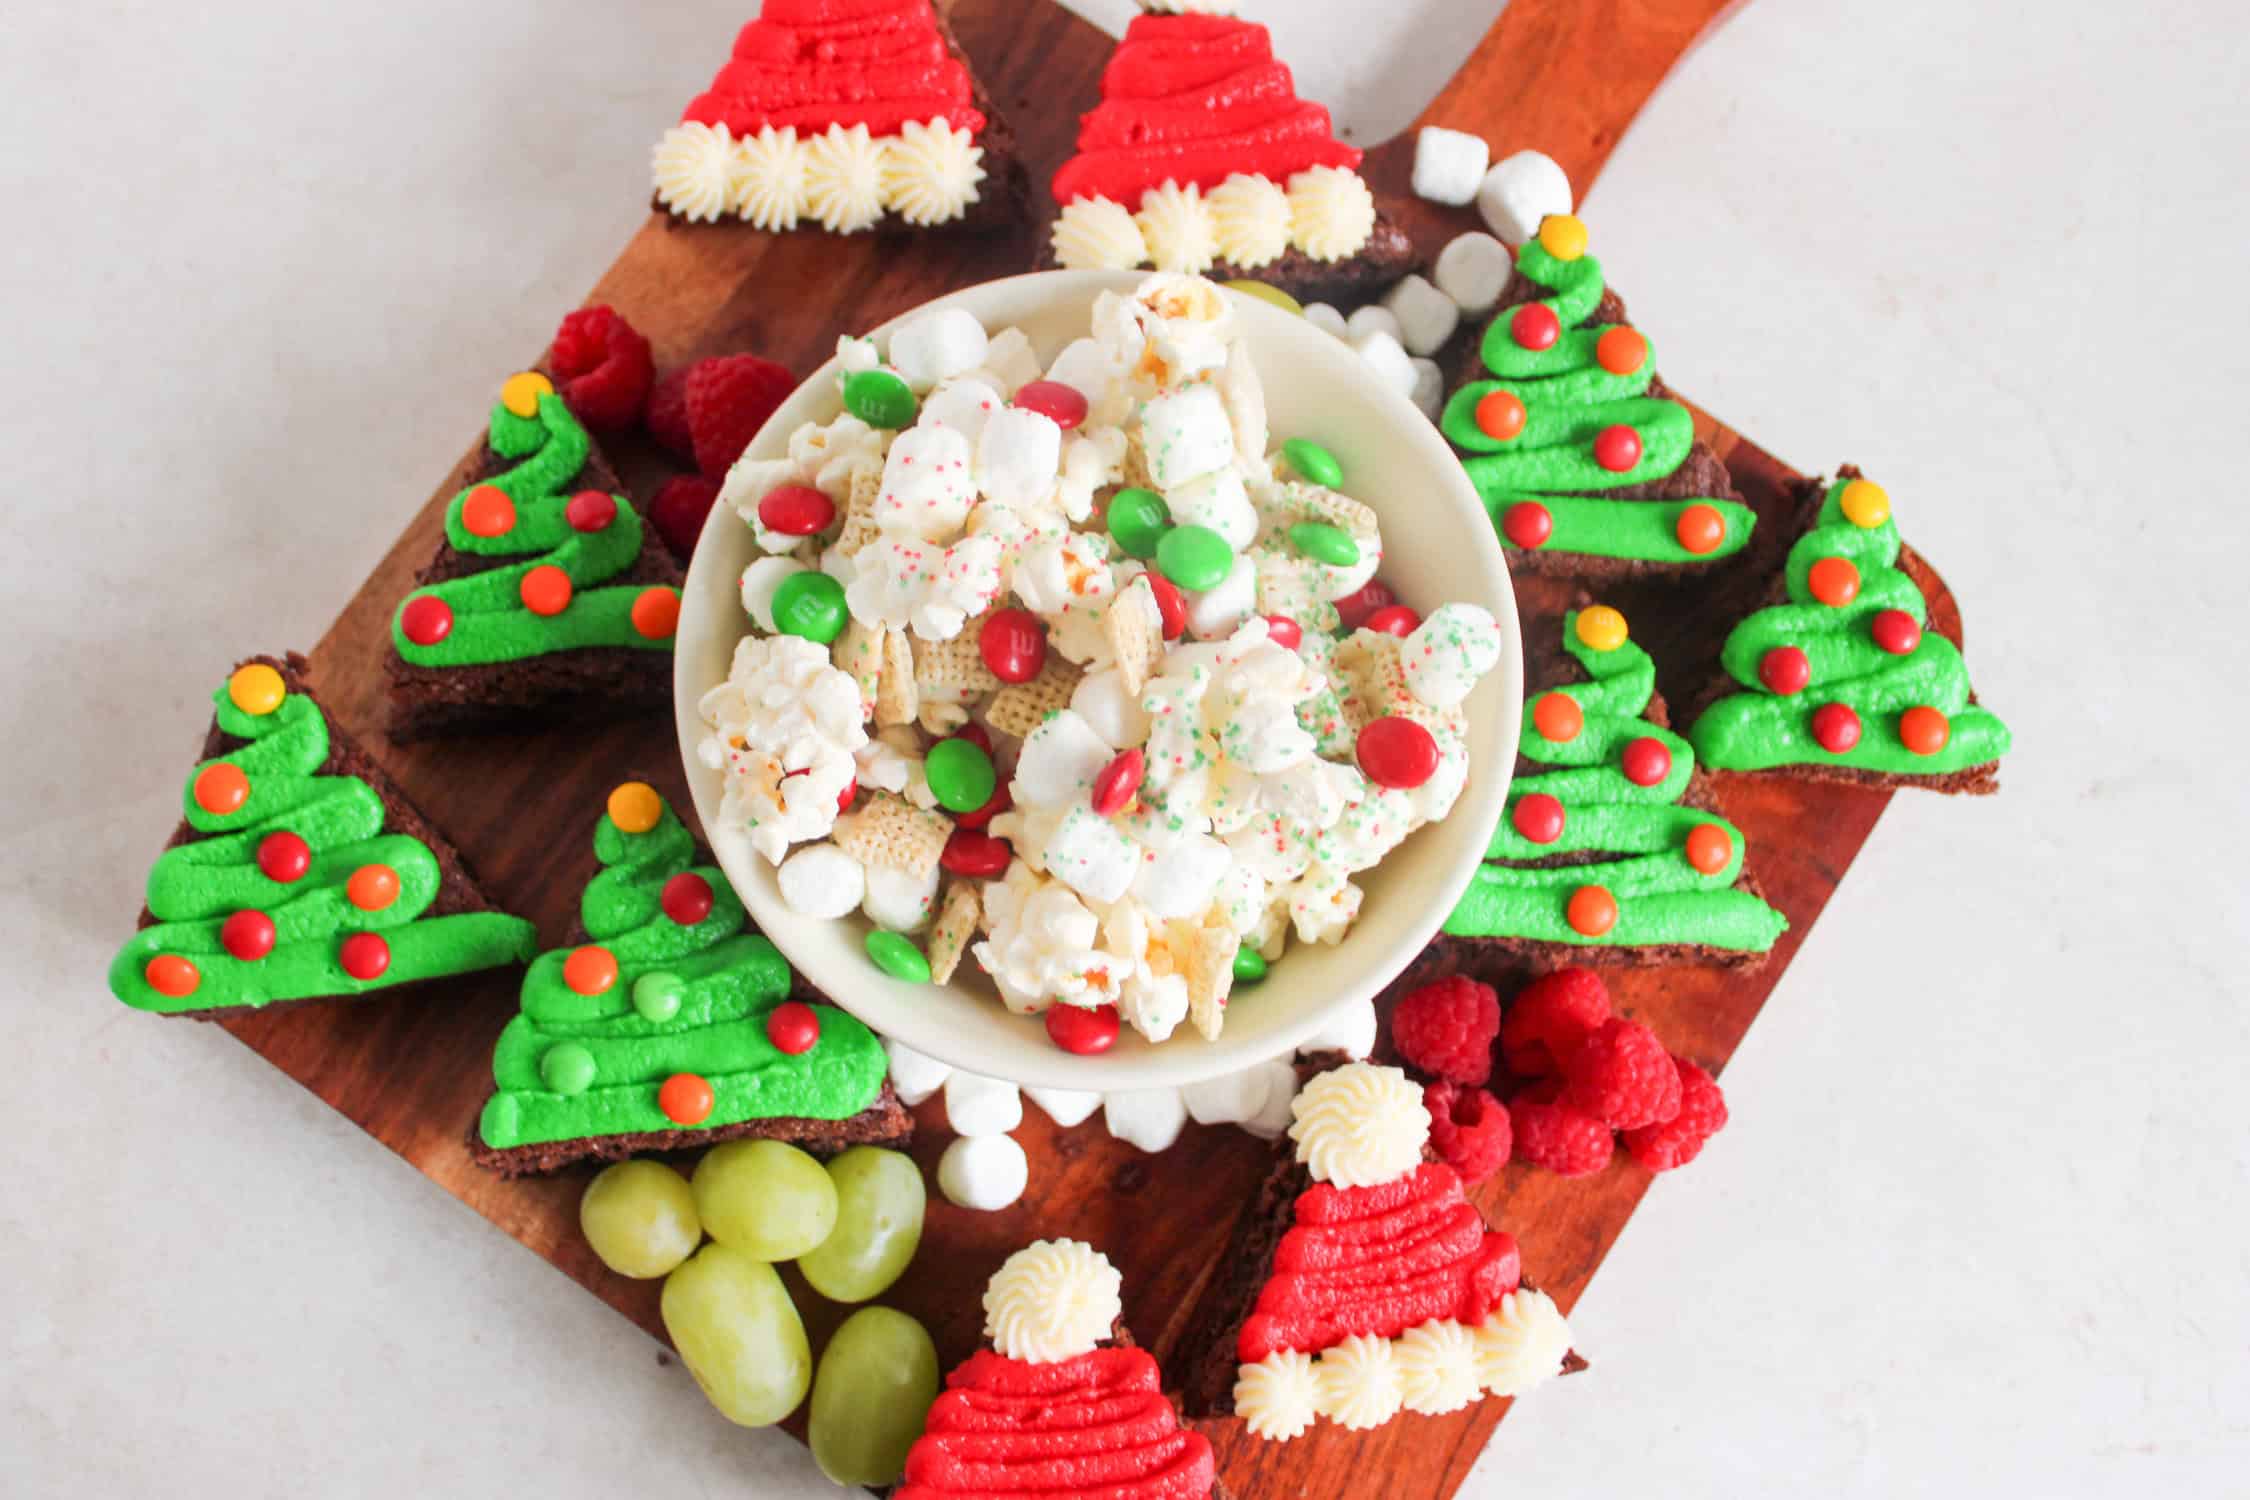
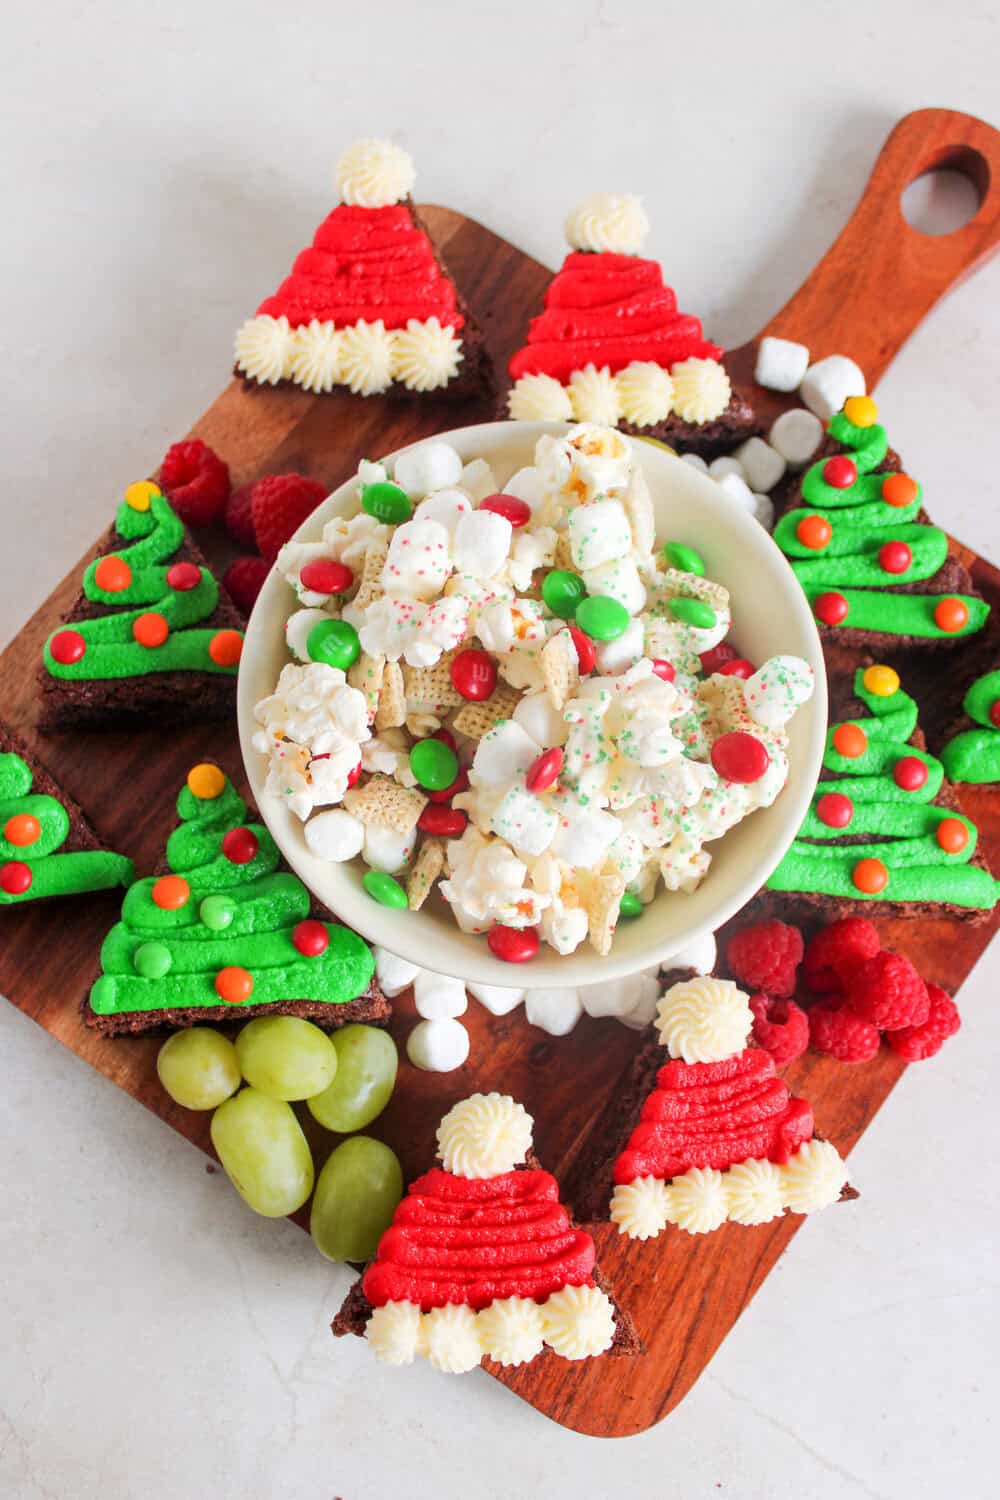
- Grab a platter or wooden board and assemble!
- First, transfer the cooled popcorn mixture to a round bowl and sprinkle M&Ms over the top. Place the bowl in the center of the board. Then arrange the Santa hat brownies and Christmas tree brownies at the corners.
- Fill remaining empty spaces with fresh fruit, marshmallows, and red-and-green M&Ms for pops of color. You can put the whole thing together easily in about 20-30 minutes.
Pro Tips
Choosing Your Board. A wooden cutting board gives rustic charm or a large white serving platter work equally well for this easy Christmas Charcuterie board. You could even grab a plastic platter from the dollar store for a pretty presentation that can be given as a gift or thrown away if you want to do fewer dishes!
Make Ahead. You can bake your brownies a day ahead and store them in an airtight container. The Christmas popcorn can also be made up to 24 hours in advance and kept in separate containers to maintain freshness. Decorate the brownies the morning you plan to serve them, then assemble the entire board 1-2 hours before guests arrive – wrapping it in plastic wrap until time to serve.
Brownie Cutting. For clean cuts, use a sharp knife wiped clean between each cut. Slightly chilled brownies cut more cleanly than room-temperature ones. Depending on the size of your cuts, you should get 10-12 brownies out of the pan.
Serving Suggestions
Set out small plates and napkins near the Santa Snack Board so guests can help themselves easily. You might include small serving utensils or cookie spatulas picking up the brownies.
Everybody loves a warm drink during the Christmas season, so pair your sweet treats with hot chocolate, apple cider, or even coffee for adults. You could also make a cream cheese dip or a classic fruit dip to go with the fruit if you want to add something else to make your board even more delicious!
More Fun Christmas Charcuterie Boards
- Christmas Tree Charcuterie Board
- Rudolph Dessert Board
- Grinch Charcuterie Board – Perfect for Christmas!
- Festive & Simple Christmas Buttercream Board
Santa Charcuterie Board (Perfect Christmas Charcuterie)
Description
This Santa Charcuterie board is perfect for Christmas! This cute board brings me so much joy! What’s not to love? It’s yummy brownies, Christmas popcorn, and lots of fresh fruit – it’s so festive and fun! If you’re looking for a new centerpiece idea for your holiday parties, this sweet Santa Charcuterie Board is perfect.
Ingredients
Christmas Popcorn
- 2 cups popped popcorn
- 1 cup Chex cereal
- 1 cup mini marshmallows
- 1/2 cup white melting wafers
- 1/4 cup red/green M&Ms
- Red and green sanding sugar
Brownie Christmas trees and Santa Hats
- Premade 9x9 pan of brownies (cooled)
- 1 stick unsalted butter (room temp)
- 2 cups powdered sugar
- 2 Tbsp heavy cream
- Red & green food coloring
- 1/4 cup mini M&Ms
- 3 piping bags and tips
Additional ingredients to fill the board
- Strawberries
- Raspberries
- Grapes
- Mini Marshmallows
- Red and Green M&Ms
Instructions
- For the Christmas popcorn: Line a baking sheet with parchment. In a large bowl, combine the popcorn, cereal, and marshmallows.
- Melt the candy wafers according to the package, then drizzle over the mixture. Spread onto the prepared baking sheet, sprinkle with red and green sanding sugar, and let cool completely.
- Transfer the cooled popcorn mixture to your serving platter and sprinkle M&Ms over the top.
- For the brownie trees and Santa hats: Cut the baked brownies into triangles as shown.
- Make the frosting by beating softened butter for 1 minute with a hand or stand mixer. Slowly mix in powdered sugar and heavy cream, scraping the bowl as needed, until the frosting is smooth and fluffy.
- Divide the frosting into three bowls – color one green, one red, and leave one white. Stir well, then place each frosting into separate piping bags.
- Decorate half of the brownie triangles as Christmas trees using the green frosting and mini M&Ms. Decorate the rest as Santa hats with red frosting and a white rim of the hat.
- Grab a platter or wooden board and assemble! First, place the popcorn mixture in a bowl in the center of the board. Then arrange the Santa hat brownies and Christmas tree brownies at the corners.
- Fill remaining empty spaces with fresh fruit, marshmallows, and red-and-green M&Ms for pops of color. You can put the whole thing together easily in about 20-30 minutes.

Notes
- Choosing Your Board. A wooden cutting board gives rustic charm or a large white serving platter work equally well for this easy Christmas Charcuterie board. You could even grab a plastic platter from the dollar store for a pretty presentation that can be given as a gift or thrown away if you want to do fewer dishes!
- Make Ahead. You can bake your brownies a day ahead and store them in an airtight container. The Christmas popcorn can also be made up to 24 hours in advance and kept in separate containers to maintain freshness. Decorate the brownies the morning you plan to serve them, then assemble the entire board 1-2 hours before guests arrive – wrapping it in plastic wrap until time to serve.
- Brownie Cutting. For clean cuts, use a sharp knife wiped clean between each cut. Slightly chilled brownies cut more cleanly than room-temperature ones. Depending on the size of your cuts, you should get 10-12 brownies out of the pan.
- Nutritional information is an estimate and does not include optional frostings, toppings, frostings, condiments, or sauces.
Nutrition
- Serving Size:
- Calories: 389
- Sugar: 37.1 g
- Sodium: 111.7 mg
- Fat: 18.7 g
- Carbohydrates: 55.8 g
- Fiber: 2 g
- Protein: 3.1 g
- Cholesterol: 39.7 mg


This is such a cute way to jazz up brownies and snacks for the holidays!
Thank you!
This is beautiful! The brownie Santa hats and Christmas trees are so fun. It all looks delicious. Visiting from the Sweet Tea and Friends linkup.
Thanks so much!
Thanks so much for sharing with us at Full Plate Thursday, 772!
Merry Christmas,
Miz Helen