Blue Velvet Cupcakes Recipe with Cream Cheese Frosting
Blue Velvet Cupcakes are a fun twist on the classic red velvet cake recipe. It’s soft, moist, and has just a hint of cocoa flavor. The bright blue color makes it perfect for birthdays, baby showers, or the 4th of July. Topped with delicious cream cheese frosting and sprinkles, it’s easy to make and sure to impress!

Blue Velvet Cupcakes
Red Velvet Cupcakes (and Red Velvet Cakes) are a really popular cake flavor in the South, but I thought it would be fun to change things up for the 4th of July and make Blue Velvet Cupcakes.
These would also be perfect for a baby shower for a baby boy, a Bluey birthday party, or any other party themed with blue (think graduation party)!
Blue Velvet Cupcakes Recipe
This is a from-scratch recipe for blue cupcakes that are topped with melt-in-your-mouth cream cheese frosting.
This blue velvet cake recipe is basically blue red velvet cake. It has the same chocolate flavor as classic red velvet cake – but blue! 💙

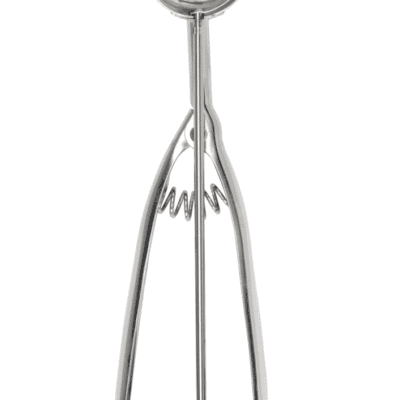
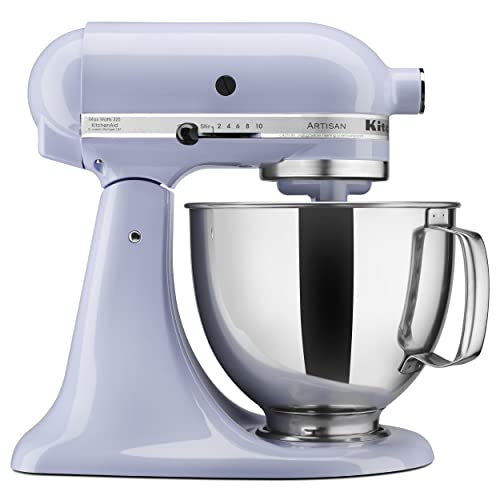
Tools Needed
- Stand Mixer with Paddle attachment OR
- Electric Hand Mixer and Large Mixing Bowl
- Mixing Bowl
- Whisk
- Cupcake Pan
- Cupcake Liners
- Toothpick
- Piping Bag
- Star Tip
Ingredients
These simple ingredients are all pantry staples, except for maybe the gel food coloring needed to make them blue.
The recommended gel food coloring can usually be found in the cake decorating aisle at Walmart or in any craft store or baking supply store.

Cake
- Sugar
- Salted butter, softened
- Eggs, room temperature
- Vanilla extract
- Cake flour
- Cocoa powder
- Salt
- Buttermilk, room temperature
- Royal blue food coloring gel
- Violet food coloring gel
- Baking soda
- Vinegar
Cream Cheese Frosting
- Cream cheese, softened
- Salted butter, softened
- Vanilla extract
- Powdered sugar
- Blue sprinkles for decorating
Find the complete recipe with ingredient measurements in the recipe card below.
Shop Here
 Buy Now →

How to Make Blue Velvet Cupcakes
For the cake:
- Preheat oven to 350°F and line a cupcake pan with liners.
- In the bowl of a stand mixer fitted with a paddle attachment, cream sugar and butter together until creamy and light, about 3 minutes. Add the eggs and mix again until well combined, scraping the sides of the bowl when necessary.
- Add the blue food coloring and small dab of violet food coloring to the buttermilk and mix together until combined and food coloring gel is dissolved. Add the baking soda and vinegar and stir until combined.
- In separate mixing bowl combine the remaining dry ingredients: flour, cocoa powder and salt.
- Add half the flour mixture to the butter-sugar mixture bowl and mix till nearly combined. Add the buttermilk mixture and mix till almost combined. Add the last of the flour mixture and mix till just barely combined.
- Fill each cupcake liner about 2/3 full with blue cake batter and bake about 18-22 minutes, till a toothpick inserted comes out with a few moist crumbs.
- Let the cupcakes cool completely before frosting.


For the frosting:
- In the bowl of a stand mixer cream together the cream cheese and butter until light and creamy. Add the vanilla and powdered sugar and whip for a few minutes.
- Add the frosting to a piping bag with an open star tip and pipe the frosting on each blue cupcake generously. Sprinkle with your favorite sprinkles or add cupcake toppers, if desired.


Pro Tips
- These cupcakes can be frozen, unfrosted for up to 2 months. Thaw in the fridge overnight before moving to room temperature. Frost before serving.
- Use room temperature ingredients for the fluffiest results.
- You can make any color “velvet” cupcakes you’d like, simply by switching the food coloring to your favorite color! Blue velvet cake, green velvet cake, orange velvet cake, etc.
- I’d suggest using a food coloring powder or gel. The liquid dye from most grocery stores will not work as well for this blue velvet cake recipe.
- I used a 1M Wilton piping tip for this piping.
- Using cake flour instead of all-purpose flour will make your cupcakes lighter in texture and less dense. They melt in your mouth. But using all-purpose will work in this cupcake recipe if that’s all you have on hand.

Serving Suggestions
These blue cupcakes are perfect for so many occasions…
- Bluey Cupcake Ideas with Cookie Monster Blue Cinnamon Rolls
- 4th of July
- Baby Boy Baby Shower or Birthday Party
- Snowflake Cupcakes
And the flavor is basically blue chocolate cake, so serve it up with a tall glass of milk or cup of coffee for a perfect dessert!
Storage Directions
If you happen to have a leftover blue velvet cupcake (or two), store in an airtight container at room temperature for up to 2 days or in the fridge for up to 4 days.
More Delicious Recipes

Blue Velvet Cupcakes Recipe with Cream Cheese Frosting
Description
Blue Velvet Cupcakes are a fun twist on the classic red velvet cake recipe. It’s soft, moist, and has just a hint of cocoa flavor. The bright blue color makes it perfect for birthdays, baby showers, or the 4th of July. Topped with delicious cream cheese frosting and sprinkles, it’s easy to make and sure to impress!
Ingredients
For the cake:
- 2 cups sugar
- 1/2 cup salted butter, softened
- 2 eggs, room temperature
- 2 teaspoons vanilla extract
- 2 1/2 cups cake flour
- 2 tablespoons cocoa powder
- 3/4 teaspoon salt
- 1 cup buttermilk, room temperature
- 1/2 tablespoon royal blue food coloring gel
- Small dab of violet gel food color
- 1/2 teaspoon baking soda
- 1 tablespoon vinegar
For the frosting:
- 16 oz cream cheese (2 8 oz. blocks) softened (1 pound)
- 1/2 cup salted butter, softened
- 1 tablespoon vanilla extract
- 4 cups powdered sugar
- Blue sprinkles for decorating
Instructions
Cake Instructions
- Preheat oven to 350°F and line a cupcake tin with liners.
- In the bowl of a stand mixer fitted with a paddle attachment, cream together the butter and sugar until creamy and light, about 3 minutes. Add the eggs and mix again until well combined, scraping the sides of the bowl when necessary.
- Add the blue food coloring and dab of violet food coloring to the buttermilk and mix together until combined and food coloring gel is dissolved. Add the baking soda and vinegar and stir until combined.
- In a mixing bowl combine the flour, cocoa powder and salt.
- Add half the flour mixture to the butter mixture bowl and mix till nearly combined. Add the buttermilk mixture and mix till almost combined. Add the last of the flour mixture and mix till just barely combined.
- Fill each cupcake liner about 2/3 full and bake about 18-22 minutes, till a toothpick inserted comes out with a few moist crumbs.
- Let the cupcakes cool completely before frosting.
Frosting Instructions
- In the bowl of a stand mixer cream together the cream cheese and butter until light and creamy. Add the vanilla and powdered sugar and whip for a few minutes.
- Add the frosting to a piping bag with an open star tip and pipe the frosting on generously. Sprinkle with your favorite sprinkles, if desired.


Notes
- Store in an airtight container at room temperature for up to 2 days or in the fridge for up to 4 days.
- These cupcakes can be frozen, unfrosted for up to 2 months. Thaw in fridge overnight before moving to room temperature. Frost before serving.
- Use room temperature ingredients for the fluffiest results.
- Use a cookie scoop to portion out your cupcakes – it’s the perfect amount.
- You can make any color “velvet” cupcakes you’d like, simply by switching the food coloring.
- I’d suggest using a food coloring powder or gel. The liquid dye will not work as well.
- I used a 1M Wilton piping tip for this piping.
- Using cake flour instead of all-purpose will make your cupcakes lighter in texture and less dense. They melt in your mouth.
Nutrition
- Serving Size: 1 cupcake
- Calories: 350
- Sugar: 37.6 g
- Sodium: 255.8 mg
- Fat: 15.2 g
- Carbohydrates: 50.8 g
- Fiber: 0.4 g
- Protein: 3.5 g
- Cholesterol: 56 mg