Golf Cake Ideas for a Groom or Father’s Day!
Whether you’re planning a birthday party for golf enthusiasts, celebrating a retirement, or surprising someone who practically lives on the course, a golf-themed cake is always a hole-in-one! From elegant designs featuring putting greens and golf balls to playful cakes with tees, clubs, and even sand traps, there are so many creative ways to bring the game to life in cake form. In this post, I’m sharing several golf cake ideas that are perfect for golfers of all ages—whether you want something simple and classic or over-the-top and fun.
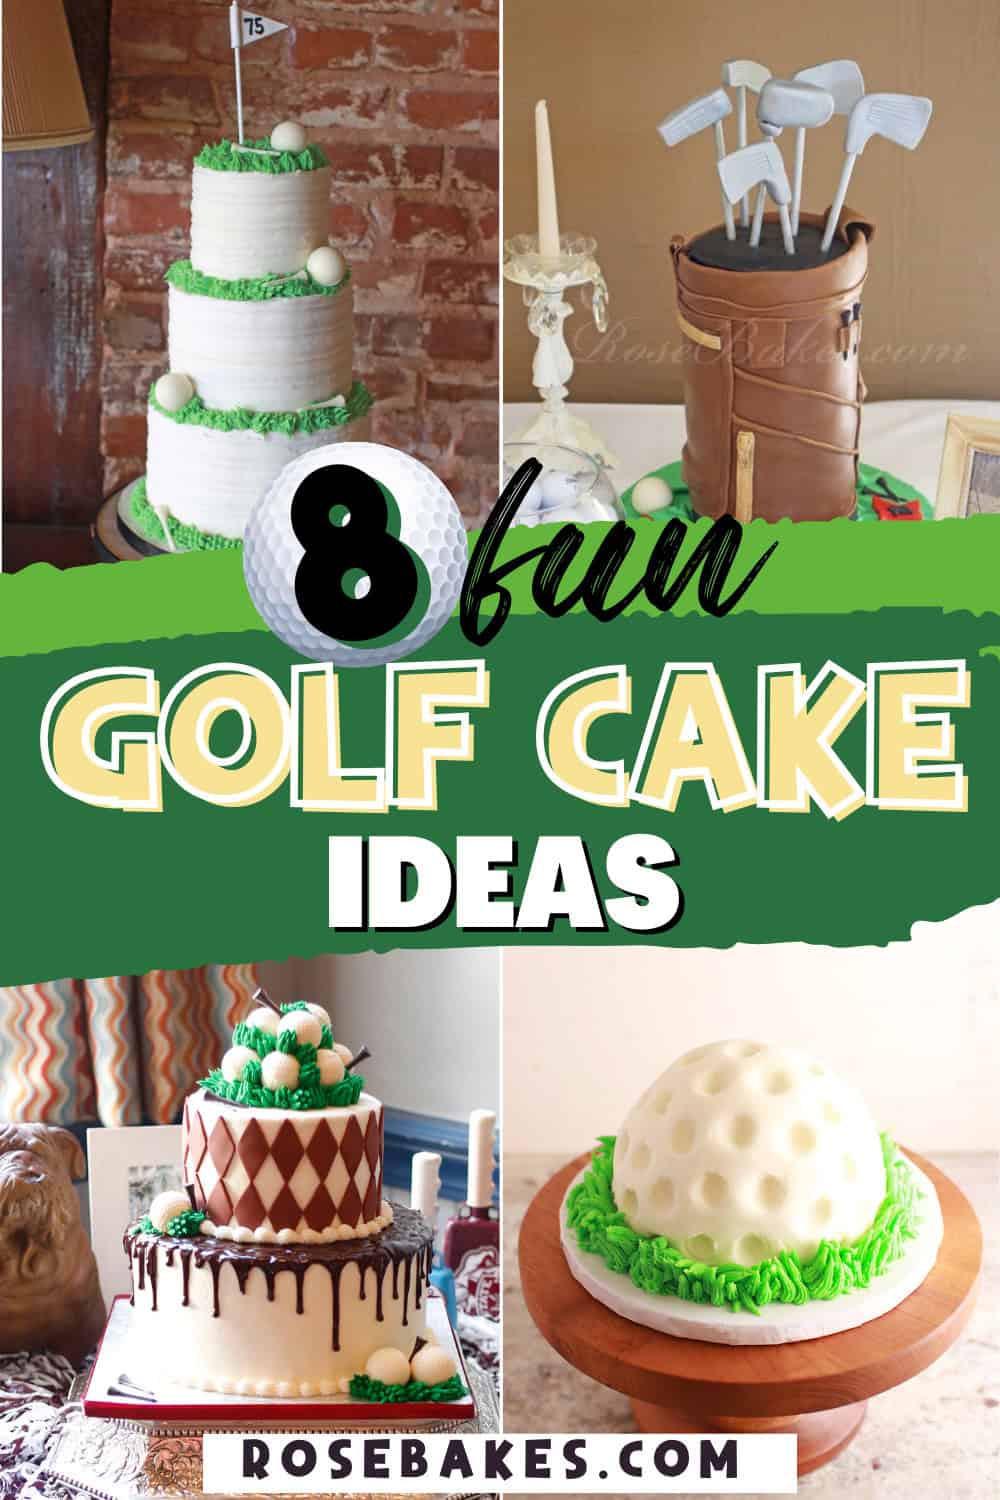
Golf Cake Ideas
The best thing about golf cakes is their versatility. You can go as simple as adding a golf ball topper and buttercream “grass” for a last-minute design, or you can get creative with 3D elements like golf bags, clubs, and even edible golf carts. These cakes also make wonderful conversation pieces.
Guests love pointing out the clever little details like graham cracker sand traps or fondant golf tees. Plus, they’re a great way to personalize a celebration by combining hobbies, team colors, or even pets into the design, making the cake truly unique to the guest of honor.
So whether you’re planning something fun for Father’s Day, surprising the groom at his rehearsal dinner, or creating a playful smash cake for a little one’s first birthday, you’ll find inspiration here. Golf cakes work for every age and stage of life, and they’re sure to bring smiles to both golfers and non-golfers alike.
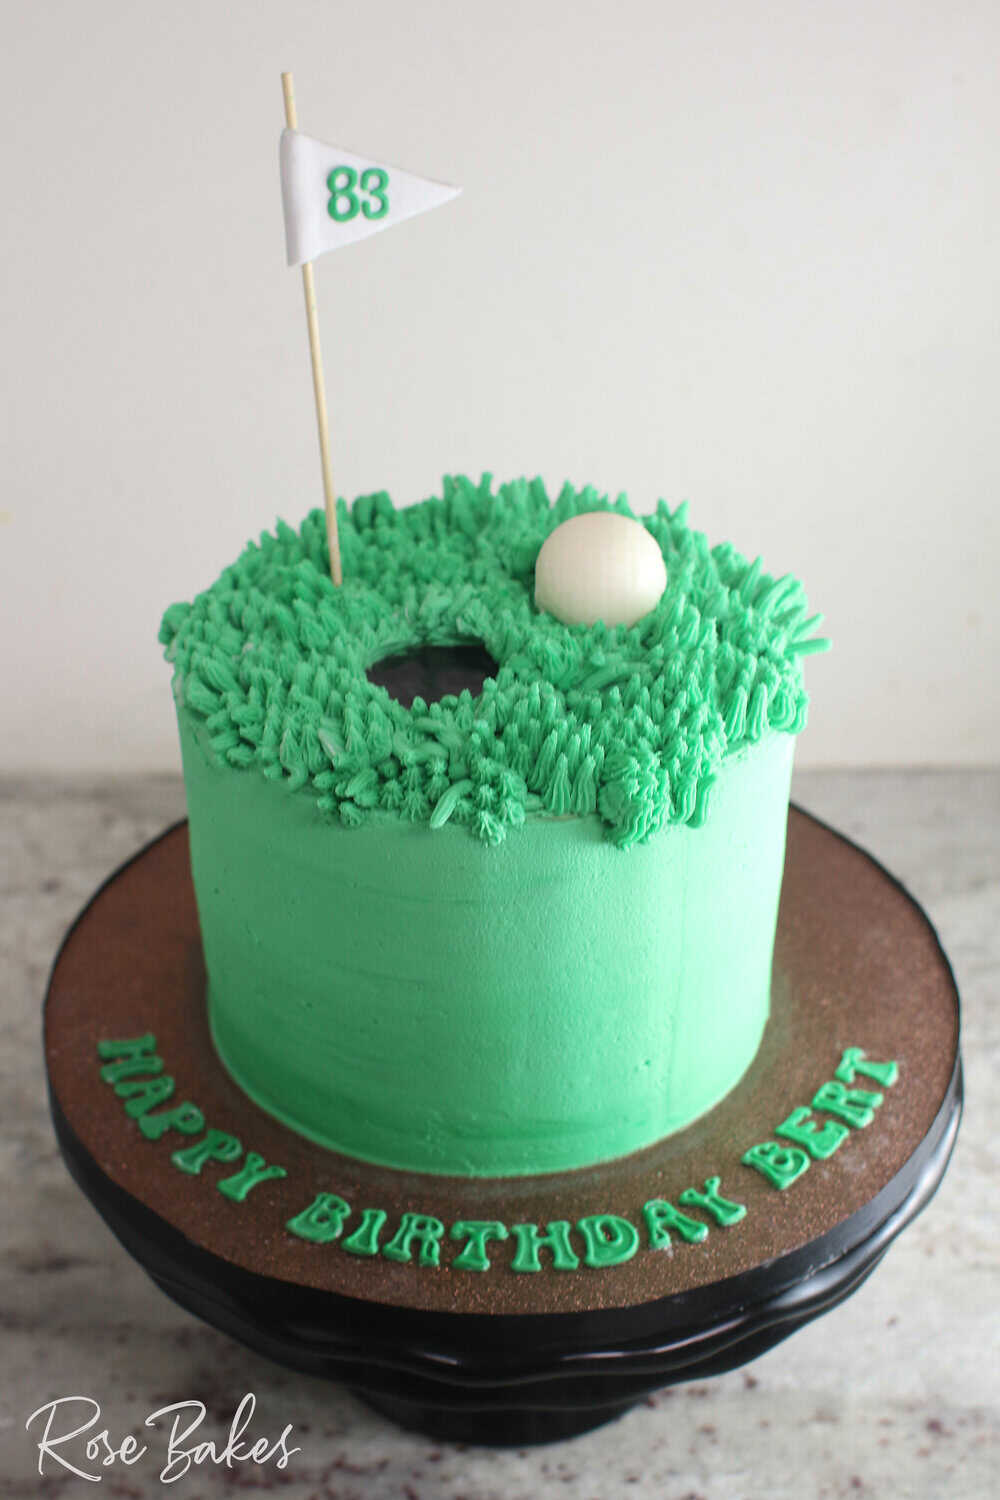
Easy Round Golf Cake
Okay – let’s look at and talk about some golf-themed cakes! First up, the classic round cake above. It is a buttercream-covered cake with a white chocolate golf ball, buttercream grass, and a tee made with a skewer and some fondant! If you need a golf-themed cake but are short on time, this one is so simple to make but so fun!
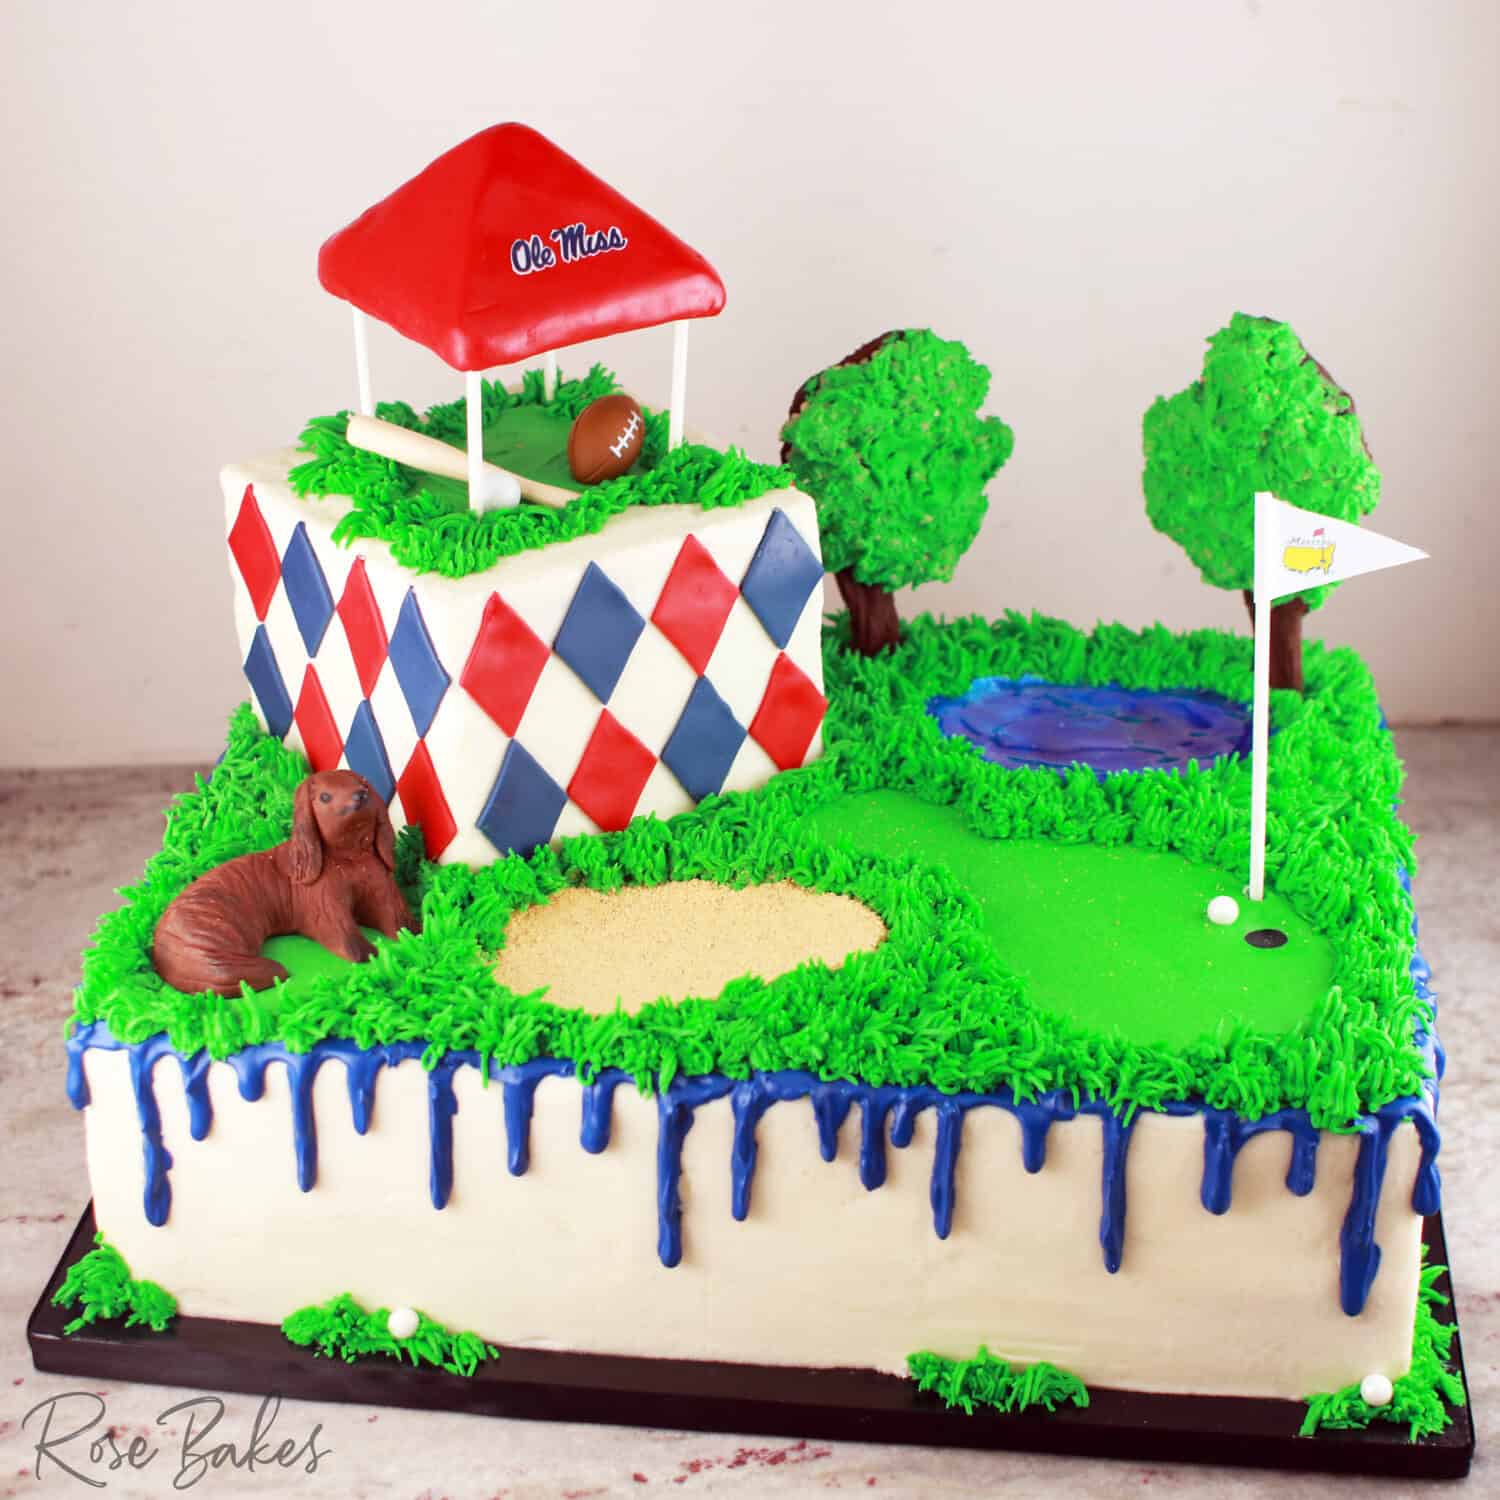
Golf Course Cake for Ole Miss Groom
This groom’s cake with a golf theme had a little bit of everything. The groom loved golf, Ole Miss, baseball, football, tailgating, and his dog. So we put it all on this huge sheet cake!
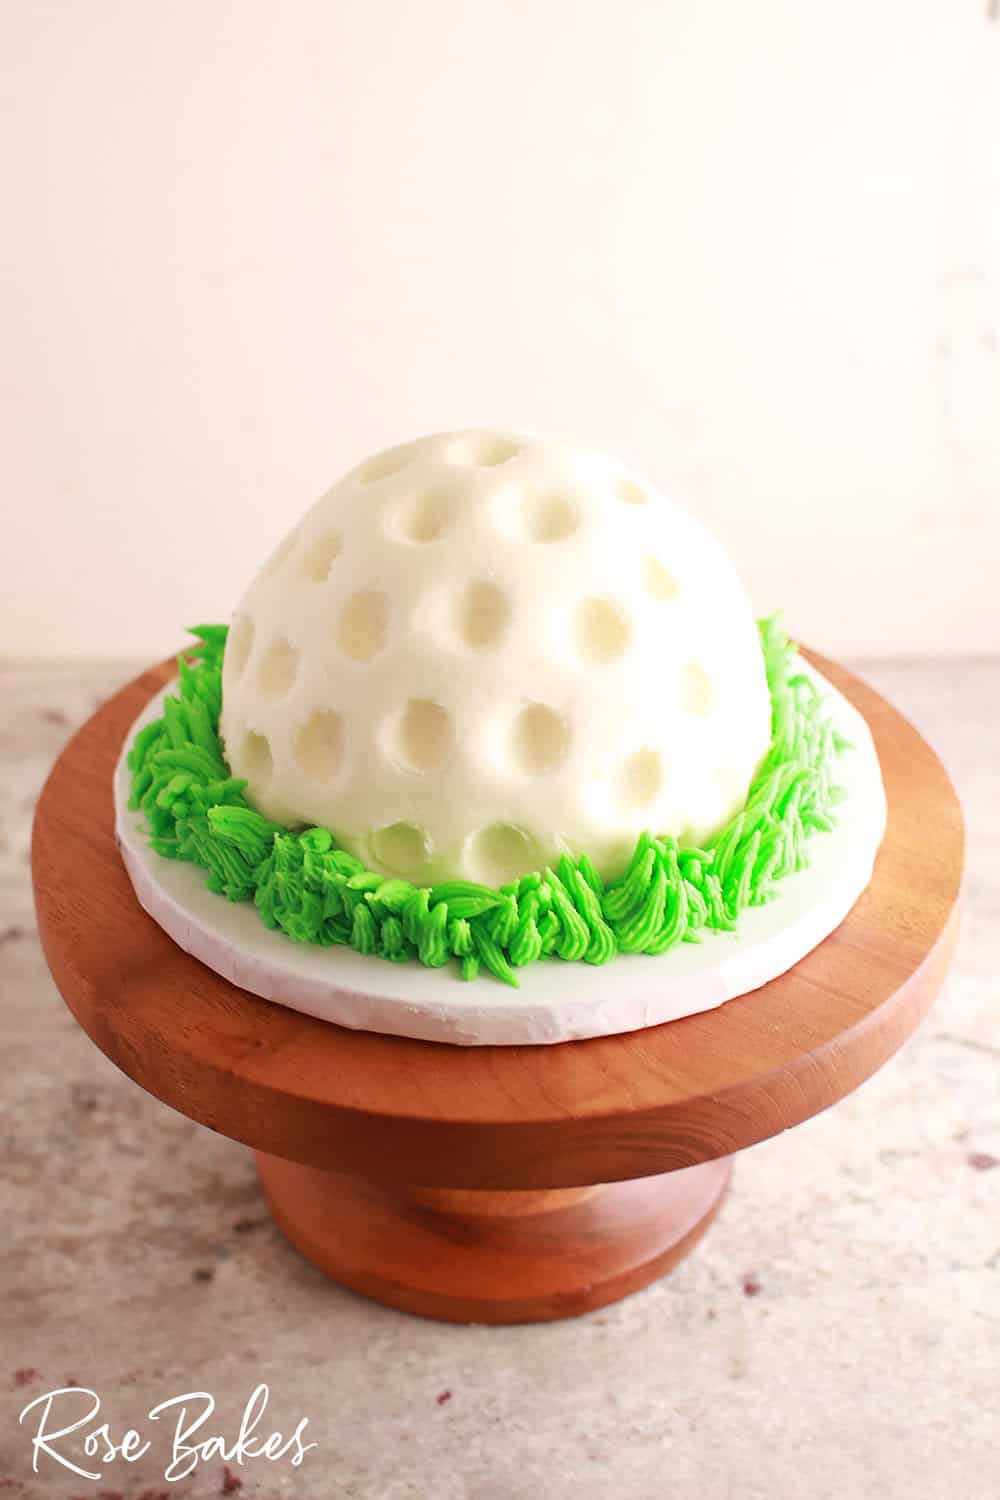
Golf Ball Cake
As far as golf ball cakes go, this little golf ball smash cake was perfect. It was a half sphere cake covered in a thick layer of buttercream, then I added divots with a ball tool to make it look like a perfect golf ball sitting in the grass.
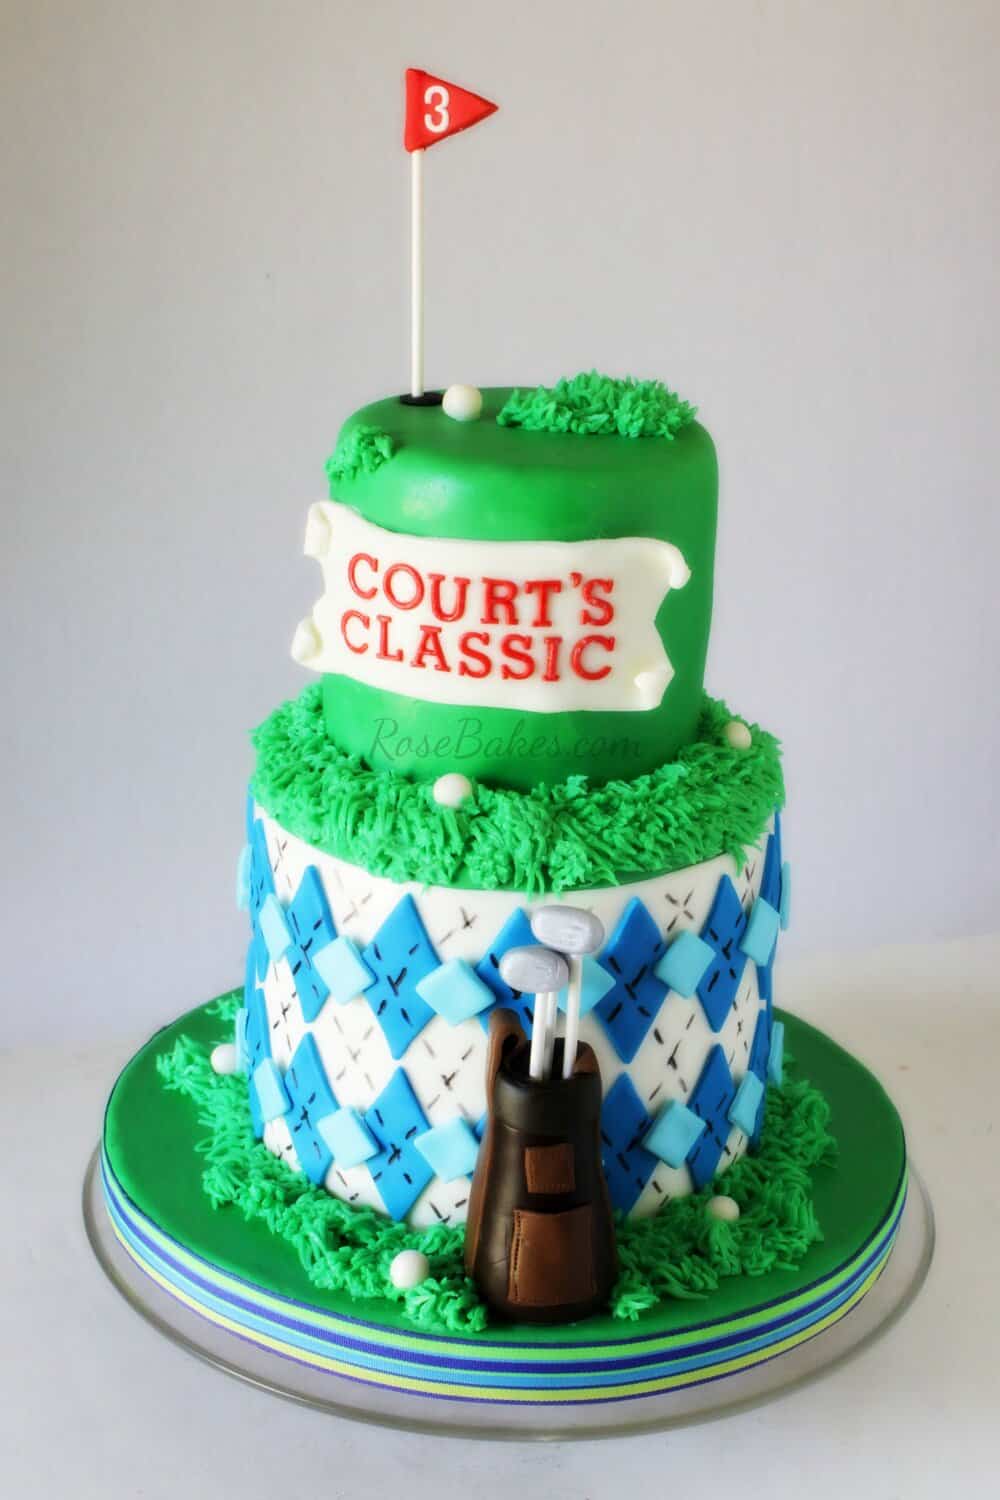
Golf 1st Birthday Cake
This is maybe the first golf-themed event I made a cake for but I loved all the details for Court’s first birthday cake. Complete with the blue argyle pattern that his mom loved and small fondant golf balls. I wasn’t sure about making golf bags out of fondant but it came together perfectly.
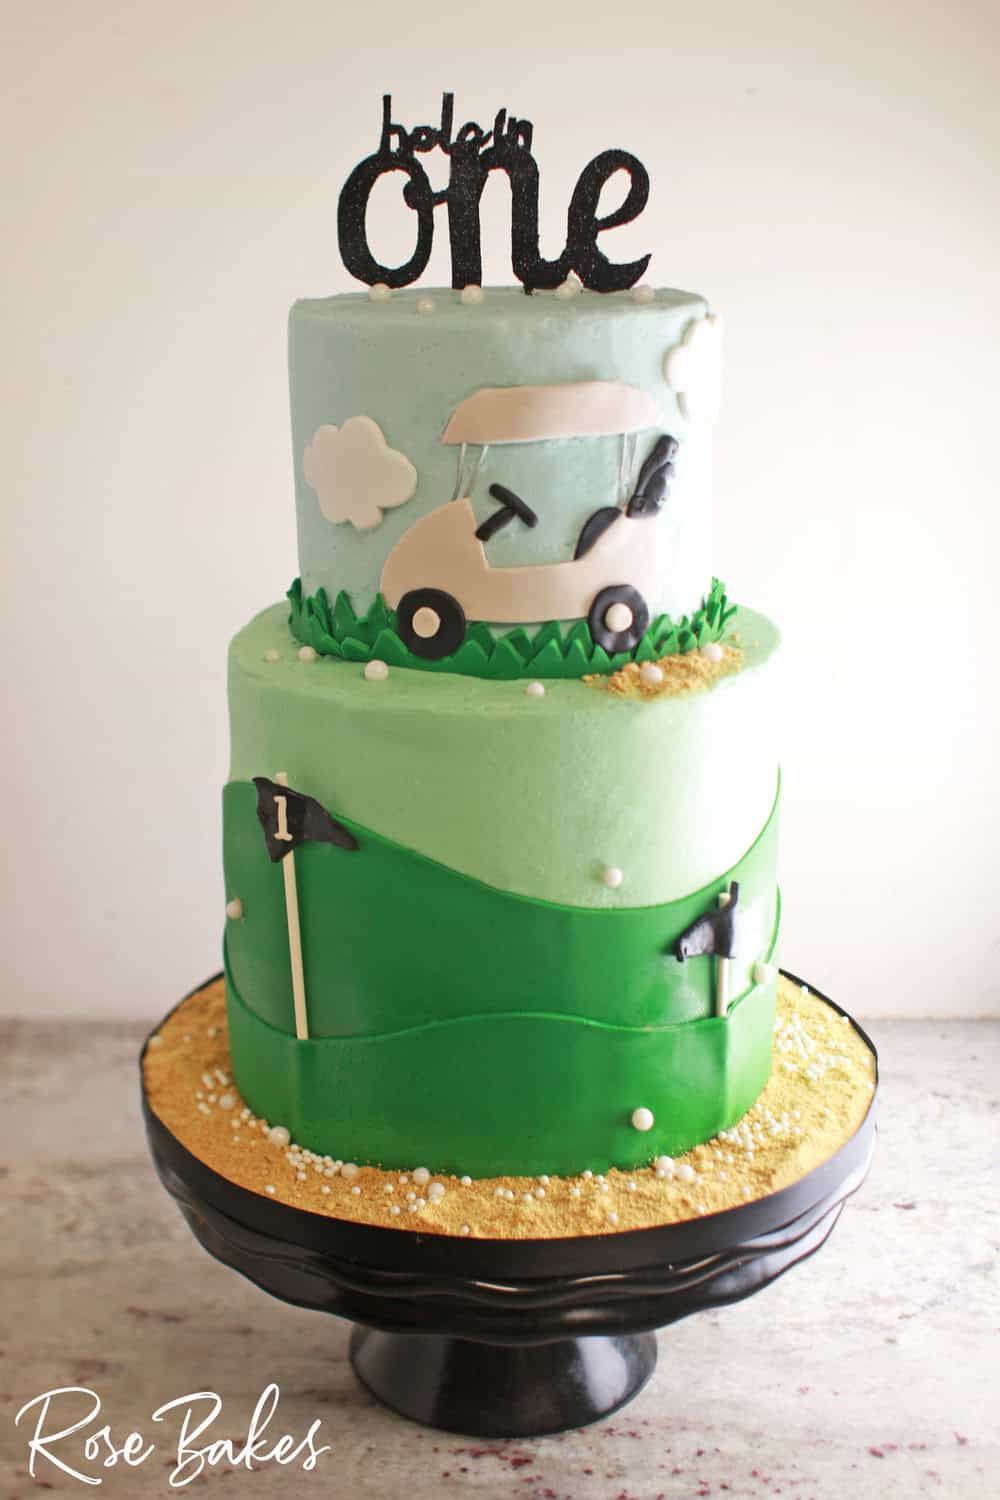
Hole in One 1st Birthday Golf Cake
My favorite feature of this “Hole in One” 1st birthday cake was the tiny golf balls all over the cake. The “sand” was graham cracker crumbs and everything else was hand-cut from fondant—from the golf cart to the hills and clouds. My son made the topper with our Cricut.
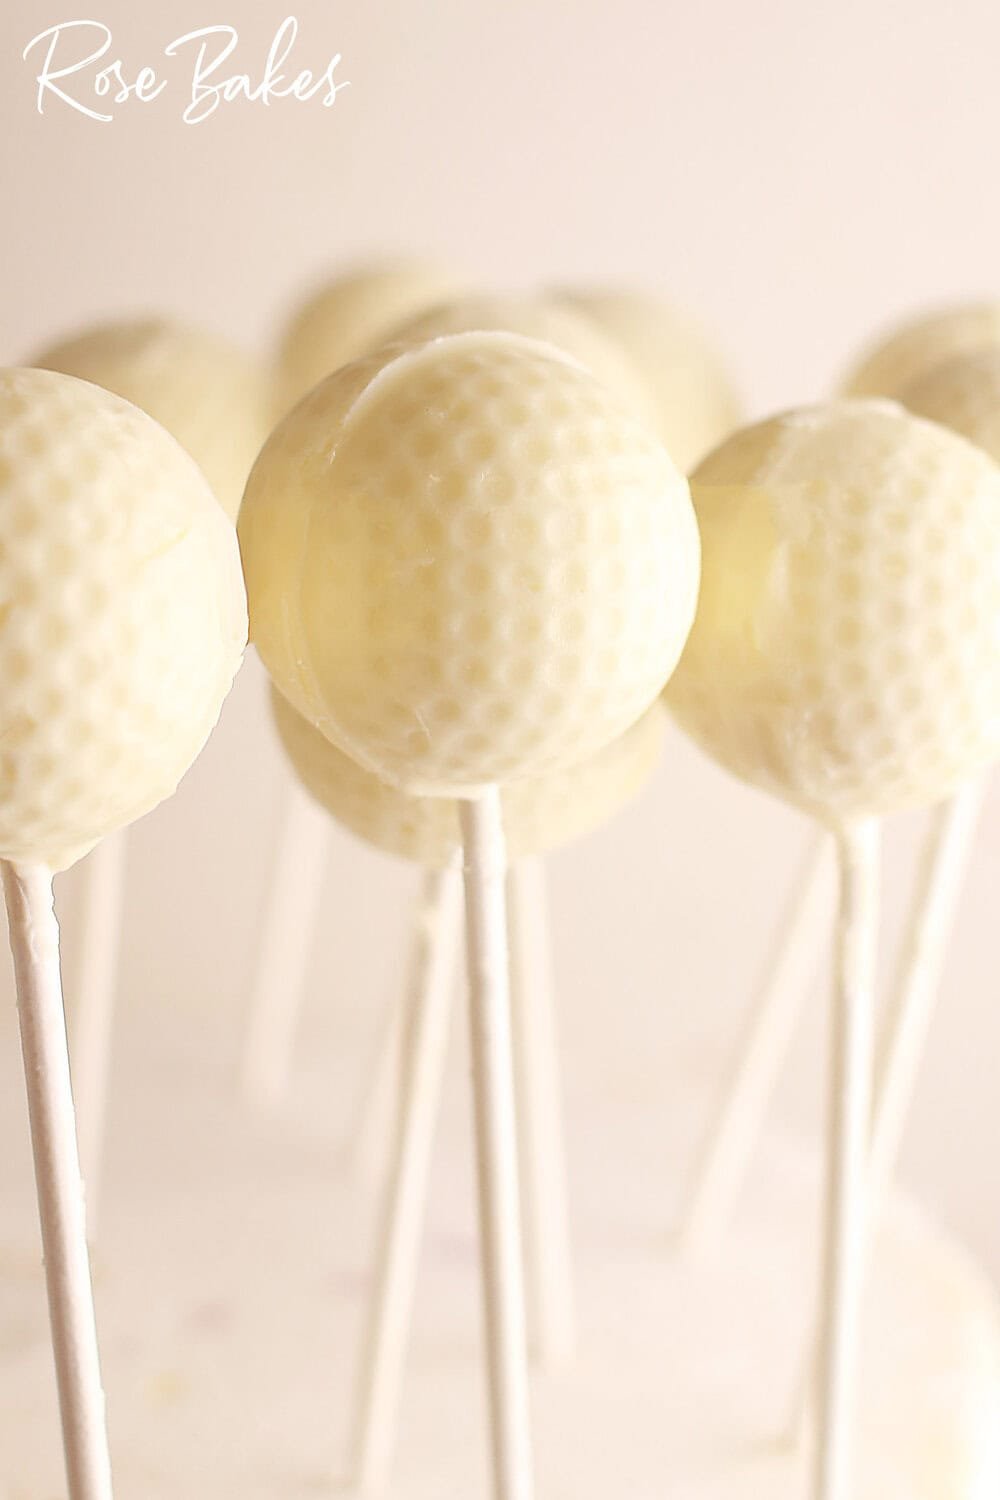
Golf Ball Cake Pops
I was a little nervous about these golf ball cake pops, but they weren’t too hard. I made the cake balls first and chilled them. To make the golf balls, I made two halves in a chocolate mold with thin layers of chocolate, then I put the cake ball in one half, added some melted chocolate to the edge, then added the other half and smoothed the seam. Easy-peasy!
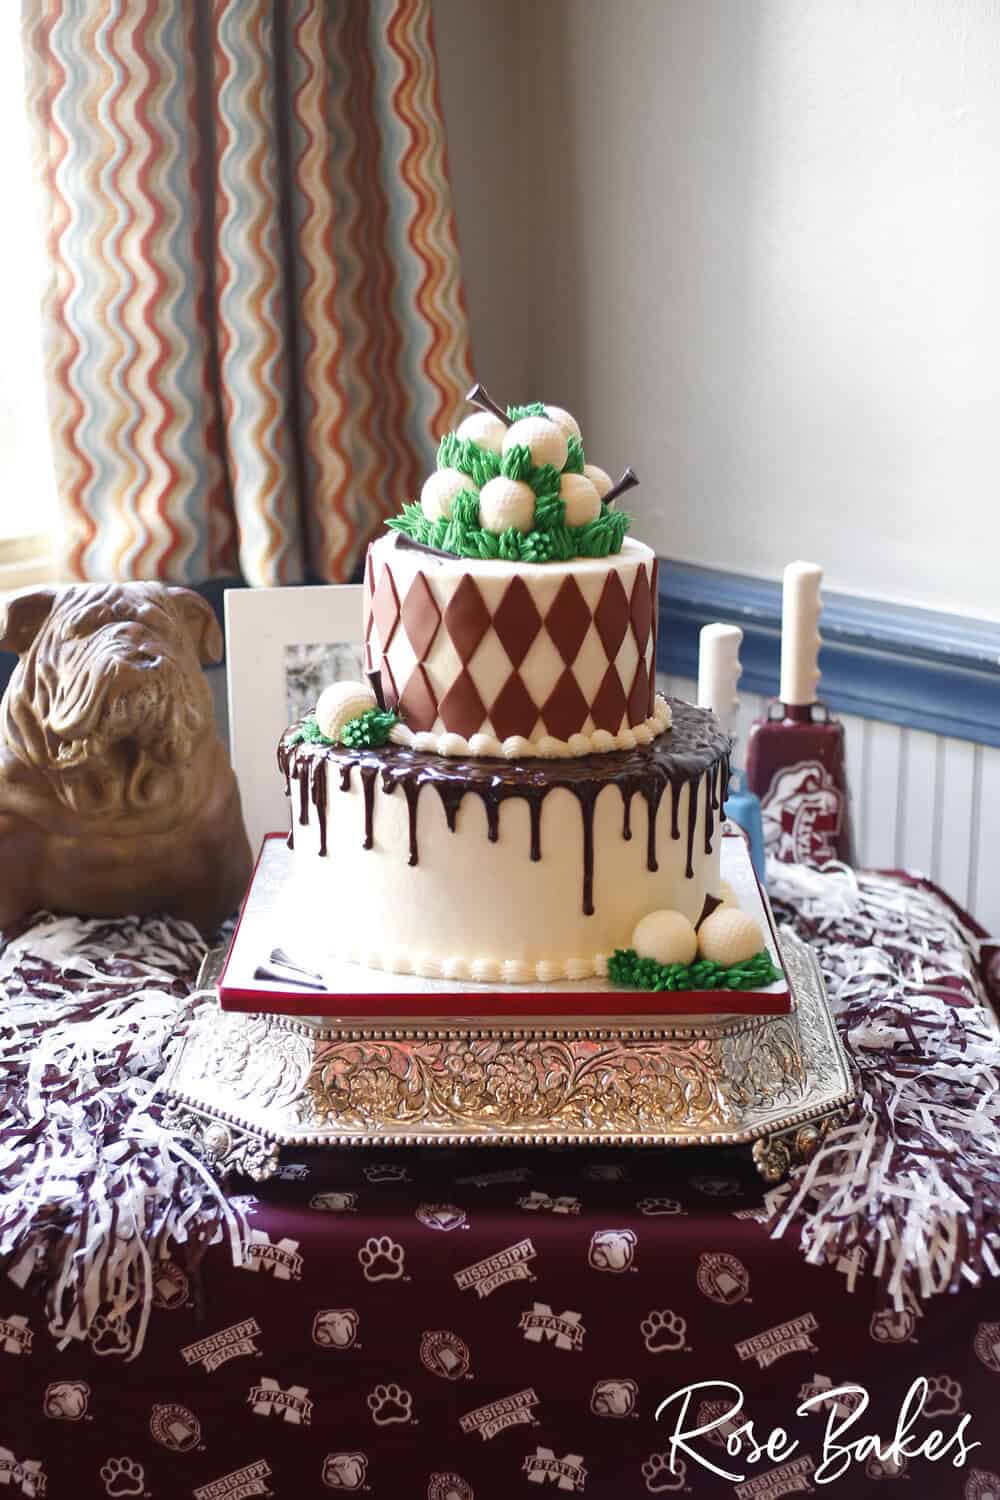
MSU Golf-themed Groom’s Cake
This cake combined the groom’s love of golf and MSU (Mississippi State University). It was decorated with the argyle MSU maroon, then I had chocolate drip, lots of white chocolate golf balls, some buttercream grass, of course, and chocolate golf tees.
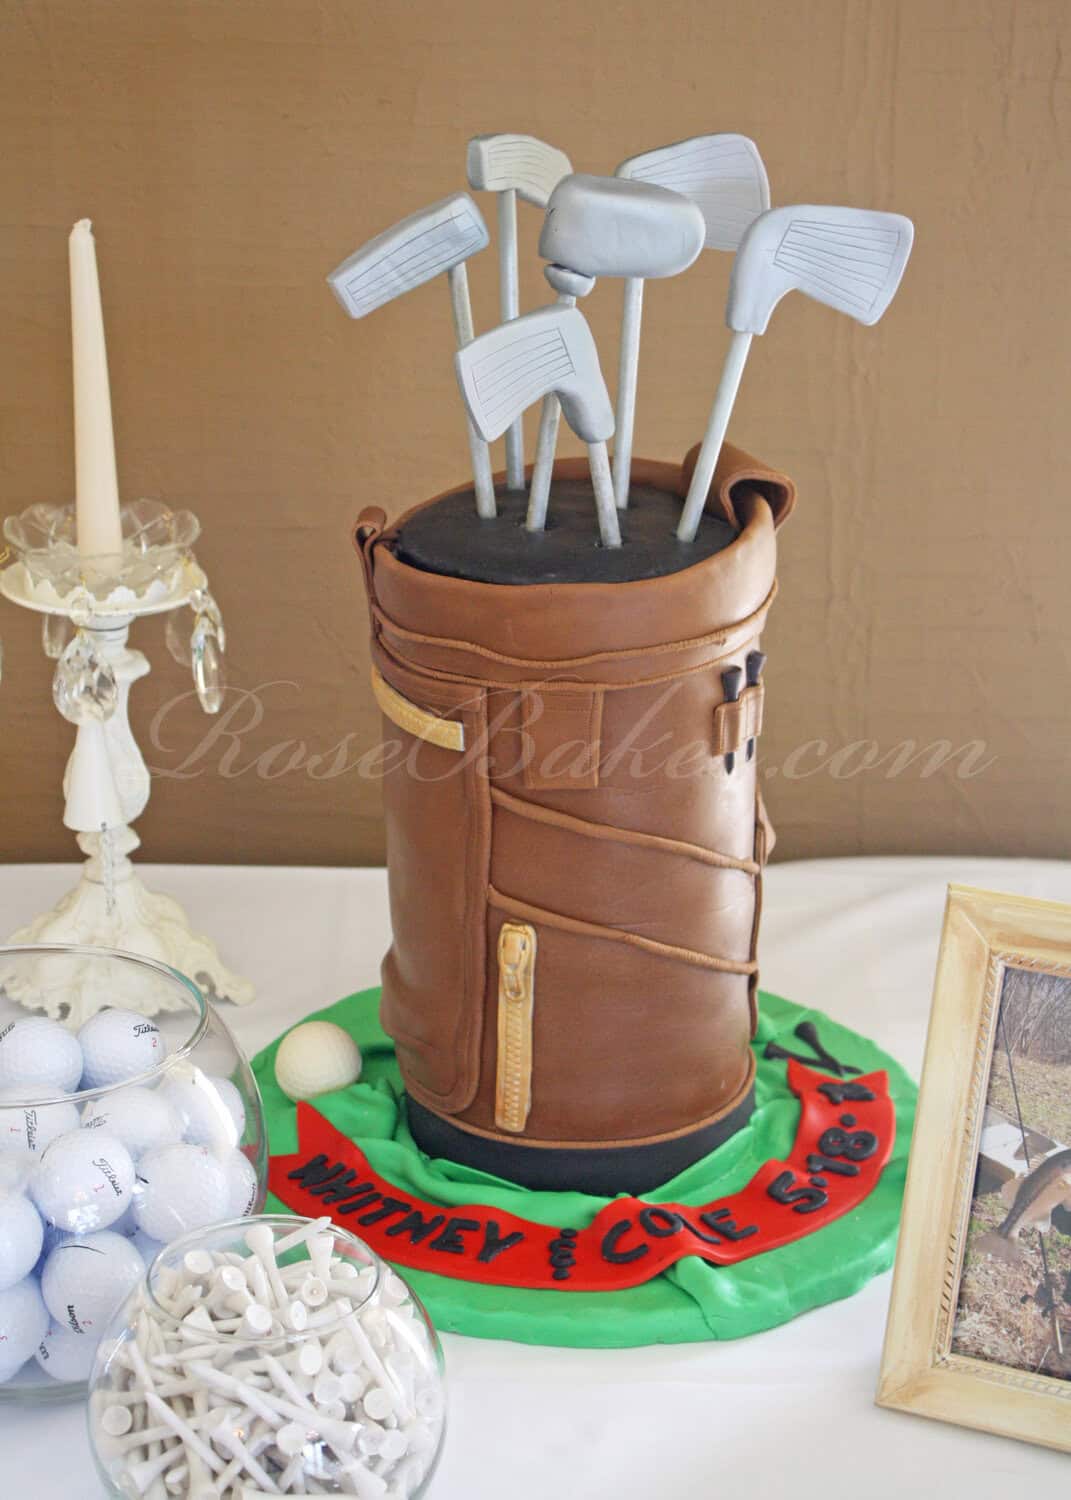
Golf Bag Groom’s Cake
This groom’s cake was extra special and it was complete with golf clubs and tees. I had shared this cake in the past, so here are all the details…
This golf bag groom’s cake was six layers of 6″ round butter cake. I assembled it by stacking two layers and adding bubble tea straws, another two layers with bubble tea straws and then the top two layers. It’s the same method I used for the rocket ship cake and I have a tutorial showing you what I mean here.
I also covered it the same way I covered the rocket ship cake – by wrapping one large sheet of fondant around the outside of the cake!
The fondant was all Satin Ice Chocolate fondant with some homemade marshmallow fondant mixed in to lighten it up (it’s really dark straight out of the bucket!).
The details were done with several tools including my pastry wheel, Xacto knife, stitching tool (from the gum paste tools set), my FMM Multi Ribbon cutter (another favorite tool!!) and of course… my extruder (for all the small round trim work).
The golf ball and tees were made with chocolate molds and I used Wilton candy melts to do them!
I used Fox Run letter cutters and a new set of numbers (can’t find the link at the moment) to do the writing on the banner.
I bought zipper molds from Way Beyond Cakes by Mayen Etsy shop to do the zippers (I love, love, love Mayen!!). I didn’t quite master using those molds, but it was one of many details so I didn’t stress over it too much!
The board was covered with green homemade marshmallow fondant and I used Satin Ice Red and Satin Ice black to do the names and date.
The golf club heads were made from Satin Ice gum paste. I made them two days before and I shaped them directly onto dowel rods. After they were completely dry and hard, my hubby painted them silver using Wilton Silver color mist.
And that’s it, I suppose! I could go on and on about details, but it would take forever to explain it all. Just leave me a comment if you have a question, okay?
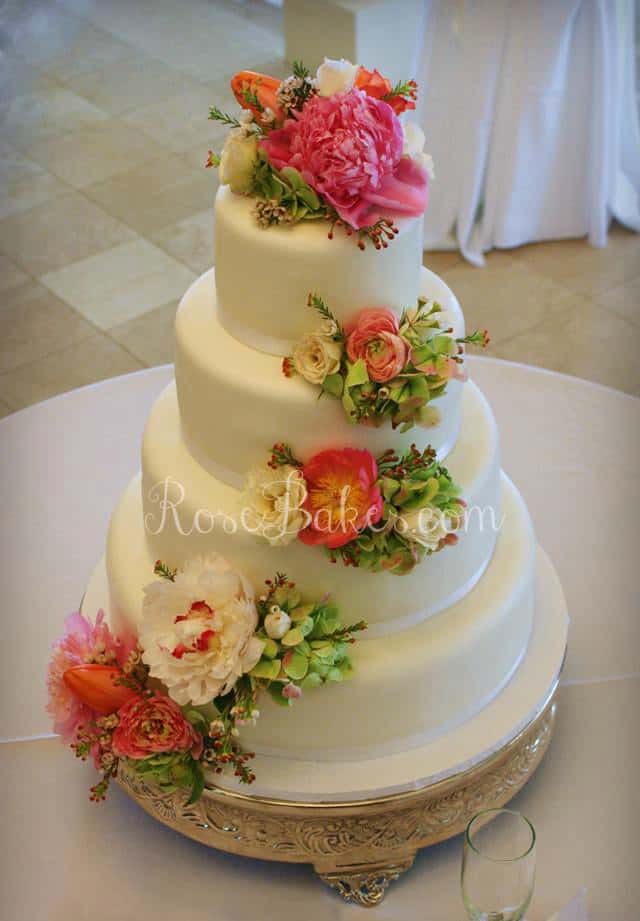
OH – and if you missed it, I shared the White Wedding cake with Cascading Flowers from the same wedding over on Facebook a few weeks ago! There are more pictures here! And be sure to check out this Golf Ball on the Green Birthday Cake!


Rose, Rose, Rose…. I am speechless…You may have outdone yourself on these cakes!! I was reading how you made the golf bag and looking at all the detail, and all that could come out every time i looked at a picture was holy #%*!!!!
Are all those flowers in the wedding cake gum paste flowers?!?! They look so real and gorgeous. That golf bag is insanely good, really, really well done. You should be so proud of yourself, Rose. You’re a rock star cake decorator!!
Kim
Thank you so much Kim!! On the wedding cake – those are real flowers and I have to give total credit to the florist (Brenda at Moreton’s Flowerland in Natchez, MS) for that stunning cake! I delivered a plain white cake with satin ribbons and she made it amazing with her flowers!!
I always have such a hard time getting the fondant to not “wrinkle” down the sides. Do you have any tips for me? Both cakes are fabulous!!!
It sounds like you’re rolling it too thin and/or using it while it’s too warm. Do you use homemade or store-bought?
I thought that making it thinner would make it easier to handle (not so heavy). And, I usually use store-bought fondant to make it easier and quicker. I’ve made the marshmallow fondant before, and I felt like it was pretty time consuming (unless there’s an easier way to not hand-knead it). Thanks for your help!!!
Your timing is amazing, Rose. I am making a prescription bottle grooms cake next week, 6″ diameter x 9″ high. Your detailed notes make me feel much less stressed about the endeavor!
Jan
Oh great!! So happy to hear it!!
Wonderful job Rose! 🙂
Thank you so much Anne!! I’m always in awe of your stunning cakes 🙂 [Insert squeal… Eeeeek!!! Anne Heap commented on MY blog]
Great job Rose! You are really generous! R
Rose you are truly a talented artist and we are blessed that you share your talents with us. I don’t know why you doubt yourself, when you have proof in all of your pictures of how well you have come along. Thank you again for sharing.
Rose,
I have one of these standing golf bag cake request. For the top of the bag, did you wrap a piece taller and fold it down or add a folded piece of fondant to get the rolled edge on the top? Great job, BTW!
Lee
It’s been a couple of years, but I’m pretty sure I used a taller pieced and folded it down toward the inside. Hope that helps! 🙂