How to Make a Number Cake Topper from Candy Melts or Almond Bark
Make a sturdy DIY number cake topper in under 15 minutes using candy melts or almond bark! This easy step-by-step tutorial creates beautiful, edible cake toppers that are perfect for birthdays and special celebrations.

I have a really fun new tutorial for you that comes in SO handy when you need a last minute or really fast number topper. I’ve only used this technique a handful of times, but when I need it, it doesn’t fail me! Today I’m sharing How to Make a Number Cake Topper from Candy Melts or Almond Bark.
Generally speaking, I make the numbers to top my cakes with fondant or gum paste. I have an entire post here sharing different methods I use to do that. But if you’re doing fondant or gum paste numbers, you have to plan ahead because they need time to dry!
However, sometimes I need to make a number in a hurry – and I need it to not be fragile. Awhile back when I mentioned that one of my gum paste numbers had broken on the way to deliver a cake, a reader suggested I try making numbers from candy melts.
After trying it out, I can tell you that this is a great way to make it and be confident that it’ll hold up for you.

It sounded like a fantastic idea, so I tried it out and voila, it worked like a charm! Now I can make a number topper for a cake in less than 15 minutes and they’re ready to go!
Instead of candy melts, today I used almond bark. Both work equally well – so use whatever is most convenient for you!
I finally figured out a few things that work really well, so let’s get started…
At the end today, I sprinkled disco dust on this number to really make it sparkly and fun, but you could easily use colored candy melts to match your cake and keep it a solid color.
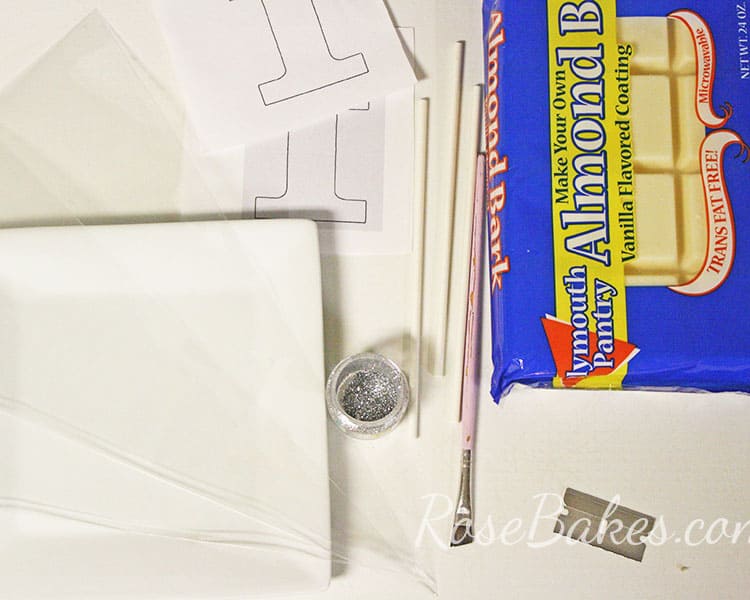
Here’s a list of what I used:
White Almond Bark (you could also use candy melts, candy coating or white chocolate)
Disposable Icing Bags
Straight blade (or an Xacto knife)
Lollipop sticks (or floral wire for curvy numbers)
Wax Paper
Template for number (reversed)
Disco Dust, Corn Syrup & Paint Brush (optional, if you want it to sparkle)
Now the tutorial:
How to Make a Number Cake Topper from Candy Melts or Almond Bark
Step 1:
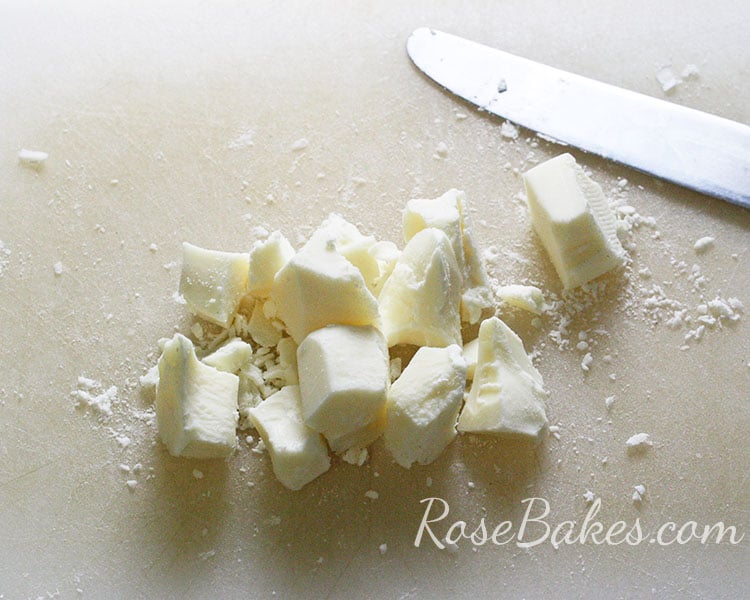
Chop up a small amount of almond bark – I started with a 2 ounce block. Obviously skip this if you’re using candy melts 😉
Step 2:
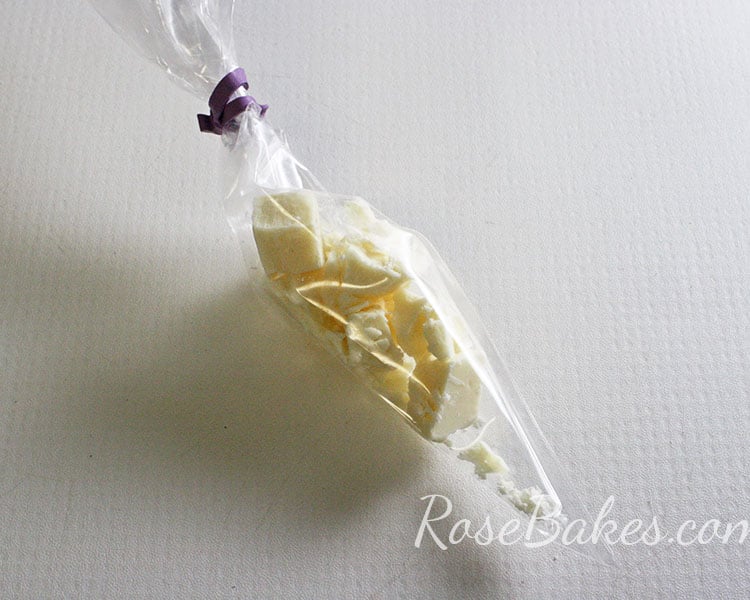
Place the chopped almond bark or candy melts into the bottom end of a disposable pastry bag. I used a bag tie on the end, but you don’t have to. You could also use the clips I talk about here.
Note: Do not cut the end off – leave the tip intact.
Step 3:
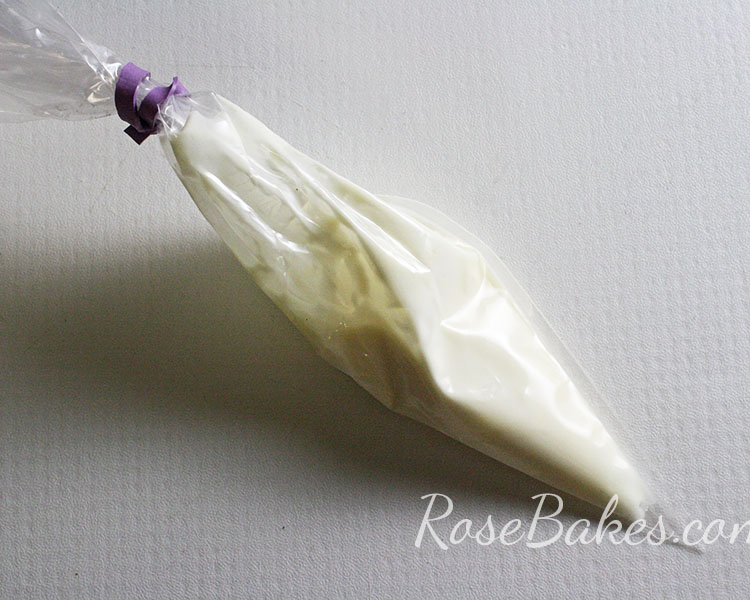
Place the bag in the microwave and melt in 30 second intervals until the almond bark/chocolate is completely melted.
Step 4:
Using a sharp blade or scissors, snip the very end off the bag – careful to only take off a tiny bit.
Step 5:
Using a reverse image of the number you want to make, lay it on a flat surface and cover with a small piece of wax paper. I found a number online, flipped the image in Microsoft Word, the printed it approximately 3″ tall.
You could also just sketch the number you want to do.

Step 6:
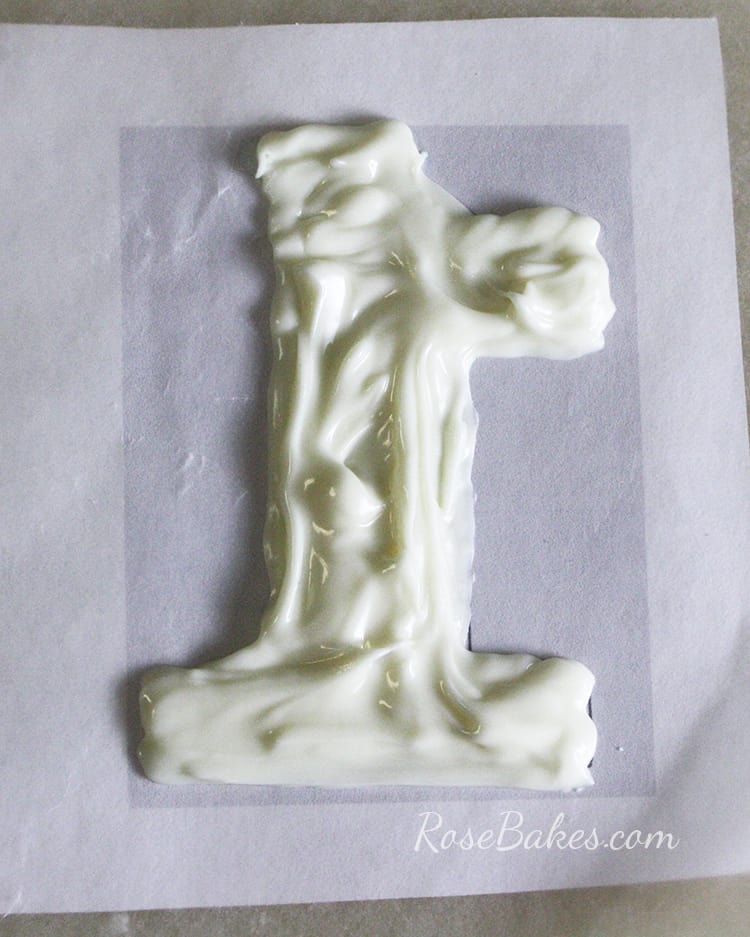
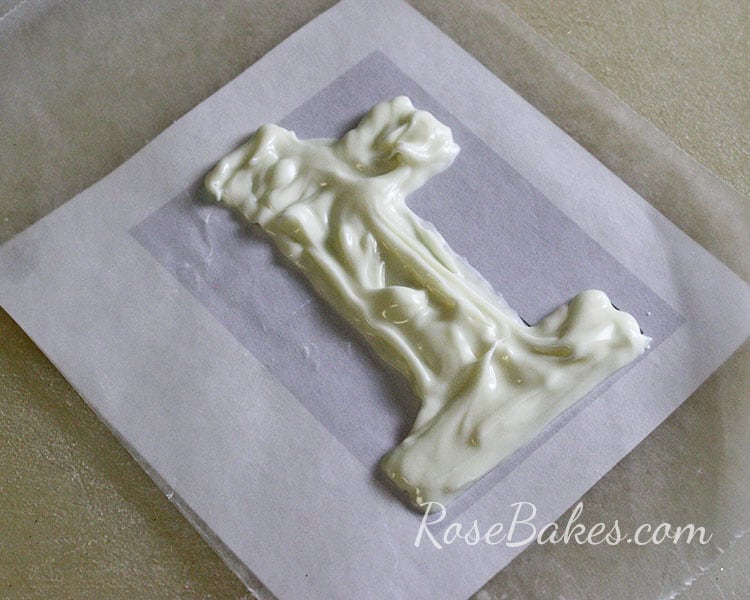
Place the number on a small surface you can move. I used a small cutting board – you could also use a small plate. Trace the number with your melted almond bark or candy melts, then fill in all the spaces. Gently lift and tap the cutting board (or plate) on your work surface to settle the chocolate and any gaps.
Note – this doesn’t have to be perfect! You can trim it and clean it up later!
Step 7:
Lay a lollipop stick in the still melted chocolate. If you’re doing a curvy number (such as a “3”), use a piece of wire that you can bend into the shape instead of a lollipop stick.
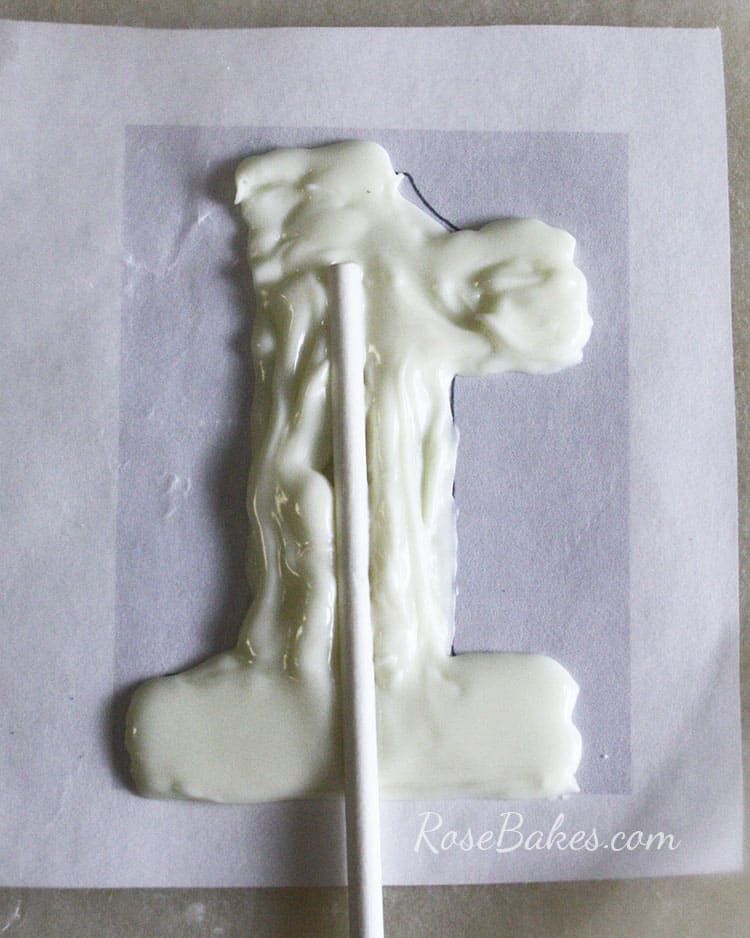
Step 8:
Pipe more chocolate over the top of the lollipop stick (or wire) to secure it. These numbers won’t necessarily be all that pretty and smooth on the backside, but if you’re in a hurry and desperate or don’t have super picky clients – this shouldn’t be a big deal!

Step 9:
Refrigerate the number for about 10 minutes to set the chocolate, then take it out and gently lift if off the wax paper.

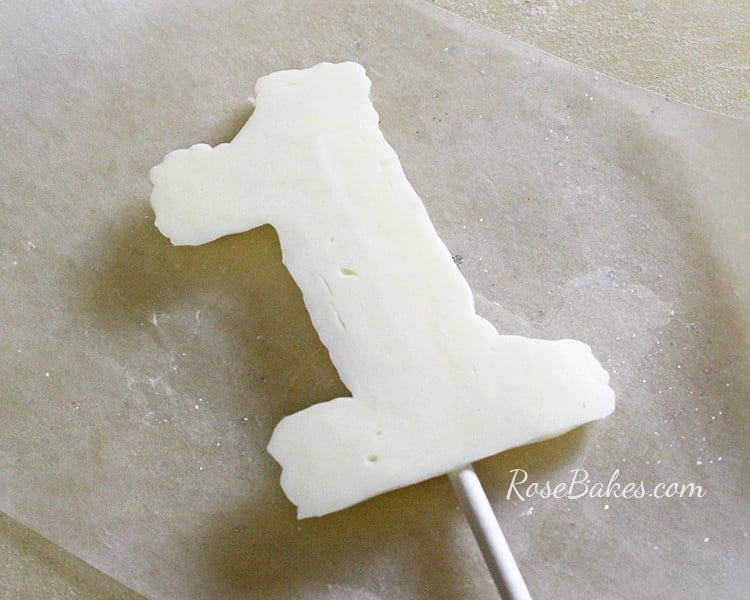
Step 10:
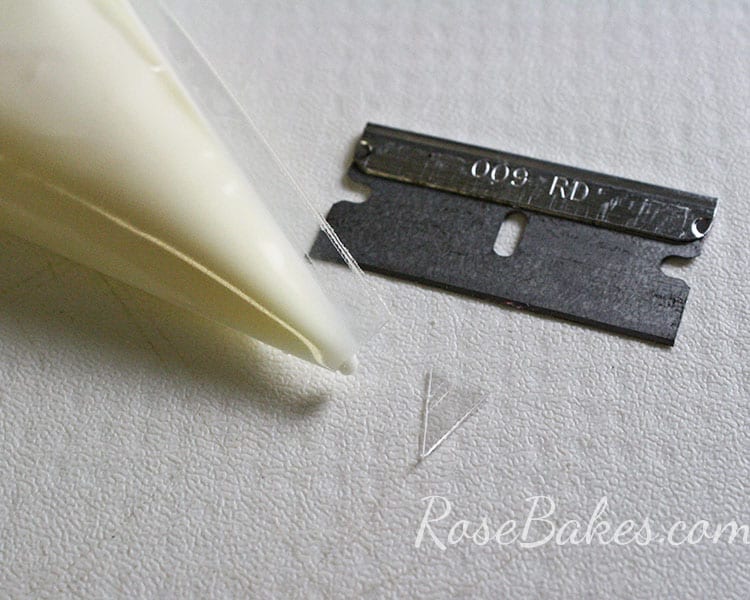
Using a single edge blade or an Xacto knife, trim the edges of the number to clean it up.
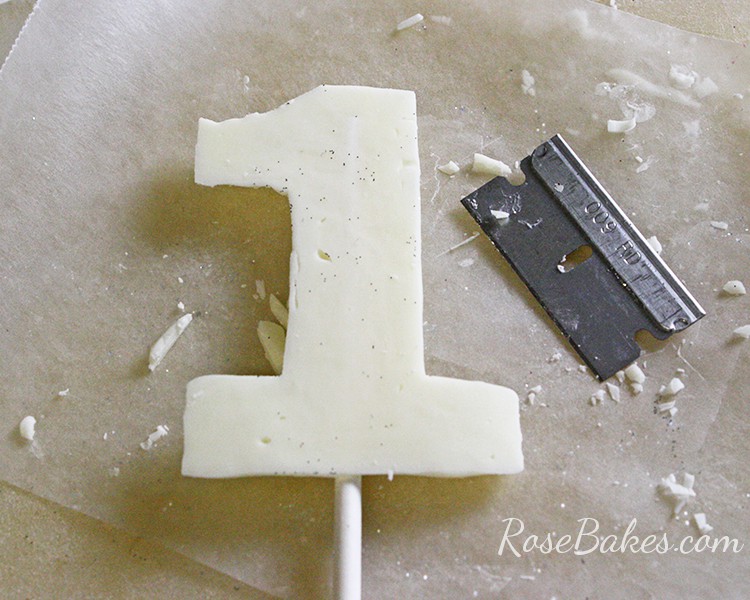
If you used a solid color to match your cake, you can call it “done” right here! This number will stand up immediately, doesn’t need to dry/harden overnight and won’t break easily!
However, if you want to go a little farther… here’s how I added some bling to my number “1”!
Step 11:
Put a small amount of corn syrup in a bowl and with a paint brush, coat the surface of the number. Then dust it with disco dust – using the paint brush to spread it out and cover any spaces. The corn syrup will still be sticky for awhile but I went ahead and put the topper on the cake immediately with no trouble.
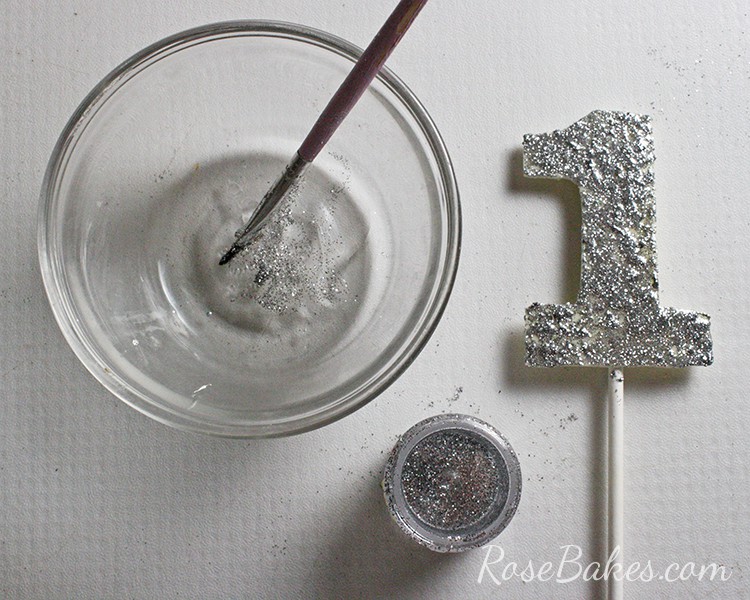
Allow it to dry for a little bit and it’s ready to use!
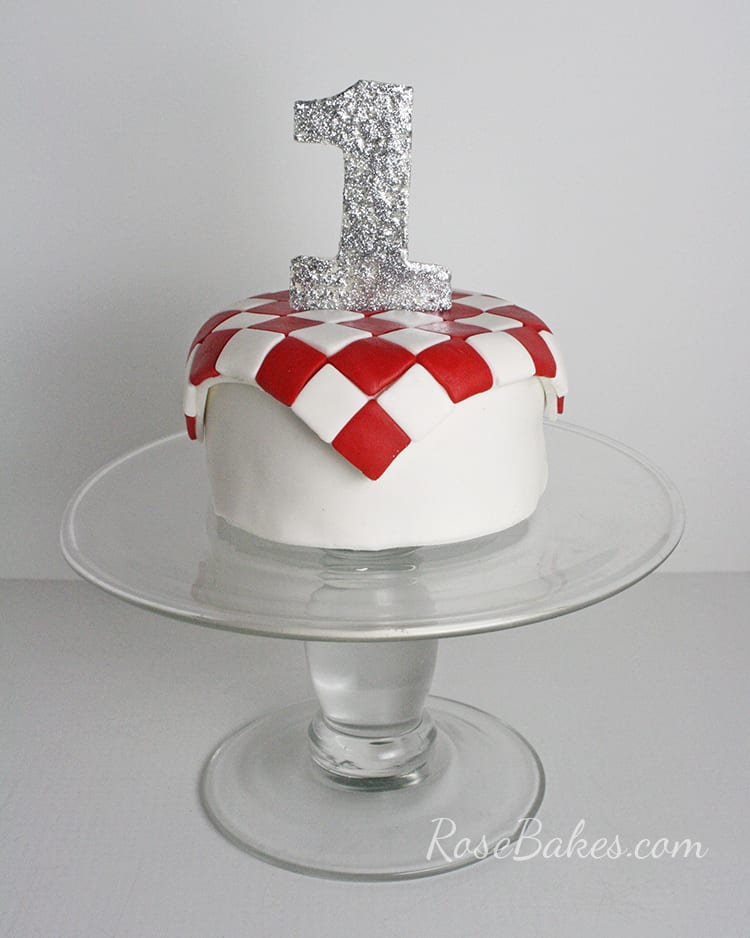
And that’s that!! If you’re interested in the tutorial for the checkerboard blanket – check it out here. Have questions? Leave me a comment!
Happy Caking!
Rose


Wow….its like you read my mind! I have a 1st birthday cake to finish by tomorrow and I just remembered I dropped the ball on making the topper from fondant. This is perfect!
Thank you as always for your great tutorials..
Awesome!! Thank you for reading!
Your sites is Beautiful. I love the Cakes
Thank you!
Beautiful blog
Love your tips! x