Easter Eggs Dyed with Beets
Make some gorgeous pink (or purple?) Easter Eggs Dyed with Beets using this easy, all-natural recipe. You’re going to love these pastel eggs with unique patterns and markings and have so much fun making them with the kids!
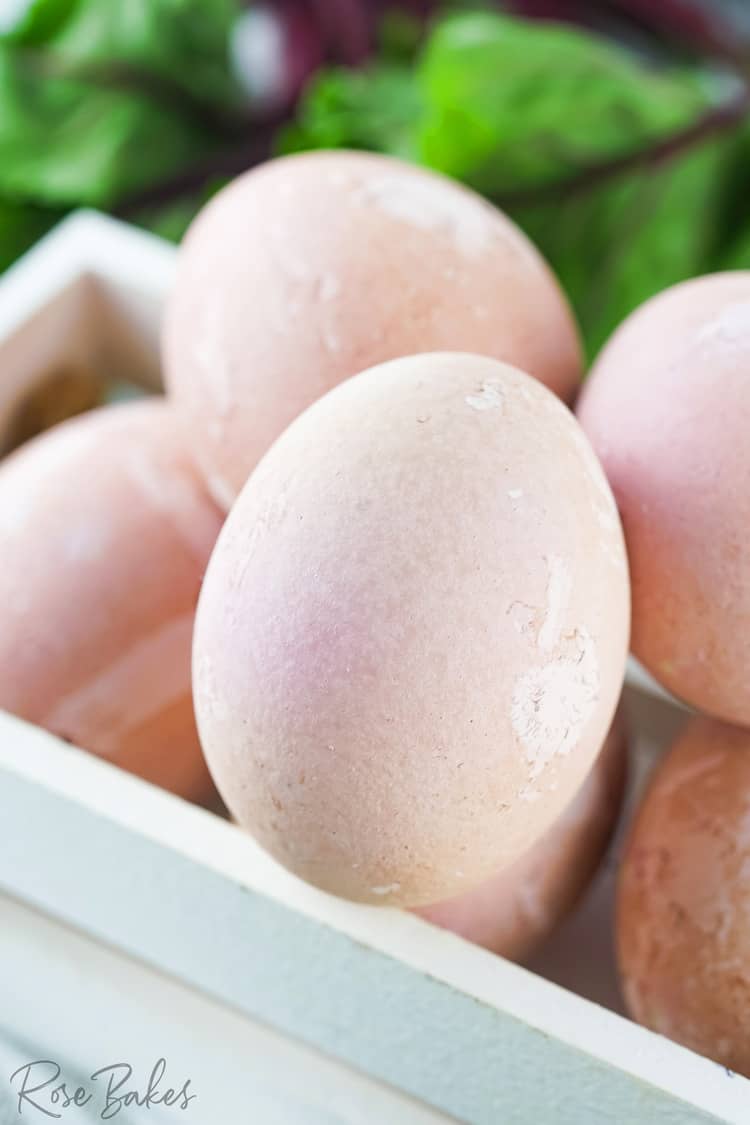
Table of contents
Easter Eggs Dyed with Beets
With so many allergies and food sensitivities in our lives these days, all-natural options for food coloring are becoming more and more popular. By making Easter Eggs with natural colors, we can reduce our exposure to artificial colors and dyes.
These Easter Eggs Dyed with Beets are the second in a series I’m sharing with Naturally Dyed Easter Eggs. These beautiful eggs are all made without food coloring!
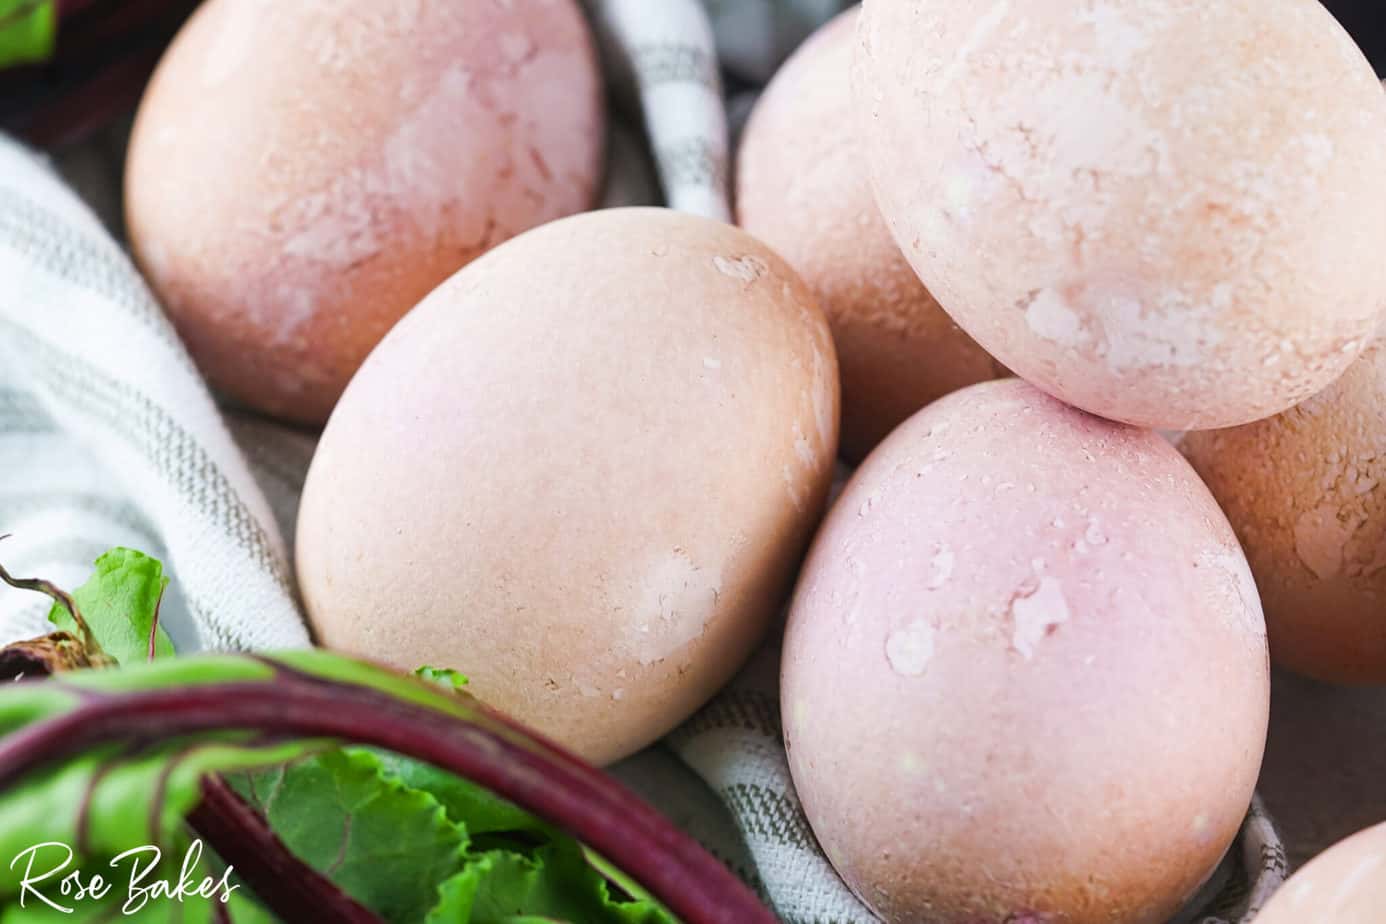
Aren’t they so pretty? I love the pastel colors so, so much.
To create these all naturally colored eggs, you’ll only need a handful of basic pantry staples plus something for the color (teas, blackberries, beets, ground turmeric, etc.).
Ingredients
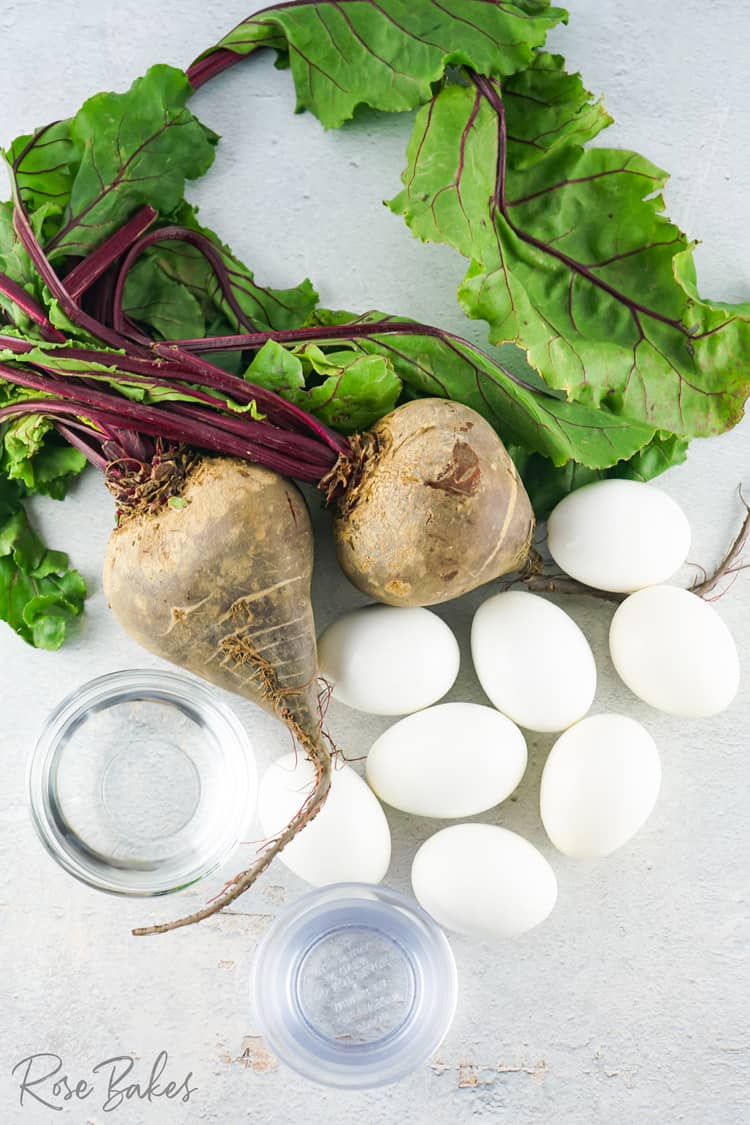
Boiling Water – Be careful when handling this hot liquid.
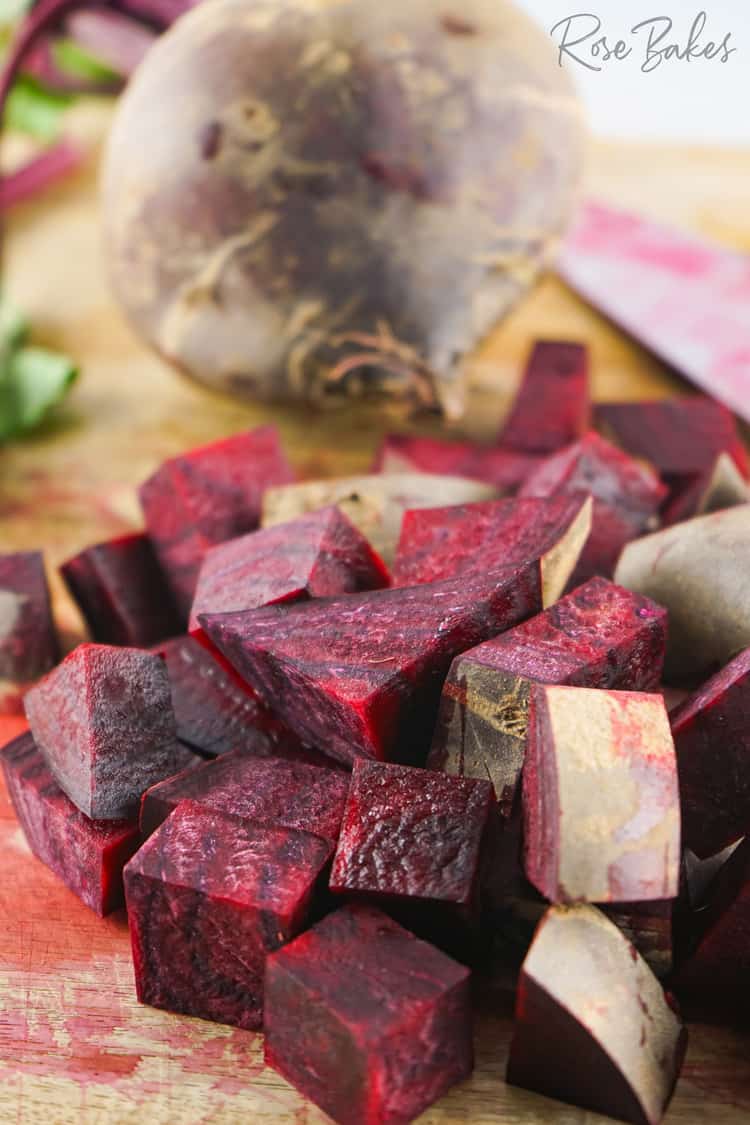
Large Beets – I used large, fresh beets and chopped them up. But you could also use beet juice from several cans of canned beets if you like. The effects will be very similar if not identical.
White Vinegar – the acid in the vinegar helps the color bind to the eggshell. Without the vinegar, the colors will be very faint.
Boiled Eggs – boil the eggs ahead of time and allow them to cool to room temperature so you can handle them. I share how I make boiled eggs in my Instant Pot here.
Equipment
You don’t need anything special to make these natural dyes.
- Large stockpot to boil the water and the beets.
- Strainer
- Knife – for cutting the beets.
- A large glass bowl for soaking the eggs
- Slotted spoon
How to Make Easter Eggs Dyed with Beets
- Before you get started, thoroughly scrub and trim the beets. Then roughly chop the beets into approximately one-inch cubes.
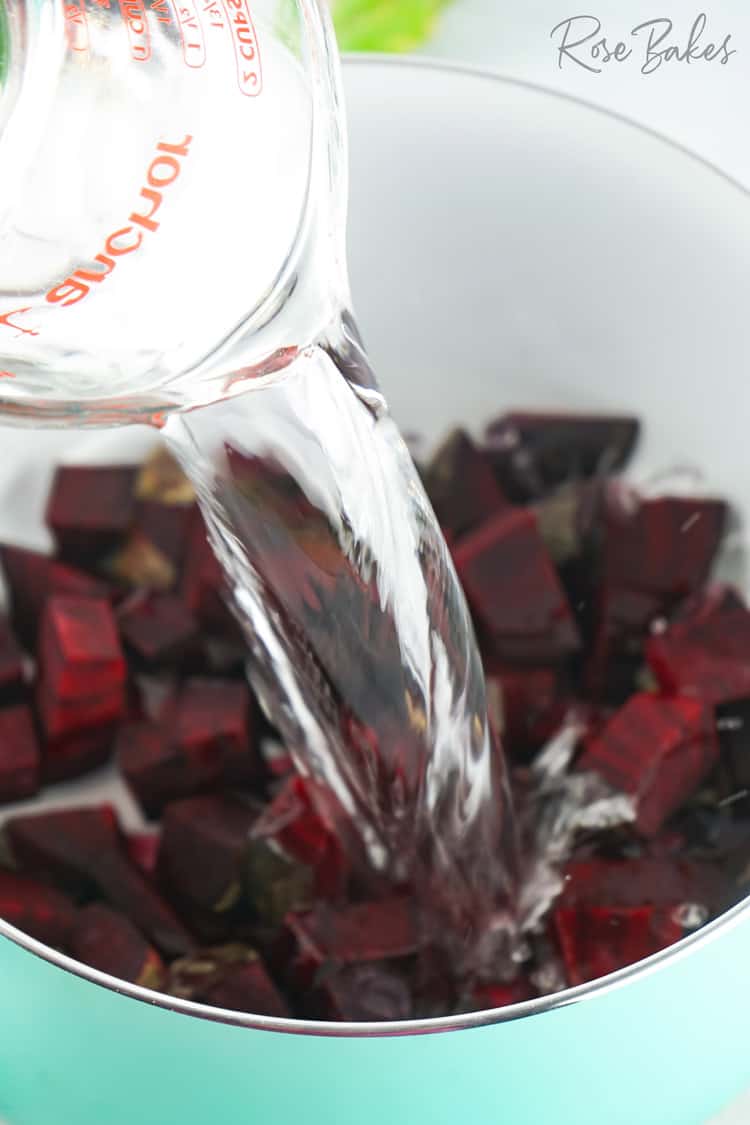
- Add the beets and water to a large pot, bring it to a boil and let it simmer for about 30 minutes.
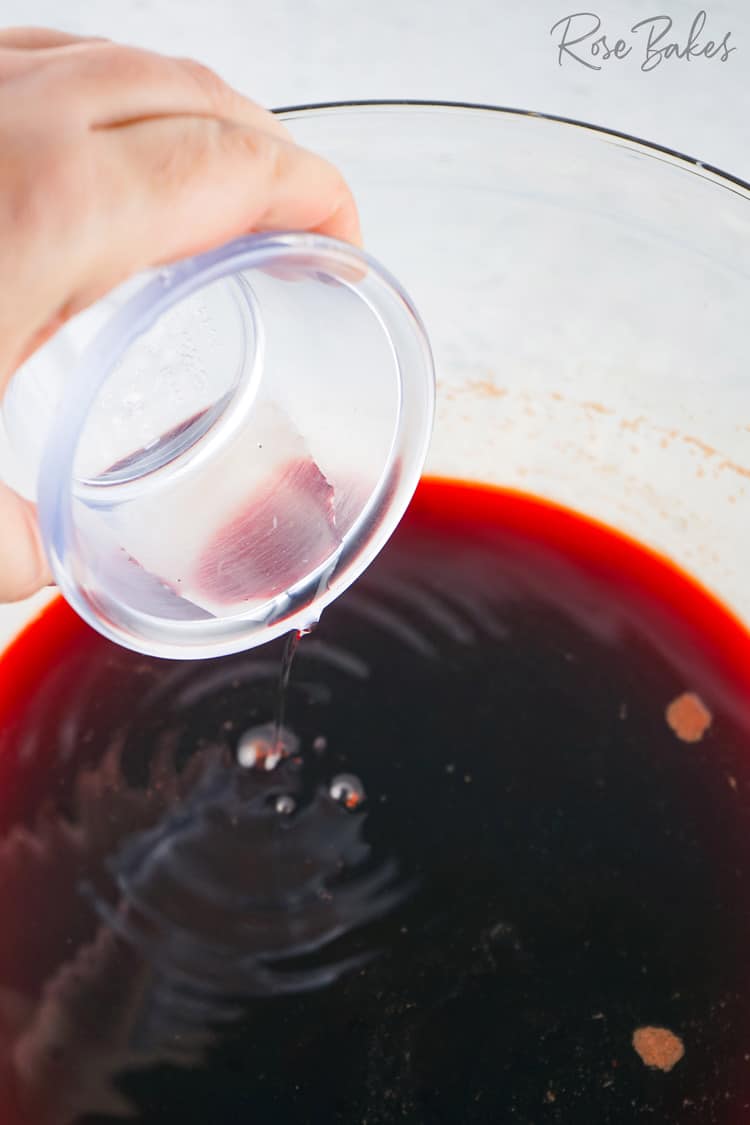
- Strain the liquid into a large glass bowl and stir in the vinegar. If you like to recycle, use the beet chunks for a side dish or compost.
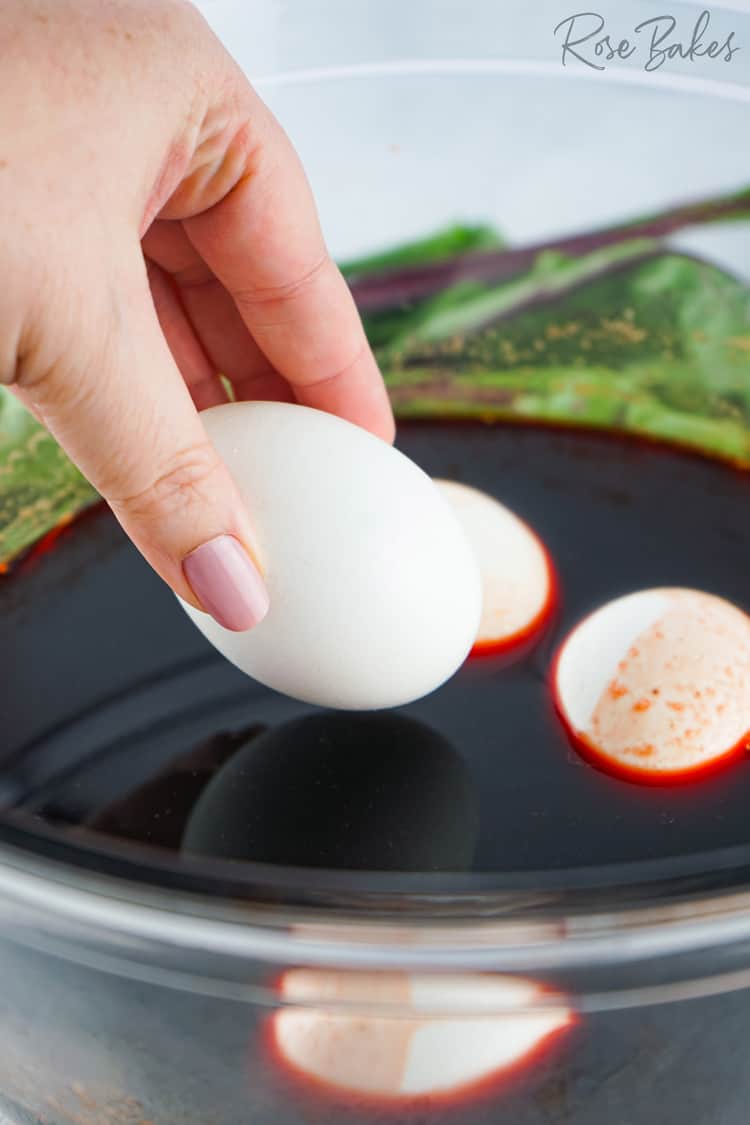
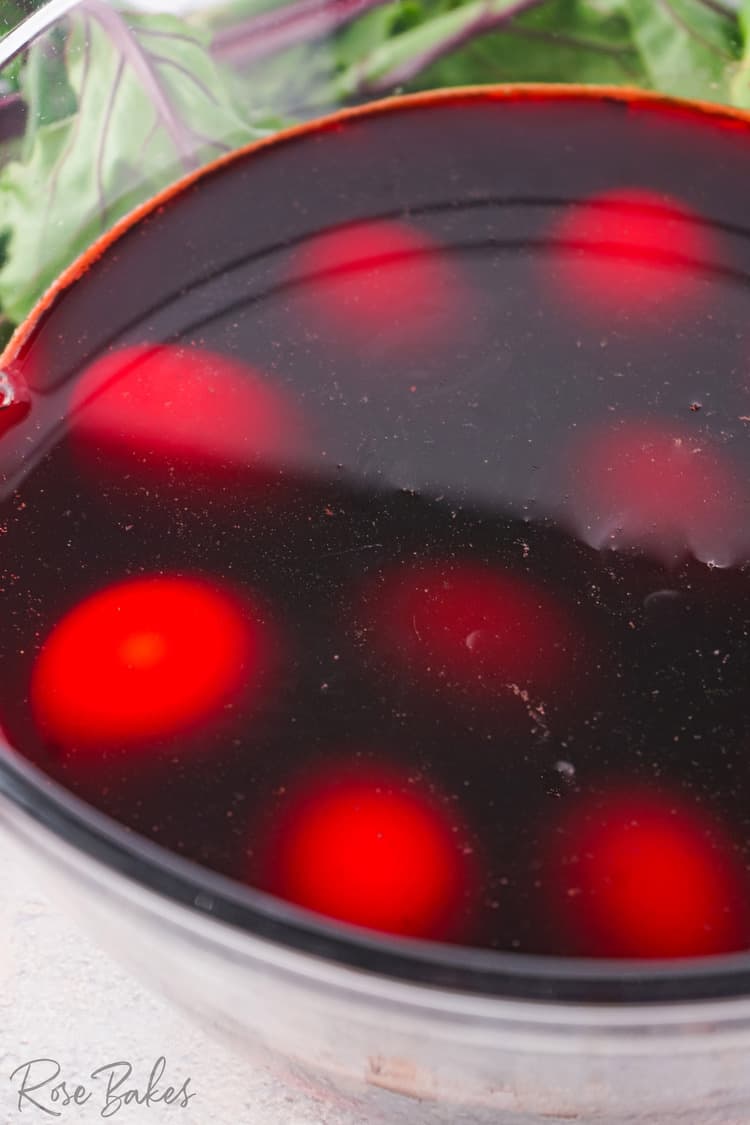
- Add your eggs to the liquid, making sure they’re completely covered by the beet dye.
- Leave to dye until the desired shade of color is reached. I left them for about 8 hours.
- Remove the foam from the top of the bowl or dish you used to dye the eggs and discard it.
- Gently remove the eggs from the dye bowl and place them on paper towels to dry. If they have some stringy or foamy substance stuck to them, use a cup of water and let a gentle stream run over it to remove some of it.
Because I like to be authentic, I’d like to mention that before sharing this recipe, several popular recipes from around the internet were tested. And it’s a little upsetting to note that the eggs in the photos looked nothing like the eggs that I ended up with.
Most of the photos for other recipes showed much more vibrant colors than the recipes actually produced. But if you follow this recipe, you will get eggs that look exactly like these photos.
Pro Tips
- It’s absolutely IMPERATIVE that you scrub your beets and trim them before slicing them and boiling them. If you don’t, scrub them really clean, the eggs will have brownish-green tint to them.
- If you want a shortcut for this recipe, you can boil the eggs in the pot with the beets. I haven’t tested this myself but I’ve read that it works just as well. If you choose to do this, there’s no need to follow the rest of the dying process in this recipe.
- To dry the eggs, place them on paper towels. After a few minutes, flip them over and remove the damp towels so they can fully dry.
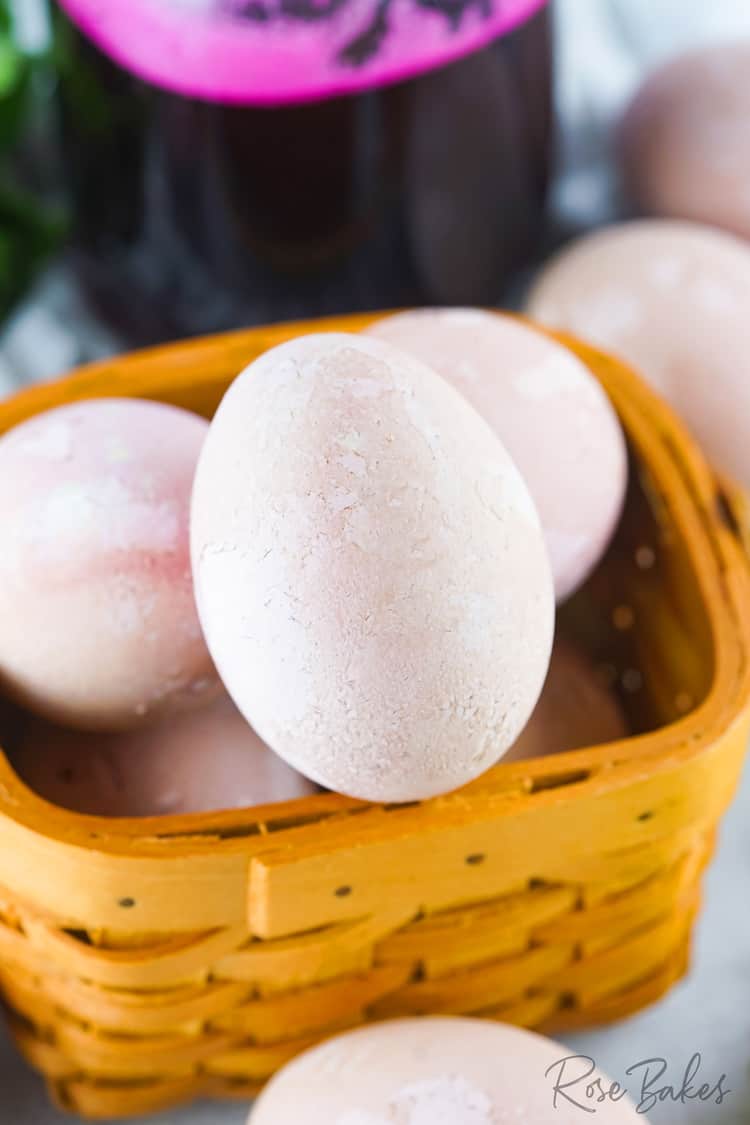
- With this natural dying process, the eggs will not be perfect. Each egg will have it’s own unique design and color pattern. For the most part, these looked to be varying shades of pastel pink, but some also had a slight purple/violet hue to them. It’s really fun to see how each turns out.
- These eggs were left in the dye for around 8 hours. You can play around with the times you want to leave them in the dye and you’ll get different shades of pink.
- This concentration of beet dye worked great for a dozen eggs. The dye can be reused for more eggs than that but it might not be as potent.
- If you have cracked eggs after boiling them, I don’t recommend dying them. Consider those a snack or save them for another recipe (like my favorite potato salad).
- I used store-bought white eggs to make our Easter eggs. If you use brown eggs, you will get an entirely different palette of darker colors.
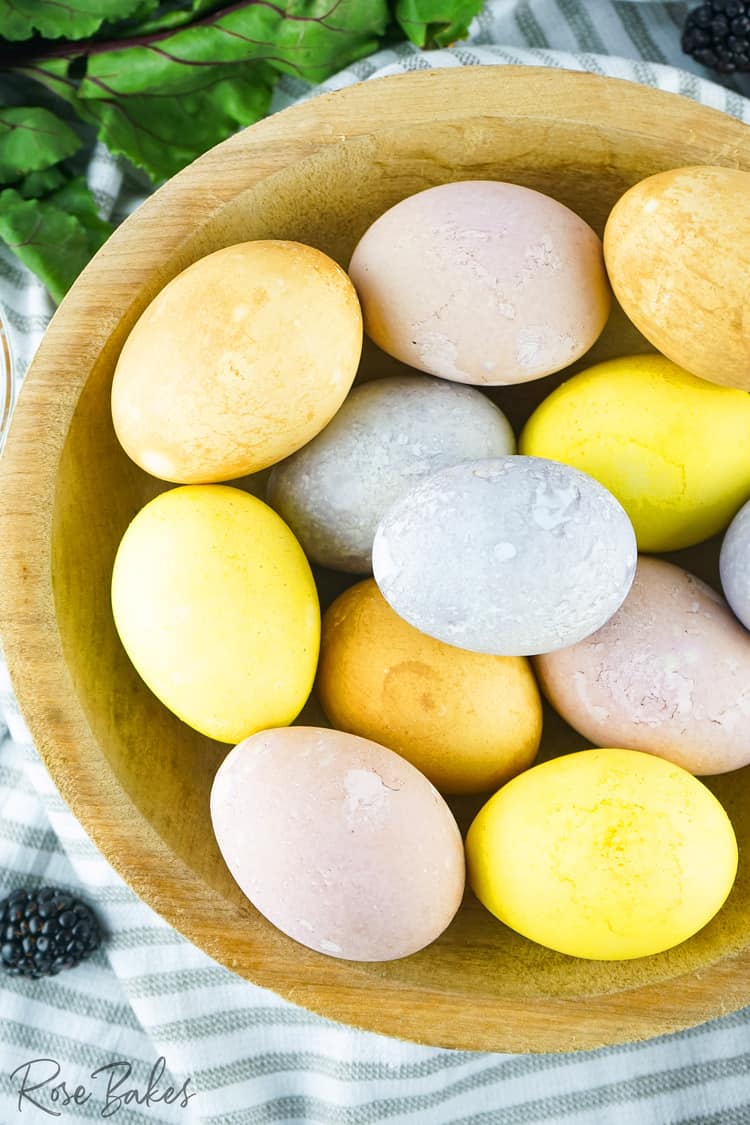
More All-Natural Easter Egg Variations
- Brownish-Orange Eggs: Easter Eggs Dyed with Black Tea
- Blue/Purple Eggs: Easter Eggs Dyed with Blackberries
- Yellow Eggs: Easter Eggs Dyed with Turmeric
Follow me on Instagram, Pinterest, Facebook & Twitter!

Check out these Easter Desserts
Printable Recipe

Easter Eggs Dyed with Beets
Description
Make some gorgeous pink (or purple?) Easter Eggs Dyed with Beets using this easy, all-natural recipe. You’re going to love these pastel eggs with unique patterns and markings and have so much fun making them with the kids!
Ingredients
● 1 Quart Water
● 2 Large Beets, chopped
● 1 Cup Vinegar
● 12 Boiled Eggs
Instructions
- Before you get started, thoroughly scrub and trim the beets. Then roughly chop the beets into approximately one-inch cubes.
- Add the beets and water to a large pot, bring it to a boil and let it simmer for about 30 minutes.
- Strain the liquid into a large glass bowl and stir in the vinegar. If you like to recycle, use the beet chunks for a side dish or compost.
- Add your eggs to the liquid, making sure they’re completely covered by the beet dye.
- Leave to dye until the desired shade of color is reached. I left them for about 8 hours.
- Remove the foam from the top of the bowl or dish you used to dye the eggs and discard it.
- Gently remove the eggs from the dye bowl and place them on paper towels to dry. If they have some stringy or foamy substance stuck to them, use a cup of water and let a gentle stream run over it to remove some of it.


Notes
- several popular recipes from around the internet were tested. And it’s a little upsetting to note that the eggs in the photos looked nothing like the eggs that the recipes actually produced. But if you follow this recipe, you will get eggs that look exactly like these photos.
- It’s absolutely IMPERITIVE that you scrub your beets and trim them before slicing them and boiling them. If you don’t, scrub them really clean, the eggs will have brownish green tint to them.
- If you want a shortcut for this recipe, you can boil the eggs in the pot with the beets. I haven’t tested this myself but I’ve read that it works just as well. If you choose to do this, there’s no need to follow the rest of the dying process in this recipe.
- To dry the eggs, place them on paper towels. After a few minutes, flip them over and remove the damp towels so they can fully dry.
- With this natural dying process, the eggs will not be perfect. Each egg will have it’s own unique design and color pattern. For the most part, these looked to be varying shades of pastel pink, but some also had a slight purple/violet hue to them. It’s really fun to see how each turns out.
- These eggs were left in the dye for around 8 hours. You can play around with the times you want to leave them in the dye and you’ll get different shades of pink.
- This concentration of beet dye worked great for a dozen eggs. The dye can be reused for more eggs than that but it might not be as potent.
- If you have cracked eggs after boiling them, I don’t recommend dying them. Consider those a snack or save them for another recipe (like my favorite potato salad).
- I used store-bought white eggs to make our Easter eggs. If you use brown eggs, you will get an entirely different palette of darker colors.
Nutrition
- Serving Size: 1 egg
- Calories: 85
- Sugar: 1.8 g
- Sodium: 92.8 mg
- Fat: 4.8 g
- Carbohydrates: 2.7 g
- Fiber: 0.6 g
- Protein: 6.6 g
- Cholesterol: 186 mg