The Perfect Little Debbie Christmas Tree Cheesecake
Get ready to indulge in a dessert that combines the best of two worlds – the Little Debbie Christmas Tree Cakes and creamy homemade cheesecake. That’s right, we’re talking about a Little Debbie Christmas Tree Cheesecake! This dessert is to die for – a creamy homemade vanilla cheesecake with chunks of Little Debbie Christmas Tree Cakes, topped with vanilla frosting and the iconic red stripes and green sprinkles!

This festive and easy-to-make dessert will not only satisfy your sweet tooth, but it will also be the perfect addition to your dining table. So, let’s get baking and spread some holiday joy with this scrumptious Christmas Tree Cake Cheesecake!
Video
Little Debbie Christmas Tree Cheesecake Recipe
Anybody that knows me, knows that I absolutely adore Little Debbie Christmas Trees. These popular snack cakes are addictive and yes, even as a professional baker, I must have them.
Last year I even discovered that one of the dads in our homeschool group drives a Little Debbie truck and I may or may not have started buying them directly from him, by the case, straight off the truck. #NoShame

So of course when I had the chance to try a Little Debbie Christmas Tree Cheesecake, I jumped at it. And oh my sweetness, I was hooked! I knew I had to make one for myself!!
With the combination of the iconic Little Debbie snack cakes and the creamy goodness of cheesecake, you have a festive treat that is sure to impress your friends and family.
The Christmas-y colors and flavors of the Little Debbie Christmas Tree Cakes add a touch of holiday magic to the classic cheesecake, making it the star of your dessert table.

One of the best things about the Little Debbie Christmas Tree Cheesecake is that they also come in chocolate!! Use a chocolate cheesecake recipe and add in Chocolate Christmas Tree Cakes and ganache on top for a delicious, rich chocolate version.
I know cheesecake recipes can be scary but even if you’re not an experienced baker, you can still create a dessert masterpiece that will wow your guests. With just a few simple ingredients and step-by-step instructions, you’ll have a stunning dessert that looks like it came straight from a bakery.
So, let your creativity shine and bring the holiday spirit to your dessert table with the Little Debbie Christmas Tree Cheesecake. It’s the perfect opportunity to show off your baking skills and spread some holiday cheer with a little Debbie cheesecake recipe that is as delicious as it is beautiful.

Why You’ll Love Little Debbie Christmas Tree Cheesecake
This festive and indulgent treat combines the iconic Little Debbie Christmas Tree Cakes with the creamy deliciousness of cheesecake. What’s not to love?
It’s Pretty: But seriously, first off, the Little Debbie Christmas Tree Cheesecake is just plain pretty to look at. The colorful and festive design of the Christmas Tree Cakes adds a touch of holiday magic to the classic cheesecake and it’s just so fun.
It’s Delicious: But it’s not just about looks, this dessert is also incredibly tasty. The creamy vanilla cheesecake perfectly complements the soft and moist texture of the Christmas Tree Cakes. Every bite is a delicious combination of flavors and textures that will leave you wanting more.
So, whether you’re looking to impress your guests or simply treat yourself to a delicious holiday dessert, the Little Debbie Christmas Tree Cheesecake is the perfect choice. Don’t miss out on this delightful mixture of flavors and textures.
Equipment & Tools Needed
- Piping Bag
- 9-inch Springform Pan
- Cooking Spray
- Aluminum Foil
- Water
- Sheet Pan
- Stand Mixer (I love my Bosch!) or you could easily do this with a hand mixer
- Silicone Spatula
Shop here:
 Buy Now →
 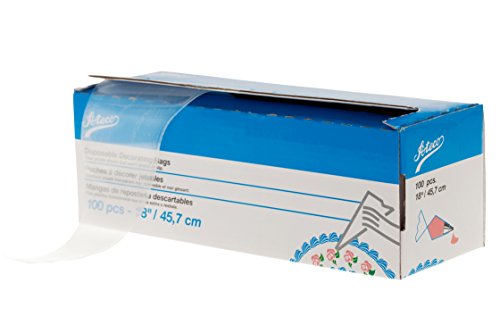 Buy Now →
 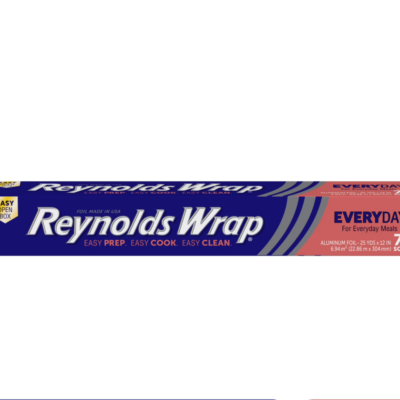 Buy Now →
  Buy Now →
  Buy Now →
  Buy Now →
Ingredients
Now, let’s dive into the delicious ingredients you’ll need to create your very own Little Debbie Christmas Tree Cheesecake.
Just like these Pecan Praline Cookies, this cheesecake has the most basic of ingredients – but when put together in a great recipe – you end up with a creamy and decadent cheesecake that will be the perfect backdrop for your festive decorations.

- Graham Cracker Crumbs
- Sugar
- Butter
- Cream Cheese
- Sugar
- All-Purpose Flour
- Vanilla Extract
- Eggs
- Sour Cream
- 3 Christmas Tree Cakes (crumbled)
- Vanilla Frosting
- Green Sanding Sugar
- Red frosting
Substitutions
- Crust: if you can’t find graham cracker crumbs, you can use a food processor to grind up graham crackers into fine crumbs for the same flavor and texture. You could also use vanilla wafers or Golden OREOs to make the crust, but I much prefer graham cracker crumbs.
- Frosting: For ease and to get that similar glossy look, I melted canned frosting for this recipe (I got the idea from my drip cake tutorial). However, you could also melt homemade vanilla buttercream or make a white chocolate ganache (white chocolate and heavy cream). Any of these would be amazing as the ‘icing on the cake’!
- Chocolate: For a chocolate version, make a chocolate cheesecake batter and add in Little Debbie Chocolate Christmas Tree Cakes. YUM!!
- Red Stripes: for the red stripes you can add red food coloring to some of your icing and pipe those by adding the icing to a zip top back and snipping off the corner (as a makeshift piping bag). You could also use melted candy melts or one of these little tubes of red gel in place of red icing.

How to Make Little Debbie Christmas Tree Cheesecake
Yes, there are a lot of steps to this recipe, but don’t let that deter you. It truly is an easy recipe and you’re going to be so glad you included this in your holiday treats!
Crust:
- Preheat the oven to 325°F.
- Start by adding your graham cracker crumbs, melted butter, and sugar to a mixing bowl. Mix until well combined and the consistency of wet sand.
- Press and smooth out evenly into the bottom of a 9-inch springform pan. I love to use the bottom of a glass to do this!
- Bake at 325°F for 10 minutes. Set the graham cracker crust aside to cool.


Cheesecake batter:
- Add your softened cream cheese and sugar to a stand mixer. Mix on high until smooth.
- Add in your vanilla and flour and mix until well combined.
- Begin adding your eggs two at a time and mix until smooth.
- Add in your sour cream and mix on high until smooth and combined. Stop a couple of times to scrape down the sides of the bowl.


- Pour half your batter into your springform pan.
- Top with crumbled Christmas tree cakes.
- Add remaining batter on top. Gently pound your pan on the counter to remove any air pockets.


- Fill your sheet pan with 2 inches of boiling water.
- Wrap the bottom of your springform pan in aluminum foil, making sure there are no holes for water to leak in.
- Place your springform pan in the middle of the sheet pan.
- Place in the oven at 325 degrees for one hour and 10 minutes. It will be set up around the edges and slightly brown. The middle will be jiggly. That is okay!
- Turn off the oven and open the door halfway. Allow the oven to cool completely.
- Remove from the oven and let the cheesecake cool to room temperature.
- Cover with plastic wrap (not touching the surface of the cheesecake) and refrigerate overnight.
Toppings:
- Take your container of vanilla frosting, remove the lid (and foil seal if applicable) and microwave for 1 minute.
- Pour the melted frosting over cheesecake, while still in the springform pan.
- Refrigerate until your frosting sets. About one hour.
- Gently remove from your chilled cheesecake from the springform pan and sprinkle with green sanding sugar.
- Pipe on your red frosting on top of the cheesecake in stripes (to mimic the red stripes on Christmas Tree Cakes).
- Slice and serve. Enjoy! This cheesecake will be a showstopper!

Pro Tips for Success
To ensure that your Little Debbie Christmas Tree Cheesecake turns out perfectly every time, here are some pro tips to keep in mind:
Soften your cream cheese
Before you start making the cheesecake filling, make sure your cream cheese is soft and at room temperature. This will ensure a smooth and creamy texture in your cheesecake. As a general rule (unless a recipe specifically calls for chilled butter, etc.), it’s always best to use room-temperature ingredients.
Use a water bath
To prevent your cheesecake from cracking during baking, place your springform pan in a larger pan filled with about an inch of hot water. This will create a gentle and even heat distribution, resulting in a beautifully smooth and crack-free cheesecake. If a full-on water bath scares you, you can also place a pan of water in the oven on the rack beneath your cheesecake. This works almost just as well without risking a wet, soggy cheesecake crust.
Be patient and let it cool
Once your cheesecake is done baking, resist the temptation to dig in right away. Let it cool in the oven with the door slightly ajar for about an hour. Then, transfer it to a cooling rack and let it cool completely at room temperature. This slow cooling process will help prevent cracks. Then refrigerate it for at least 6 hours… even better if overnight. Do not skip the chilling – this is necessary to get the perfect creamy texture that can be sliced and served without being runny.
Make ahead of time
The great thing about the Little Debbie Christmas Tree Cheesecake is that it can and even should be made ahead of time. Plan ahead for your next holiday party or family get-together and make this amazing cheesecake.
Don’t stress over cracks
This just means there were some air bubbles left in your batter or you slightly overbaked your cheesecake. The frosting over the top will cover any flaws and it will still taste amazing!
With these pro tips in mind, you’ll be well-equipped to create a Little Debbie Christmas Tree Cheesecake that will impress everyone. So go ahead and unleash your creativity, embrace the festive spirit, and enjoy the magical flavors of the holiday season with this delightful dessert.

Serving Suggestions
- Use a sharp knife and dip it in hot water between slices. This will help you get the cleanest slices of cheesecake without a mess.
- This cheesecake is perfect for any holiday gathering: a family get-together, office party, church celebration, and more! There’s no wrong day to eat a cheesecake!
Storage Suggestions
- Refrigerator: Store any leftovers in the refrigerator in an airtight container for up to one week. But truly – who’s gonna have leftovers? Not me!
- Freezer: This baked cheesecake can be frozen for up to 3 months when wrapped tightly in several layers of plastic wrap, then placed in a box or airtight container. Thaw on the counter for 30-60 minutes or in the fridge overnight before eating.
More Amazing Recipes

The Perfect Little Debbie Christmas Tree Cheesecake
Description
Get ready to indulge in a dessert that combines the best of two worlds – the Little Debbie Christmas Tree Cakes and creamy homemade cheesecake. That’s right, we’re talking about a Little Debbie Christmas Tree Cheesecake! This dessert is to die for – a creamy homemade vanilla cheesecake with chunks of Little Debbie Christmas Tree Cakes, topped with vanilla frosting and the iconic red stripes and green sprinkles!
Ingredients
- 1 cup of Graham Cracker Crumbs
- 3 tablespoons of Sugar
- 3 tablespoons of butter, melted
- 4 packages of cream cheese, softened
- 1 cup of sugar
- 3 tablespoons of all-purpose flour
- 1 tablespoon of vanilla extract
- 4 eggs
- 1 cup of sour cream
- 4 Little Debbie Christmas Tree Cakes (crumbled)
- 1 16-ounce container of Vanilla Frosting (I use Pillsbury White)
- Green Sanding Sugar
- Red frosting or Candy Melts for the red stripes
Instructions
- Preheat the oven to 325°F.
- Add graham cracker crumbs, melted butter, and sugar to a mixing bowl. Mix until well combined and the consistency of wet sand.
- Press and smooth out evenly into a well-greased springform pan.
- Bake at 325°F for 10 minutes. Set aside to cool.
- Add cream cheese and sugar to a stand mixer. Mix on high until smooth.
- Add vanilla and flour and mix until well combined.
- Begin adding your eggs two at a time and mix until smooth.
- Add sour cream and mix on high until smooth and combined.
- Pour half your batter into your springform pan.
- Top with crumbled Christmas tree cakes.
- Add remaining batter on top. Gently pound your pan on the counter to remove any air pockets.
- Fill your sheet pan with 2 inches of boiling water.
- Wrap the bottom of your springform pan in aluminum foil making sure there are no holes for water to leak in.
- Place your springform pan in the middle of the sheet pan.
- Place in the oven at 325°F for one hour and 10 minutes.
- Turn off the oven and open the door halfway. Allow the oven to cool completely.
- Remove from the oven, run a knife around the edges to loosen it, and let the cheesecake come to room temperature.
- Refrigerate overnight (or at least 8 hours. You cannot skip this set o
- Take your container of vanilla icing and microwave for 1 minute.
- Pour over cheesecake, while still in the springform pan.
- Refrigerate until your icing sets. About one hour.
- Gently remove from your springform pan and sprinkle with green sanding sugar.
- Pipe on curvy stripes of red frostng, melted chocolate, or cookie icing. Whichever you choose.
- Slice and serve. Enjoy! This cheesecake will be a show-stopper!


Nutrition
- Serving Size:
- Calories: 578
- Sugar: 46.6 g
- Sodium: 335.8 mg
- Fat: 36.6 g
- Carbohydrates: 55.9 g
- Fiber: 0.2 g
- Protein: 7.6 g
- Cholesterol: 131 mg


