Despicable Me Minion Cake Tutorial
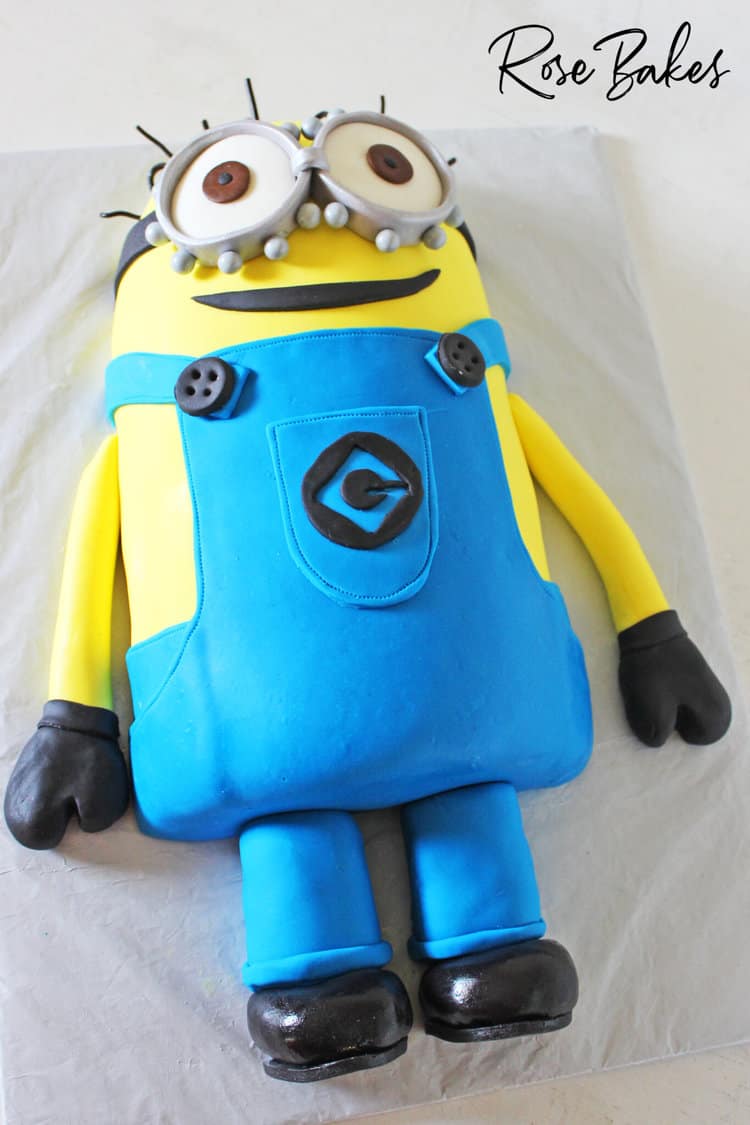
This Despicable Me Minion Cake Tutorial has lots of photos and all of the details you’ll need to create this fun, easy cake for your Minions party! Kevin is my sons favorite Minion so today we’re making a Kevin cake 🤓
Originally published February 2015, updated July 2022.

This Minion Birthday Cake was so much fun to make! I generally don’t like making sheet cakes, but this was sort of a combo between a sheet cake (laying flat) and a 3-D cake… so I didn’t mind!
Supplies to make this Despicable Me Minion Cake:
- (3) 8″ round cakes plus (1) 6″ half ball cake – Magic Line pans are my favorite cake pans
- serrated knife for carving cake
- buttercream, for filling and frosting
- yellow, blue, black, white, gray and brown fondant (a combination of Satin Ice & homemade marshmallow fondant)
- rolling pin
- pizza wheel
- fondant smoothers
- Ribbon cutter
- Xacto blade
- Sugar glue
- Stitching tool
- Cake ball dough
- 1″ and 2″ round cookie cutters
- Small round frosting tip (#3 or #4 would work well)
- Black Licorice Laces (can substitute fondant if you need to)
- Silver Sixlets
- Small round cutters
Recipes for the Minion Cake
I’m going to list the recipes I used but you can substitute any of your favorites or use store-bought products (such as the fondant) if you want.
Vanilla Cake – this is one of my favorite recipes for carving.
Vanilla Buttercream – this crusting buttercream is what I use for 90% of my cakes!
Homemade Marshmallow Fondant – my go-to recipe for light-colored fondants. For dark colors (like the blue and black, I purchase Satin Ice fondant).
Sugar Glue – an easy homemade edible glue to attach fondant pieces to each other.
How to Make a Despicable Me Minion Cake
Once you have everything together, it’s time for the step by step guide to make this cake!
Step 1. Bake the cakes. As mentioned above, you’ll need (2) 8″ rounds plus a 6″ half ball cake for the body. You could just bake (3) 8″ rounds, but I used foil and dry beans to make half a cake in one pan because I didn’t have enough batter to fill it and I *thought* I might need the extra cake for the body. I didn’t. But I did use it to make the cake ball dough for the legs & feet!
Step 2: Build the main body of the cake. I take the 8″ rounds and fill them normally with a layer of buttercream, then cut them down the middle. I also take the half-ball cake and cut it in half, then put filling between all of the layers to create the body. Half-round on top, followed by four layers of cake. Then crumb coat the entire thing!


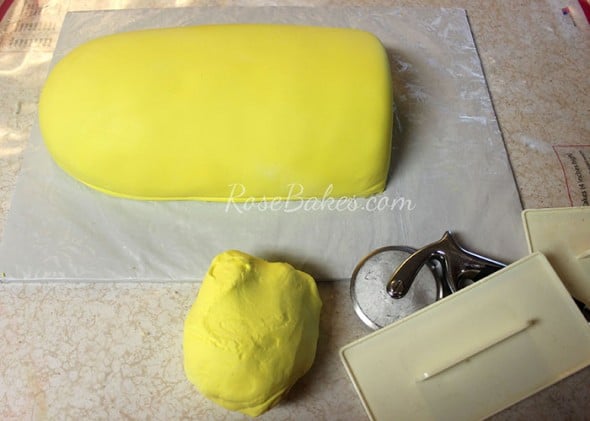
Step 3: Cover the Minion body with yellow fondant; cut off the excess around the edges and use fondant smoothers to get a smooth finish. Note: I use homemade marshmallow fondant for the yellow and white parts on this cake then Satin Ice for the black, blue, and brown.
Putting Overalls on a Minion Cake
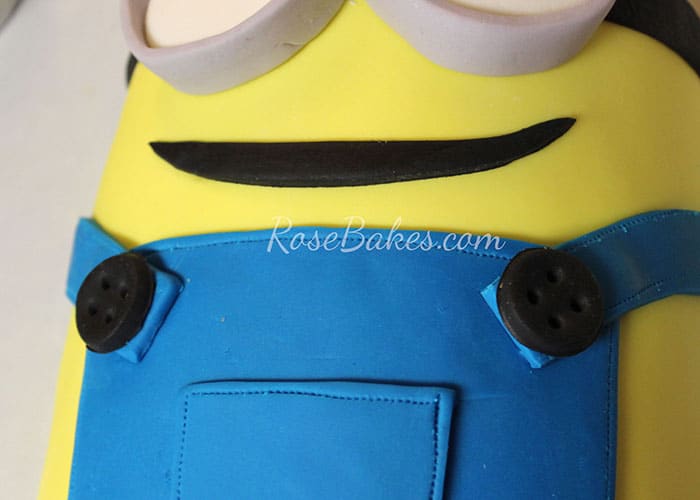
Step 4: Use blue fondant to create the blue overalls. I didn’t do step-by-step photos here, but I just pulled up a picture of a Minion online and then did my best to copy that design. I used a ribbon cutter, X-Acto knife and then sugar glue to attach it.
Step 5: Add the pocket on the front and then use a stitching tool to add details around all the hems and seams. You can stick the pocket and overall straps on with edible glue or a thin layer of shortening.


Minion Feet & Legs from Cake Ball Dough
Step 6: Now it’s time to add the feet and legs. I used the leftover cake from the half ball and the extra half a cake to make cake ball dough to do these. You can see my tutorial here for making cake balls – that’s the dough I used. I laid them out side by side to be sure I had them symmetrical.

Step 7: Cover the legs in blue fondant, then the feet in black fondant. I added a sole to the shoes, then painted them with water to make them shiny (just don’t touch them until they dry!).


Step 8: Add black bands around the side of the head. I used Satin Ice black fondant, my ribbon cutter, and an impression mat to give it a cloth texture (you could skip that).


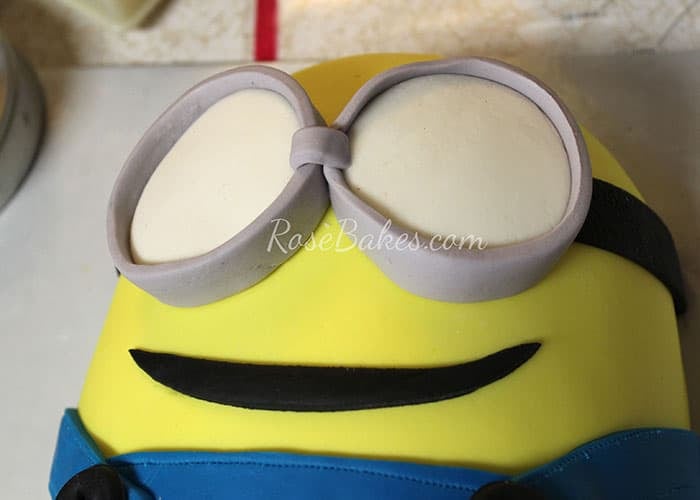
Step 9: For the eyes, roll out a thick layer of white fondant, then use a 2″ round cookie cutter to cut out white fondant circles. Next cut out gray strips with my ribbon cutter to wrap them in. Assemble it all with sugar glue.


Step 10: Put the eyes on with the seams in the center, then you cover them with a little bridge. Also cut a moon-shaped sliver for the mouth out of black fondant and attach it with a tiny dot of sugar glue.
Step 11: Cut out 1″ circles, then use a round frosting tip to make impressions in it for the buttons on the overalls and also attach those with sugar glue.
Minion Cake Details
Step 12: The rest of these pictures are where I added all of the details to finish him up. First, I used Black Licorice Laces for the hair but you could also use tiny rolls of black fondant. With this candy, I cut it into pieces maybe 2″ long, then pushed it into the top of the cake.

You can see the hair in the picture below, along with a few other details. I used black and brown to add black circles on the eyeballs with smaller round cutters and I used Silver Sixlets to add the rivets around the edges of his glasses (are they glasses? goggles?).

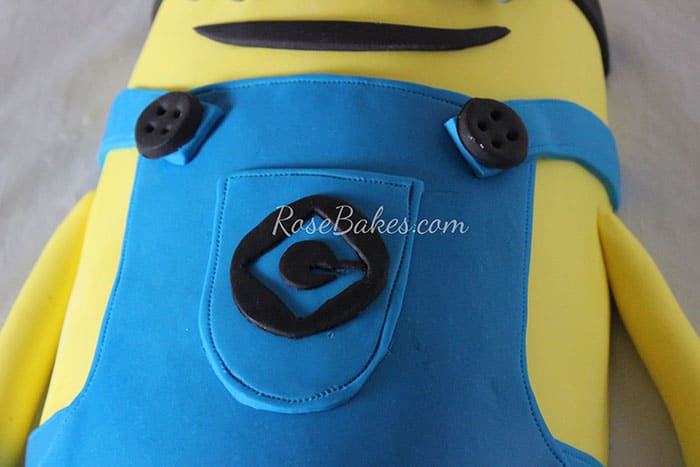
I also hand-cut the little logo on his front pocket – I didn’t get it super clean but that little booger was hard!
Oh, oh, oh!! And I almost forgot… the arms and hands!!!!!!!!!! That would’ve been terrible, huh? They were both solid fondant. I rolled out long ropes for the arms then cut & glued them to the sides. For the hands, I shaped the balls of fondant, flattened them, then cut and pulled them apart for the thumb. Then I added a little band around the seam between the arm & hand.
And that’s it!! Not counting the baking, I was able to decorate him in 3 hours or less. The most tedious part was the little logo!!
Do you have any questions about this Despicable Me Minion Cake Tutorial? Leave me a comment and I’ll answer if I can!


This is amazing! I did my first minion cake a couple of weeks ago (vertical) and wish your tutorial had been out to help me along. Thanks for sharing!
Hi Rose, thanks a lot for the tutorial. You are amazing
Awww, thank you Susan! xx
Beautiful! Thanks for the tutorial – great explained and pictures are awesome! I am going to make it for my step daughter, she loves the minions 😉
You’re welcome! I hope it turns out great for you!
WOW! Learning how to use a new photography program, feeling sick, plus handling sick kids by yourself is enough without making a special cake on top of everything else! You’re a brave determined lady. Thanks for the free tutorial. I hope you and the kids are feeling better by now. .
Just made this cake for my minion-mad son’s 7th birthday party. It’s looking good, and I know it tastes good because I’ve been eating ‘spare’ bits all day. Thanks Rose!
That’s great Luke!
What an amazing cake and I agree about changing editors. I tried and just can’t do it.Thanks for linking up to Merry Monday! Pinned! Have a great week!
Kim
This is amazing! I love it! And, PS – I know exactly what you mean about the learning curve of learning a new program! Thanks for sharing at Delicious Dishes recipe party!