How to Make Decorated Easter Bunny Cookies
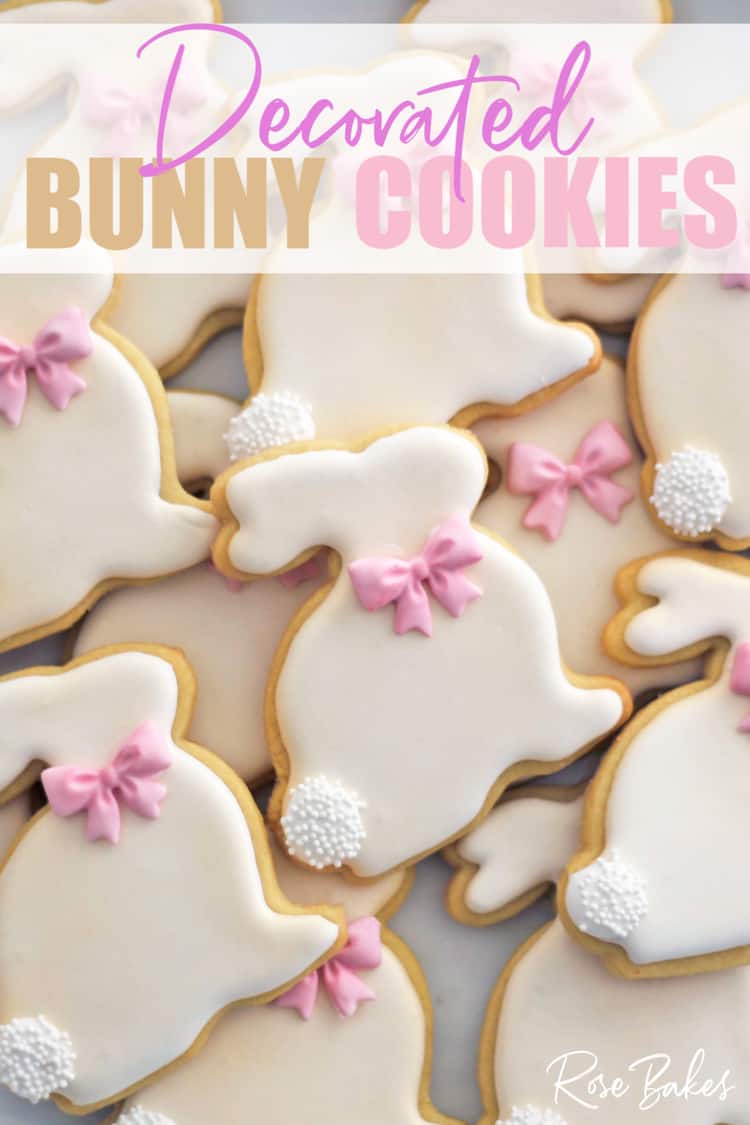
These Decorated Easter Bunny Cookies are a favorite of mine! The design is simple but so pretty and sweet. They have a light gold finish with a simple pink bow and a textured poofy tail. And I’m sharing all the details on How to Make the Decorated Easter Bunny Cookies!
I first shared these on my personal Facebook page. They were originally made for a baby shower, but I immediately got orders for another 6 dozen for Easter that year (and the orders kept coming in!).
Are you interested in selling cookies for Easter or any other holiday? Check out my ebook: How to Sell Paint-Your-Own Cookie Sets (No Cookie Decorating required!).

I loved the Bunny Cookies so much so I wanted to share how I’m making them with you! There are no step-by-step pictures but I can list the tools and recipes I used along with some written instructions.
First, if you want them to be identical to mine, you’ll need this set of Easter Cookie Cutters from Wilton. The bunny shape is included!
Other things you may not have on hand are this silicone mold for the bow, white nonpareils, and edible gold spray.
You’ll also need a rolling pin, piping bag and a small round tip.

How to Make Decorated Easter Bunny Cookies:
- Make this Roll-Out Sugar Cookie Dough (or whatever no-spread cookie dough recipe is your favorite) and follow the instructions using the sitting bunny cookie cutter from this set. You’ll get at least 24 cookies.
- After the cookies have cooled, cover them with this royal icing. My icing consistency was similar to a 10-second icing (see note below*). I outlined first, then immediately flooded them.
- Let them dry overnight, or at least for a couple of hours. Depending on the humidity where you live, how “wet” your icing is, etc., this time will vary. You want them to be fully set dry before the next step, however long that takes.
- In the meantime, use pink fondant (I used homemade marshmallow fondant with electric gel pink coloring added) and this bow mold to make tiny bows for each bunny. I like to add the fondant to the mold, trim any excess off, then pop the whole mold in the freezer for a few minutes so the bows pop out easily.
- When the cookies are dry, use this edible gold spray to give them a light gold sheen.
- Pipe a small dot of royal icing onto the neck of the bunny and attach the bow.
- Pipe a small circle of royal icing on the tail, then sprinkle with white nonpareils.
- Let the cookies dry for another hour or two.
- And you’re done!

*What is 10-Second Icing?
First let me say, I’m not a cookie expert. Cake is my thing. But I’ve done a few hundred cookies over the years and I know what works for me.
So when talking about royal icing, it’s often referred to in “seconds”. If you run a knife through your icing, the seconds counted are how long it takes for a line to disappear again.
For the icing on these cookies, I added a few drops of water at a time until I had 10-second icing. That way I could outline the cookie first. Then immediately flood them and have a seamless finish (you can’t see the outlined edge).
But my 10-second icing may not be what works for you. Sweet Sugarbelle is a cookie expert and she talks about icing consistency a lot more than I ever could! So I’ll point you over to her post here to get you started on information from a true cookie pro!
So that’s it – all of the details I have for how to make the Decorated Easter Bunny Cookies! In my next post, I plan to share the cake that I made to go with these cookies!
While you’re here, check out this post for How to Make Easter Bunny Ears for Cupcakes!
If I missed anything or you have questions, please leave me a comment!
More amazing cookies and Easter ideas:

Supplies you’ll need for Decorated Easter Bunny Cookies:
 Buy Now →
  Buy Now →


Hi Rose
Thank you so much for your Easter Bunny cookies, they look good and neat. I’m going to give them a try.
Thanks.